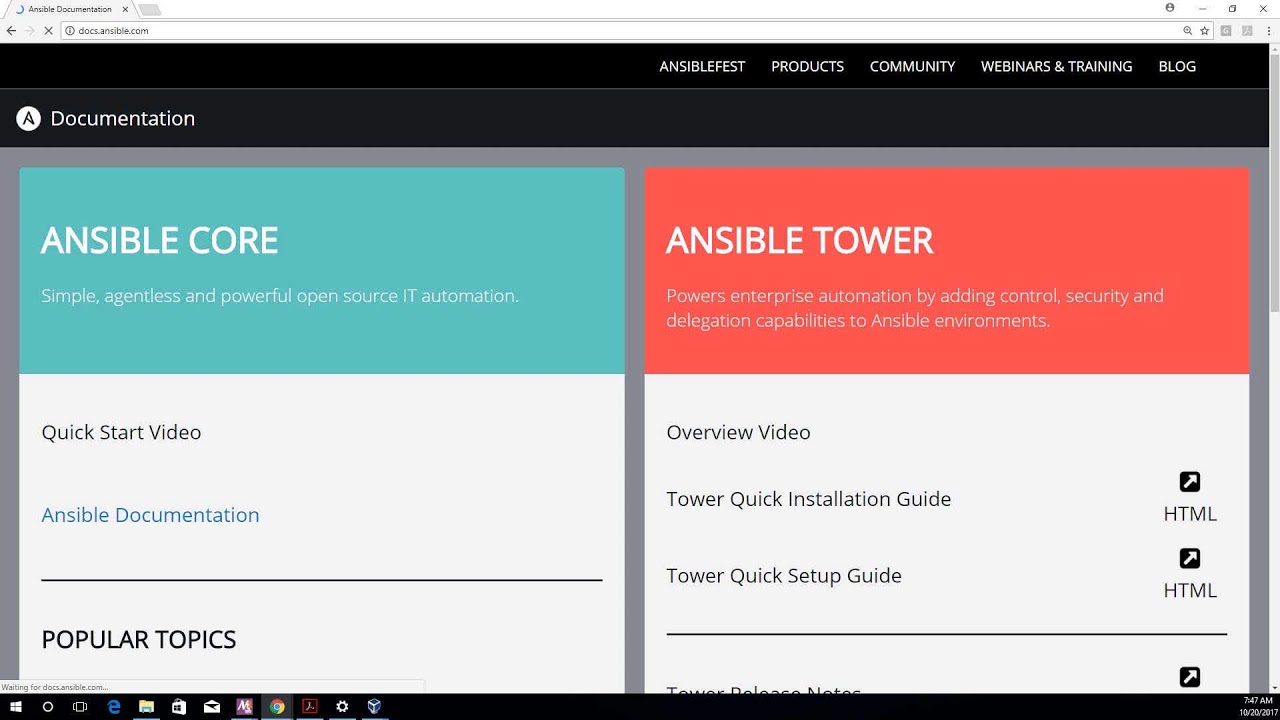
Ansible Part3 DEVOPS ONLINE TRAINING
July 18, 2026 — LiveStream
🛒 Recommended gear on AmazonDisclosure: some links above are affiliate links — if you buy through them I may earn a small commission at no extra cost to you. Thanks for supporting the channel!
As an Amazon Associate I earn from qualifying purchases.
Ready to level up your automation game with Ansible? This comprehensive guide, building on the foundations of your Ansible DevOps online training journey, dives deep into advanced Ansible Part3 concepts, equipping you with the skills to tackle complex infrastructure challenges with confidence.
Jab hum DevOps ki baat karte hain, automation uska dil hai, aur Ansible is automation ka ek powerful tool. Agar aapne pehle parts mein basics cover kar liye hain, toh ab time hai thoda aur gehrai mein jaane ka. Iss article mein, we’ll explore the more sophisticated aspects of Ansible that separate a casual user from a seasoned pro. We're talking about mastering inventory, harnessing advanced playbook logic, structuring projects with roles, and most importantly, securing your sensitive data with Ansible Vault. So, grab your chai, because we're about to demystify some truly powerful Ansible concepts!
Mastering Ansible Inventory and Variables: Beyond the Basics
Dekho, initially, jab hum Ansible seekhte hain, toh hum ek simple hosts file bana lete hain, right? But as your infrastructure grows, that static file becomes a bottleneck. Imagine managing hundreds or even thousands of servers, each with unique configurations. That’s where mastering Ansible inventory and variables truly shines, especially in a dynamic DevOps environment. This is a crucial area often covered in advanced DevOps online training sessions like Ansible Part3.
The Power of Dynamic Inventory
Static inventories are great for small, fixed environments. But what if your infrastructure is elastic, like in a cloud environment where VMs are spun up and down regularly? Manually updating a hosts file is not just inefficient, it’s a recipe for disaster. This is where dynamic inventory comes in handy.
Dynamic inventory sources are external scripts or plugins that Ansible can execute to fetch its inventory at runtime. These scripts can interface with cloud providers (AWS EC2, Azure, GCP), virtualization platforms (VMware), CMDBs, or even custom databases. When you run an Ansible command, it first executes this script, which then returns a JSON output representing the current state of your infrastructure.
Problem: Manually maintaining server lists in a fast-changing cloud environment.
Solution: Use dynamic inventory to fetch host information directly from your cloud provider.
Steps:
- Choose the appropriate inventory plugin for your cloud provider (e.g.,
aws_ec2 for AWS).
- Configure the plugin. This usually involves creating a YAML file (e.g.,
aws_ec2.yml) specifying region, filters, and other parameters.
- Run your Ansible commands, pointing to this configuration file.
Example (AWS EC2 Dynamic Inventory):
First, you'd need the community.aws collection installed:
ansible-galaxy collection install community.aws
Then, create a file named aws_ec2.yml:
plugin: amazon.aws.ec2
regions:
  - us-east-1
filters:
  instance-state-name: running
  tag:Environment: production
keyed_groups:
  - key: tags.Name
    prefix: instance_
  - key: tags.Role
    separator: ''
    prefix:
Now, to view your dynamic inventory:
ansible-inventory -i aws_ec2.yml --list
This will list all running EC2 instances in us-east-1 tagged with Environment: production, creating groups based on their Name and Role tags. Kitna seamless ho gaya kaam, right? No more manual updates!
Leveraging Group Variables and Host Variables
Once you have your inventory, the next step is to manage configurations specific to groups of hosts or individual hosts. Hardcoding values in playbooks is bad practice. That's where group_vars and host_vars directories save the day.
These directories allow you to define variables specific to host groups or individual hosts without modifying your inventory file or playbooks. This promotes reusability and keeps your configurations clean and organized, which is key for efficient DevOps practices.
Problem: Managing different configurations (e.g., database names, user credentials, package versions) for different server types or individual servers.
Solution: Use group_vars for shared group configurations and host_vars for host-specific overrides.
Structure:
production/
├── inventory.ini
├── group_vars/
│   ├── webservers.yml
│   └── databases.yml
└── host_vars/
    ├── webserver01.yml
    └── dbserver01.yml
Example:
group_vars/webservers.yml:
---
http_port: 80
max_clients: 200
document_root: /var/www/html
host_vars/webserver01.yml:
---
http_port: 8080 # Overrides the group_vars value for webserver01
extra_packages:
  - htop
  - iotop
This hierarchy allows for powerful, flexible variable management. Group variables apply to all hosts in that group, and host variables can override them for specific hosts. Think of it as inheritance in programming; a child can override a parent's trait. Bahut hi useful hai yeh!
Advanced Playbook Logic: Conditionals, Loops, and Handlers Deep Dive
Writing a basic playbook to install a package or start a service is one thing. But what about when you need to make decisions, repeat actions, or only run certain tasks when a change has occurred? This is where advanced playbook logic comes into play, making your automation intelligent and robust. For anyone serious about their DevOps online training, especially in an Ansible Part3 context, these concepts are non-negotiable.
Conditional Execution with when
The when clause is like an if statement for your Ansible tasks. It allows a task to be executed only if a specific condition is met. This is incredibly powerful for making your playbooks adapt to different host configurations or states.
Problem: You need to install a package only on specific operating systems, or perform a configuration change only if a certain file exists.
Solution: Use the when keyword to define conditions based on facts, variables, or the output of previous tasks.
Example: Install Nginx only on Debian-based systems:
- name: Install Nginx on Debian-based systems
  ansible.builtin.apt:
    name: nginx
    state: present
  when: ansible_facts['os_family'] == "Debian"
Here, ansible_facts['os_family'] is an Ansible fact gathered from the remote host. You can use complex conditions with and, or, and parentheses. For instance, to install a package only if it's Debian *and* a certain variable is true:
- name: Install Apache on specific Debian systems
  ansible.builtin.apt:
    name: apache2
    state: present
  when: ansible_facts['os_family'] == "Debian" and install_apache | bool
Yaad rakhna, the when condition must evaluate to True or False. If it’s False, the task is skipped.
Looping Through Tasks: loop, with_items, and More
Sometimes you need to perform the same task multiple times, but with different parameters. Instead of duplicating tasks, Ansible offers powerful looping constructs. The modern way is to use the loop keyword, which supersedes older constructs like with_items and with_dict, though you might still see them in older playbooks.
Problem: Installing multiple packages, creating multiple users, or performing similar actions on a list of items.
Solution: Use the loop keyword to iterate over lists, dictionaries, or even generated sequences.
Example: Install multiple packages:
- name: Install common packages
  ansible.builtin.apt:
    name: "{{ item }}"
    state: present
  loop:
    - vim
    - htop
    - git
    - curl
You can also loop over a list of dictionaries, accessing specific keys within each item:
- name: Create multiple users
  ansible.builtin.user:
    name: "{{ item.name }}"
    shell: "{{ item.shell | default('/bin/bash') }}"
    groups: "{{ item.groups | join(',') }}"
  loop:
    - { name: 'john', groups: ['sudo', 'dev'] }
    - { name: 'jane', groups: ['dev'] }
    - { name: 'peter', shell: '/bin/sh', groups: ['ops'] }
Dekho, loop makes your playbooks concise and easy to read. It's a big deal for repetitive tasks.
Handlers: The "Only If Changed" Magic
You’ve got a web server config file, and you update it. You want the web server to restart, but only if the config file actually changed, right? Restarting it every time, even if nothing changed, is inefficient and can cause unnecessary downtime. This is where handlers shine. Handlers are tasks that only run when explicitly notified by another task, and only once, even if notified multiple times.
Problem: Services need to be restarted or reloaded only when their configuration files are actually updated, not on every playbook run.
Solution: Define handlers for service actions and notify them from tasks that make configuration changes.
Example: Update Nginx config and restart:
Your main playbook task:
- name: Configure Nginx site
  ansible.builtin.template:
    src: nginx.conf.j2
    dest: /etc/nginx/sites-available/default
  notify: restart nginx
Your handlers section (usually at the end of the playbook or in a role's handlers/main.yml):
handlers:
  - name: restart nginx
    ansible.builtin.service:
      name: nginx
      state: restarted
If the template module detects a change in the nginx.conf file, it will notify the "restart nginx" handler. The handler will then run *after* all other tasks in the play have completed. This ensures services are restarted only when necessary, minimizing disruption. Bahut hi elegant solution hai yeh, for maintaining service uptime.
Selective Execution with Tags
As playbooks grow, you might want to run only a subset of tasks. For example, deploy a database, or just update common packages. Tags allow you to label tasks and then run only those specific tasks.
Problem: You have a large playbook, but only want to run specific parts (e.g., just the database setup, or just application deployment).
Solution: Apply tags to tasks and use --tags or --skip-tags when running the playbook.
Example:
- name: Install database packages
  ansible.builtin.apt:
    name: postgresql
    state: present
  tags: database, packages

- name: Configure database
  ansible.builtin.template:
    src: postgresql.conf.j2
    dest: /etc/postgresql/postgresql.conf
  notify: restart postgresql
  tags: database, config

- name: Deploy application code
  ansible.builtin.git:
    repo: https://github.com/my/app.git
    dest: /var/www/app
  tags: application
To run only database-related tasks:
ansible-playbook your_playbook.yml --tags database
To skip package installation:
ansible-playbook your_playbook.yml --skip-tags packages
Tags are super useful for debugging, quick deployments of specific components, or running maintenance tasks. Definitely a feature a senior DevOps engineer uses regularly.
Building Robust Automations with Ansible Roles and Error Handling
At some point in your Ansible journey, especially as you move beyond simple scripts and into complex infrastructure automation, you’ll realize that monolithic playbooks become unmanageable. This is where Ansible Roles become indispensable. Coupled with intelligent error handling, roles empower you to build robust, modular, and maintainable automation that scales with your organization. This is a core topic in any advanced DevOps online training, particularly relevant for Ansible Part3.
Ansible Roles: Modularity for Reusability
Roles are the best practice for organizing Ansible content. They provide a standardized directory structure for tasks, handlers, variables, templates, files, and meta information. Think of a role as a self-contained unit of automation that can configure a specific component (e.g., a web server, a database, an application). Yeh toh software engineering mein modules jaise hain, yaar!
Problem: Large, complex playbooks that are hard to read, maintain, and reuse. Duplication of tasks across different playbooks.
Solution: Organize your automation into reusable Ansible Roles, each responsible for a specific component or service.
Standard Role Structure:
roles/
├── webserver/
│   ├── tasks/                  # Main tasks for the role
│   │   └── main.yml
│   ├── handlers/               # Handlers for the role
│   │   └── main.yml
│   ├── vars/                   # Variables specific to the role
│   │   └── main.yml
│   ├── defaults/               # Default variables (lowest precedence)
│   │   └── main.yml
│   ├── templates/              # Jinja2 templates for config files
│   ├── files/                  # Static files to be copied
│   └── meta/                   # Role metadata (dependencies, author)
│       └── main.yml
└── database/
    ├── tasks/
    │   └── main.yml
    └── ...
Using a Role in a Playbook:
- name: Deploy a web application stack
  hosts: webservers
  become: yes
  roles:
    - webserver
    - database
    - application
Ansible automatically looks for tasks/main.yml, handlers/main.yml, etc., within the specified role directory. This makes your playbooks extremely clean and focuses on what roles to apply to which hosts. Reusability badhti hai, aur complexity kam hoti hai. This is a crucial concept for any professional DevOps pipeline.
Robust Error Handling Strategies
Even the best automation can fail. A network glitch, a package not found, a service failing to start – these things happen. A good DevOps engineer anticipates these failures and designs playbooks to handle them gracefully. Ansible provides several mechanisms for error handling.
Problem: A single task failure stops the entire playbook, leading to partially configured systems or broken deployments.
Solution: Implement error handling using ignore_errors, block/rescue/always, failed_when, and changed_when.
1. ignore_errors: Continue on Failure
Sometimes, a task failure isn't critical enough to halt the entire playbook. You can use ignore_errors: true to allow the playbook to continue even if that specific task fails. Use this sparingly, only for non-critical tasks.
- name: Try to stop a service that might not exist
  ansible.builtin.service:
    name: some_non_existent_service
    state: stopped
  ignore_errors: true
2. block, rescue, and always: Try-Catch-Finally for Tasks
This is Ansible's most powerful error handling mechanism, similar to try-catch-finally blocks in programming. If any task within the block fails, Ansible executes the tasks in the rescue block. The always block executes regardless of success or failure.
- name: Example of block, rescue, and always
  block:
    - name: Ensure critical package is installed
      ansible.builtin.apt:
        name: critical_package
        state: present
    - name: Configure critical service
      ansible.builtin.template:
        src: critical_service.conf.j2
        dest: /etc/critical_service.conf
  rescue:
    - name: Log the error and notify admin
      ansible.builtin.debug:
        msg: "CRITICAL ERROR: {{ ansible_failed_result.msg }} on {{ inventory_hostname }}"
    - name: Rollback changes (example)
      ansible.builtin.file:
        path: /etc/critical_service.conf
        state: absent
  always:
    - name: Send status notification
      ansible.builtin.debug:
        msg: "Playbook run completed on {{ inventory_hostname }}. Status: {{ 'Failed' if ansible_failed_result is defined else 'Success' }}"
This structure helps in maintaining system integrity even when things go south.
3. failed_when and changed_when: Customizing Task Status
Sometimes, a task might return a "failure" status according to Ansible, but it's actually an acceptable outcome for you. Or vice-versa, a task might succeed but its output indicates a logical failure. failed_when allows you to define custom conditions for a task to be marked as failed. Similarly, changed_when allows you to control when a task is marked as "changed".
Example (failed_when): A command might exit with 0 (success) but print an error message to stderr. You can check for that message:
- name: Check service status, but fail if it's 'degraded'
  ansible.builtin.command: systemctl status my_service
  register: service_status
  failed_when: "'degraded' in service_status.stderr"
Example (changed_when): A script always exits with 0 and prints output, but doesn't actually make changes unless a specific string is present in its output.
- name: Run idempotent update script
  ansible.builtin.command: /usr/local/bin/my_update_script
  register: script_output
  changed_when: "'UPDATED' in script_output.stdout"
These fine-grained controls give you immense flexibility in defining task success and failure, making your automations truly intelligent. Jab real-world scenarios handle karte hain, yeh sab bohot kaam aata hai.
Securing Your Automation: An Introduction to Ansible Vault
In any DevOps online training, security is paramount. Hardcoding sensitive information like passwords, API keys, or private SSH keys directly into your playbooks or inventory files is a massive security risk. Anyone with access to your repository could see this sensitive data. This is where Ansible Vault steps in. It allows you to encrypt sensitive data at rest, making your automation secure and compliant. This is a non-negotiable topic for Ansible Part3 and beyond.
The Problem with Plaintext Secrets
Imagine your database password sitting in a plain text file on your version control system. A developer with repository access, or even a misconfigured CI/CD pipeline, could expose these credentials. This exposure could lead to data breaches, unauthorized access, and significant security incidents. Plain and simple, never store secrets in plaintext.
How Ansible Vault Works
Ansible Vault uses strong encryption (AES256) to encrypt entire files or specific variables. When you need to use the encrypted data, Ansible decrypts it on the fly, typically by prompting you for a vault password or by reading it from a secure file. The decrypted data is only held in memory during the execution of the playbook and is never written to disk in plaintext.
Problem: Storing sensitive data like passwords, API keys, or certificates securely within Ansible projects.
Solution: Use Ansible Vault to encrypt these files or variables, requiring a password for decryption during playbook execution.
Basic Ansible Vault Commands
Ansible Vault provides a set of commands to manage encrypted files and variables:
1. Creating an encrypted file: ansible-vault create
This command creates a new file and immediately prompts you for a password to encrypt it. The content you type will be encrypted.
ansible-vault create group_vars/all/vault.yml
This will open your default editor. You can add sensitive variables here, e.g.:
db_password: "MySuperSecretDbPassword123!"
api_key: "abc123xyz456"
Save and exit, and the file will be encrypted.
2. Editing an existing encrypted file: ansible-vault edit
To modify an encrypted file, use edit. It will prompt for the vault password, decrypt the file into your editor, and then re-encrypt it upon saving.
ansible-vault edit group_vars/all/vault.yml
3. Viewing an encrypted file: ansible-vault view
To view the plaintext contents of an encrypted file without editing it:
ansible-vault view group_vars/all/vault.yml
4. Encrypting an existing plaintext file: ansible-vault encrypt
If you already have a plaintext file you want to encrypt:
ansible-vault encrypt secret_ssh_key.pem
5. Decrypting an encrypted file: ansible-vault decrypt
To turn an encrypted file back into plaintext (use with extreme caution!):
ansible-vault decrypt secret_ssh_key.pem
6. Re-keying an encrypted file: ansible-vault rekey
To change the password for an encrypted file:
ansible-vault rekey group_vars/all/vault.yml
Integrating Vault into Playbooks
Once you have encrypted files (e.g., group_vars/all/vault.yml), Ansible automatically knows how to load them. When you run your playbook, you'll need to provide the vault password. There are several ways to do this:
1. Prompt for password (manual):
ansible-playbook my_app.yml --ask-vault-pass
2. Specify password file (recommended for CI/CD):
Create a file (e.g., ~/.vault_pass.txt) containing only your vault password. Secure this file carefully (e.g., restricted permissions, only accessible by CI/CD agent).
ansible-playbook my_app.yml --vault-password-file ~/.vault_pass.txt
For even better security, especially in CI/CD pipelines, you can use a program that outputs the vault password to stdout, and Ansible can read it from there: --vault-password-file <(command_to_get_password). This avoids writing the password to a physical file. This is crucial for automation pipelines and a key discussion point in advanced Ansible Part3 discussions about security.
Best Practices for Ansible Vault
- Encrypt only what needs to be encrypted: Don't encrypt entire configuration files if only a small part is sensitive. Consider using
ansible-vault encrypt_string for single variables.
- Keep vault password secure: The vault password itself is the master key. Manage it like any other critical secret (e.g., using a secret management solution like HashiCorp Vault, AWS Secrets Manager, Azure Key Vault, or GCP Secret Manager).
- Use a dedicated vault password file for automation: For CI/CD, avoid interactive prompts.
- Separate concerns: You can have multiple vault files, each with a different password, if you need to segregate access to different sets of secrets (e.g., database secrets vs. API keys).
By effectively using Ansible Vault, you ensure that your automation is not just efficient, but also secure, which is a hallmark of professional DevOps engineering. Pakka yeh seekhna chahiye, boss!
Key Takeaways
- Dynamic Inventory Management: Move beyond static hosts files by integrating dynamic inventory scripts for cloud environments, ensuring your Ansible inventory is always up-to-date.
- Advanced Variable Handling: Utilize
group_vars and host_vars for structured, hierarchical variable management, promoting reusability and clarity in your configurations.
- Intelligent Playbook Logic: Employ
when clauses for conditional task execution, use loop for efficient iteration over items, and leverage handlers to trigger service restarts only when configurations actually change.
- Modular Automation with Roles: Organize your Ansible projects into reusable
roles to enhance maintainability, readability, and shareability of your automation code.
- Robust Error Handling: Implement strategies like
block/rescue/always, ignore_errors, failed_when, and changed_when to build resilient playbooks that gracefully handle failures and ensure consistent deployments.
- Secure Secrets with Ansible Vault: Encrypt sensitive data using Ansible Vault to prevent plaintext exposure of passwords, API keys, and other critical information, safeguarding your infrastructure.
Frequently Asked Questions
What is the main difference between with_items and loop in Ansible?
Ansible's loop keyword is the modern, preferred way to iterate over lists and is designed to replace older loop constructs like with_items, with_dict, etc. While with_items is still functional for simple lists, loop offers more flexibility and consistency, supporting various lookup plugins and handling complex data structures (like lists of dictionaries) more elegantly. It's recommended to use loop for new playbooks.
When should I use group_vars versus host_vars?
Use group_vars when you need to define variables that apply to an entire group of hosts (e.g., all web servers use the same Nginx version). Use host_vars when a variable needs to be specific to an individual host, overriding any group-level definitions (e.g., webserver01 has a unique listen port). This hierarchical approach keeps your variables organized and manageable.
How do Ansible Handlers ensure idempotency?
Ansible handlers contribute to idempotency by only running when explicitly notified by a task that has registered a "changed" state. If a task makes no changes to the system, it won't notify its handler, and thus the handler won't run. This prevents unnecessary service restarts or reloads, ensuring that actions are only taken when truly required, which is key to idempotent automation.
Is Ansible Vault secure enough for production secrets?
Yes, Ansible Vault provides strong AES256 encryption, making it generally secure for production secrets when used correctly. The critical factor is the security of your vault password itself. For production environments, it's highly recommended to integrate Vault with a dedicated secret management solution (like HashiCorp Vault, AWS Secrets Manager, etc.) that can securely store and provide the vault password to your Ansible runs, rather than storing the password in a file or passing it manually.
We hope this deep dive into advanced Ansible concepts has been insightful for your DevOps journey. Mastering these techniques will undoubtedly make you a more effective and efficient automation engineer. To see these concepts in action and get further guided explanations, make sure to watch the full video: Ansible Part3 DEVOPS ONLINE TRAINING on the @explorenystream channel. Don't forget to subscribe for more expert DevOps content!