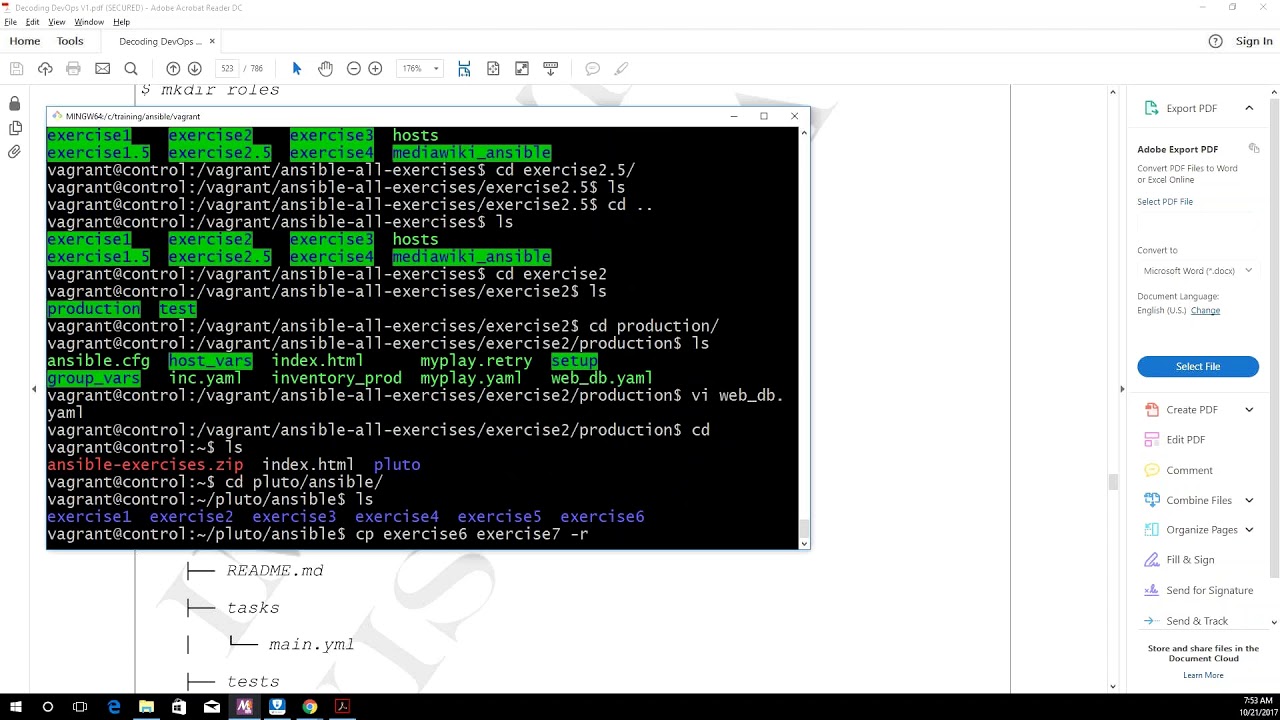
Ansible Part3 Roles Galaxy DEVOPS ONLINE TRAINING
July 15, 2026 — LiveStream
🛒 Recommended gear on AmazonDisclosure: some links above are affiliate links — if you buy through them I may earn a small commission at no extra cost to you. Thanks for supporting the channel!
As an Amazon Associate I earn from qualifying purchases.
Ready to level up your Ansible game and tame complex infrastructure configurations like a pro? This guide dives deep into Ansible Roles and Ansible Galaxy, the cornerstone for building scalable, reusable, and organized automation workflows. Understand how these powerful features transform your playbooks from mere scripts into robust, modular solutions, propelling your DevOps journey forward.
Acha, my young DevOps padawan, in our previous sessions, we've covered the basics of Ansible – inventory, playbooks, modules, right? But what happens when your infrastructure grows, your playbooks become monstrously long, and you find yourself copying-pasting tasks across different projects? That's where Ansible Roles come into play, yaar. Think of roles as the architectural blueprints for your automation, bringing structure and reusability to a whole new level. And once you master roles, Ansible Galaxy becomes your public library, a treasure chest of community-contributed automation solutions.
This isn't just theory, mind you. We're talking about practical, real-world application that will make your life as a DevOps engineer much easier. We'll explore why roles are indispensable for efficient Ansible automation, how to structure them, develop your own, and then, how to tap into the vast ecosystem of pre-built roles available on Ansible Galaxy. Chalo, let's demystify these powerful features and integrate them into your daily DevOps training.
Understanding Ansible Roles: The Blueprint for Scalable Automation
So, what exactly is an Ansible Role? Imagine you're setting up a web server. You need to install Nginx, configure its service, deploy some static files, and perhaps set up a firewall. Without roles, you'd write a long playbook with all these tasks. If you need to set up another web server, or perhaps twenty, you'd either copy that entire playbook or have a massive, unmanageable master playbook. Not ideal, right?
This is where roles shine. A role is a self-contained, independent unit of automation, designed to encapsulate a specific functionality. It's like a mini-playbook, but with a predefined directory structure that helps organize tasks, handlers, variables, templates, files, and metadata. This structure promotes consistency, reusability, and makes your automation much more readable and maintainable. It’s a fundamental component of effective playbook organization and a key principle in Infrastructure as Code (IaC).
Why Are Ansible Roles Indispensable?
- Reusability: Once a role is developed, it can be used across multiple playbooks, projects, and environments. Need to install Nginx? Just call your
nginx role.
- Modularity: Roles break down complex automation into smaller, manageable chunks. This makes debugging easier and encourages single responsibility for each component.
- Collaboration: Different team members can work on different roles simultaneously without stepping on each other's toes.
- Consistency: By defining a standard way to configure specific components (e.g., a database server, a monitoring agent), roles ensure consistency across your infrastructure.
- Readability: The predefined structure makes it easy for anyone familiar with Ansible to understand what a role does and how it's organized.
- Simplified Variable Management: Roles allow for clear separation of default variables, making it easier to override them at higher precedence levels (e.g., in playbooks or inventory).
The Anatomy of an Ansible Role
An Ansible Role follows a specific, predictable directory structure. When you create a role, Ansible expects to find certain directories, each serving a distinct purpose. This standardization is what makes roles so powerful for reusable playbooks.
Here's a typical role directory structure:
my_role/
├── defaults/
│   └── main.yml         # Default variables for the role
├── handlers/
│   └── main.yml         # Handlers (tasks that are triggered by other tasks)
├── tasks/
│   └── main.yml         # Main tasks executed by the role
├── templates/
│   └── service.conf.j2  # Jinja2 templates (e.g., config files)
├── files/
│   └── script.sh        # Static files (e.g., scripts, binaries)
├── vars/
│   └── main.yml         # Other variables (higher precedence than defaults)
├── meta/
│   └── main.yml         # Metadata for the role (author, description, dependencies)
└── README.md            # Documentation for the role
Let's break down each key directory:
tasks/: This is the heart of your role. The main.yml file here contains all the tasks that the role will execute. You can also include other task files (e.g., install.yml, configure.yml) from within main.yml using the include_tasks or import_tasks module for further organization.handlers/: Handlers are tasks that only run when explicitly notified. Typically, these are actions like restarting a service after a configuration change. Handlers are idempotent – they only run if a change actually occurred.defaults/: This directory contains main.yml which holds default variables for the role. These variables have the lowest precedence, meaning they can be easily overridden by variables defined in inventory, playbooks, or vars/ within the role itself. This is super useful for making roles flexible!vars/: Variables defined here (usually in main.yml) have a higher precedence than those in defaults/. Use vars/ for variables that are integral to the role's logic and less likely to be overridden externally, or sensitive variables (though for truly sensitive data, use Ansible Vault).files/: This is where you put static files that need to be copied to the remote hosts without any modification. Think scripts, binaries, certificates – anything that doesn't require templating.templates/: Contains Jinja2 templates. These files are processed by Ansible before being copied to the remote host. This allows you to dynamically insert host-specific or environment-specific values into configuration files, making your roles highly adaptable.meta/: The main.yml file here contains metadata about the role, such as its author, description, license, and crucially, its dependencies. If your role requires other roles to function, you define them here.
Developing and Using Your Own Ansible Roles: From init to Playbook Integration
Creating your own Ansible Roles is straightforward and essential for structured automation. Let's walk through the process, from initializing a role to integrating it into your playbooks, covering variables, and demonstrating practical examples. This is where your understanding of Ansible best practices truly begins to solidify.
Step 1: Initializing a Role with ansible-galaxy
The easiest way to start a new role is by using the ansible-galaxy init command. This command automatically sets up the standard directory structure for you. It's a lifesaver, trust me.
ansible-galaxy init my_webserver_role
This command will create a directory named my_webserver_role with all the necessary subdirectories we discussed.
Step 2: Populating the Role with Tasks and Logic
Now, let's add some actual automation logic to our my_webserver_role. Our goal is to install Nginx, ensure it's running, and deploy a basic HTML index page.
my_webserver_role/tasks/main.yml:
---
- name: Update apt cache (if Debian/Ubuntu)
  ansible.builtin.apt:
    update_cache: yes
  when: ansible_os_family == "Debian"

- name: Install Nginx
  ansible.builtin.package:
    name: nginx
    state: present

- name: Ensure Nginx service is running and enabled
  ansible.builtin.service:
    name: nginx
    state: started
    enabled: yes

- name: Create Nginx default configuration directory
  ansible.builtin.file:
    path: /etc/nginx/sites-available
    state: directory
    mode: '0755'

- name: Deploy custom Nginx default virtual host configuration
  ansible.builtin.template:
    src: default.conf.j2
    dest: /etc/nginx/sites-available/default
    mode: '0644'
  notify: Restart Nginx

- name: Enable Nginx default virtual host
  ansible.builtin.file:
    src: /etc/nginx/sites-available/default
    dest: /etc/nginx/sites-enabled/default
    state: link
  notify: Restart Nginx

- name: Deploy index.html for default Nginx site
  ansible.builtin.template:
    src: index.html.j2
    dest: /usr/share/nginx/html/index.html
    mode: '0644'
my_webserver_role/handlers/main.yml:
---
- name: Restart Nginx
  ansible.builtin.service:
    name: nginx
    state: restarted
my_webserver_role/templates/default.conf.j2:
server {
    listen {{ nginx_listen_port }};
    server_name {{ ansible_fqdn }};

    root /usr/share/nginx/html;
    index index.html index.htm;

    location / {
        try_files $uri $uri/ =404;
    }
}
my_webserver_role/templates/index.html.j2:
Welcome to Nginx
Hello from {{ ansible_hostname }}!
This page was deployed by Ansible role {{ ansible_role_name }}.
It's running on port {{ nginx_listen_port }}.
my_webserver_role/defaults/main.yml:
---
nginx_listen_port: 80
Notice how we're using variables like nginx_listen_port, ansible_fqdn, and ansible_hostname. nginx_listen_port comes from our role's defaults, making it easily configurable. The ansible_fqdn and ansible_hostname are Ansible facts, automatically gathered from the target host – pretty neat, right?
Step 3: Integrating the Role into a Playbook
Once your role is ready, using it in a playbook is incredibly simple. Just define your role in the roles section of your playbook.
Let's assume your my_webserver_role is in the same directory as your playbook, or in a path Ansible knows to look for roles (e.g., in a roles subdirectory relative to your playbook).
deploy_webserver.yml:
---
- name: Deploy a web server with Nginx
  hosts: webservers
  become: yes

  roles:
    - my_webserver_role
To run this, you'd execute:
ansible-playbook deploy_webserver.yml -i inventory.ini
Overriding Role Variables
The beauty of the defaults/ directory is that it provides sensible defaults but allows for easy overrides. You can override nginx_listen_port in several ways, maintaining clear Ansible variable precedence:
[webservers]
webserver1 nginx_listen_port=8080
webserver2

[webservers:vars]
nginx_listen_port=80
In your playbook:
---
- name: Deploy a web server with Nginx on a custom port
  hosts: webservers
  become: yes

  vars:
    nginx_listen_port: 8080 # This will override the default for all hosts in this playbook

  roles:
    - my_webserver_role
Directly when calling the role:
---
- name: Deploy a web server with Nginx on a custom port per role
  hosts: webservers
  become: yes

  roles:
    - role: my_webserver_role
      nginx_listen_port: 8080 # This specific variable is passed to *this* role call
Understanding variable precedence is crucial for effective Ansible role development. Generally, variables defined closer to the host (like inventory variables) or in the playbook have higher precedence than those in role defaults.
Leveraging Ansible Galaxy: The Community's Treasure Chest of Automation
So you've mastered creating your own roles. But what if you need to install Docker, or configure a specific database, or set up monitoring? Chances are, someone in the vast Ansible community has already built and shared a robust, tested role for that exact purpose! This is where Ansible Galaxy comes in – it's the official hub for finding, sharing, and collaborating on Ansible content.
Ansible Galaxy (galaxy.ansible.com) is a public repository that hosts thousands of roles contributed by individuals and organizations. It's an invaluable resource for accelerating your automation efforts and adhering to Ansible best practices. Instead of reinventing the wheel, you can leverage battle-tested roles, saving significant time and effort.
Using the ansible-galaxy Command to Manage Roles
The ansible-galaxy command-line tool is your gateway to interacting with Ansible Galaxy. It allows you to search for, install, list, and manage roles.
1. Searching for Roles
You can search for roles directly on the Ansible Galaxy website or from the command line:
ansible-galaxy search nginx
This will return a list of roles whose names or descriptions match "nginx." You'll typically see roles with names like nginxinc.nginx or geerlingguy.nginx. The format is usually namespace.role_name.
2. Installing Roles from Galaxy
Once you find a role you want to use, you can easily install it:
ansible-galaxy install geerlingguy.nginx
By default, ansible-galaxy installs roles into ~/.ansible/roles. You can specify a different installation path using the -p or --roles-path option:
ansible-galaxy install geerlingguy.nginx -p ./roles
This is a common practice to keep roles local to your project directory.
3. Specifying Role Versions
It's crucial for consistent automation to pin to specific versions of roles. You can install a particular version using the comma-separated format:
ansible-galaxy install geerlingguy.nginx,10.0.0
Or by specifying a Git reference (e.g., a tag or branch) if installing from a Git repository:
ansible-galaxy install git+https://github.com/geerlingguy/ansible-role-nginx.git,10.0.0
4. Installing Multiple Roles with requirements.yml
For complex projects, managing multiple role installations manually is cumbersome. The best practice is to use a requirements.yml file. This YAML file lists all the roles and their versions your project depends on.
Example requirements.yml:
---
- src: geerlingguy.nginx
  version: "10.0.0" # You can also use tags or branches here
  name: nginx_webserver # Optional: rename the installed role
- src: geerlingguy.mysql
  version: "7.1.0"
- src: https://github.com/your-org/ansible-role-internal-app.git
  scm: git # Optional, but good for clarity for non-Galaxy sources
  version: main # Install from 'main' branch
To install all roles listed in this file, navigate to the directory containing requirements.yml and run:
ansible-galaxy install -r requirements.yml
This command is idempotent; it will only install roles that aren't already present or update them if a new version is specified.
5. Listing and Removing Roles
To see which roles are installed and where:
ansible-galaxy list
To remove an installed role:
ansible-galaxy remove geerlingguy.nginx
Role Dependencies in meta/main.yml
Sometimes, one role might depend on another. For example, your "application" role might require a "database" role to be set up first. You can define these dependencies in the meta/main.yml file of your role.
Example my_app_role/meta/main.yml:
---
galaxy_info:
  author: Your Name
  description: My application role
  license: MIT
  min_ansible_version: "2.10"
  platforms:
    - name: Ubuntu
      versions:
        - focal
  galaxy_tags:
    - application
    - web

dependencies:
  - role: geerlingguy.mysql # This role needs the MySQL role to run first
    version: "7.1.0"
  - role: my_custom_base_config
    src: https://github.com/your-org/ansible-role-base-config.git
    version: main
When you use my_app_role in a playbook, Ansible will automatically install and run its dependencies first (if they aren't already present), ensuring the correct order of operations. This is crucial for building complex, interconnected automation logic and showcases advanced Ansible automation techniques.
Advanced Role Strategies and Best Practices for DevOps Excellence
Once you're comfortable with the basics of Ansible Roles and Ansible Galaxy, it's time to refine your approach with some advanced strategies and best practices. These tips will help you write more robust, maintainable, and efficient automation, aligning perfectly with modern DevOps principles.
1. Idempotency is Key
Always strive for idempotent roles. This means running a role multiple times should result in the same system state without causing errors or unnecessary changes after the first successful run. Most Ansible modules are idempotent by design, but always double-check your custom scripts or conditional logic.
# Good: This task is idempotent, only creates directory if it doesn't exist
- name: Ensure /opt/my_app directory exists
  ansible.builtin.file:
    path: /opt/my_app
    state: directory
    mode: '0755'

# Bad: This would always try to 'rm -rf' regardless of state (though 'remove' state is idempotent)
# You need to be careful with shell commands.
2. Role Naming Conventions and Documentation
Use clear, descriptive names for your roles (e.g., nginx_webserver, postgresql_database). For roles shared on Ansible Galaxy, follow the namespace.role_name convention. Always provide a README.md in your role directory explaining its purpose, how to use it, its variables, and any dependencies. Good documentation is priceless, especially in a collaborative environment.
3. Minimizing Direct Shell Commands
While ansible.builtin.shell and ansible.builtin.command modules are powerful, overuse can make your roles less portable and harder to debug. Whenever possible, use native Ansible modules (e.g., ansible.builtin.apt, ansible.builtin.yum, ansible.builtin.service, ansible.builtin.copy, ansible.builtin.template). They handle idempotency, error checking, and platform differences more gracefully.
4. Structuring Complex Role Tasks
For roles with many tasks, consider breaking down tasks/main.yml into smaller, logical files and including them. This improves readability significantly.
my_complex_role/tasks/main.yml:
---
- name: Include installation tasks
  ansible.builtin.include_tasks: install.yml

- name: Include configuration tasks
  ansible.builtin.include_tasks: configure.yml

- name: Include deployment tasks
  ansible.builtin.include_tasks: deploy.yml
my_complex_role/tasks/install.yml:
---
- name: Install dependencies
  ansible.builtin.package:
    name:
      - git
      - python3-pip
    state: present
5. Testing Your Roles
Robust roles are tested roles. Use tools like Molecule (with test frameworks like Testinfra) to write automated tests for your roles. This ensures that your roles perform as expected across different operating systems and Ansible versions, catching issues before they hit production. This is a critical aspect of reliable DevOps training and continuous integration.
6. Version Control and CI/CD Integration
Always store your roles in a version control system like Git. Tag releases for major versions (e.g., v1.0.0, v1.1.0). Integrate role testing and deployment into your CI/CD pipeline. This automates validation and ensures that only tested, stable roles are used in your environments, strengthening your Infrastructure as Code strategy.
7. Handling Sensitive Data with Ansible Vault
Never hardcode sensitive information (passwords, API keys, private keys) directly into your role files. Use Ansible Vault to encrypt such data. Vault files can be included in your roles, but their content remains encrypted, safeguarding your credentials. This is non-negotiable for security!
8. Role Prefixes/Namespaces for Internal Roles
If you develop many internal roles within your organization, consider adopting a consistent naming prefix or namespace (e.g., yourcompany.apache_role, yourcompany.database_setup). This prevents naming collisions and clearly identifies the origin of the roles, especially when mixing with community roles from Ansible Galaxy.
By following these practices, you're not just writing Ansible code; you're building a reliable, scalable, and maintainable automation framework. Your roles become professional, shareable assets that truly embody the spirit of DevOps, driving efficiency and reducing manual errors across your infrastructure.
Key Takeaways
- Ansible Roles provide a structured, modular approach to organizing Ansible automation, promoting reusability and maintainability for complex infrastructure tasks.
- Each role has a predefined directory structure (
tasks/, handlers/, defaults/, templates/, files/, meta/) that encapsulates specific functionality.
- The
ansible-galaxy init command quickly scaffolds a new role, and roles are easily integrated into playbooks using the roles directive.
- Ansible Galaxy is a vast community hub for sharing and discovering pre-built roles, significantly accelerating automation development.
- The
ansible-galaxy install -r requirements.yml command is crucial for managing role dependencies and ensuring consistent environments.
- Adhering to best practices like idempotency, clear documentation, using native modules, testing, and version control are vital for robust, scalable, and secure Ansible automation.
Frequently Asked Questions
What is the difference between an Ansible playbook and an Ansible role?
An Ansible playbook orchestrates the execution of tasks on target hosts. It defines the hosts, the user, and the overall sequence of operations. An Ansible Role, on the other hand, is a self-contained, structured unit of automation that encapsulates a specific functionality (like installing Nginx or configuring a database). Playbooks *use* roles to simplify complex workflows, treating roles as building blocks. Think of a playbook as the full recipe and roles as individual, pre-made components or sub-recipes that the main recipe calls upon.
When should I use Ansible Galaxy roles versus creating my own?
You should always check Ansible Galaxy first when you need to automate common infrastructure components like web servers (Nginx, Apache), databases (MySQL, PostgreSQL), or container runtimes (Docker). Using well-maintained community roles saves time, leverages expert knowledge, and often comes with good documentation and testing. Create your own roles for highly specific, custom applications, internal configurations, or for educational purposes where you want to deeply understand the underlying logic. A hybrid approach, combining Galaxy roles for generic tasks and custom roles for unique requirements, is often the most efficient.
How do I handle variables and secrets within Ansible Roles effectively?
Variables within roles should be managed primarily through the defaults/main.yml and vars/main.yml directories. defaults/ holds the lowest precedence variables, allowing for easy overrides. For sensitive information like passwords or API keys, always use Ansible Vault. Encrypting sensitive data ensures that your roles can be safely stored in version control systems without exposing credentials. When calling roles in a playbook, you can pass additional variables or override role defaults to customize its behavior for specific environments or hosts, following Ansible's variable precedence rules.
What are role dependencies, and why are they important?
Role dependencies allow you to specify that one role requires other roles to be executed before it. These dependencies are declared in a role's meta/main.yml file. They are crucial for ensuring the correct order of operations in complex setups. For instance, an application deployment role might depend on a database setup role and a web server configuration role. By defining these dependencies, Ansible automatically ensures that the required foundational services are in place before your main role attempts to configure or deploy its components, making your automation more robust and predictable.
Achha, that wraps up our deep dive into Ansible Roles and Ansible Galaxy. Hopefully, you've now got a solid understanding of how to structure your automation, leverage community content, and build truly scalable solutions. Don't just read this; open your terminal, create some roles, and try out the ansible-galaxy commands! For a practical walkthrough of these concepts and to see them in action, make sure to watch the full video on the Ansible Part3 Roles Galaxy DEVOPS ONLINE TRAINING by @explorenystream. Don't forget to like the video and subscribe to the channel for more awesome DevOps content!