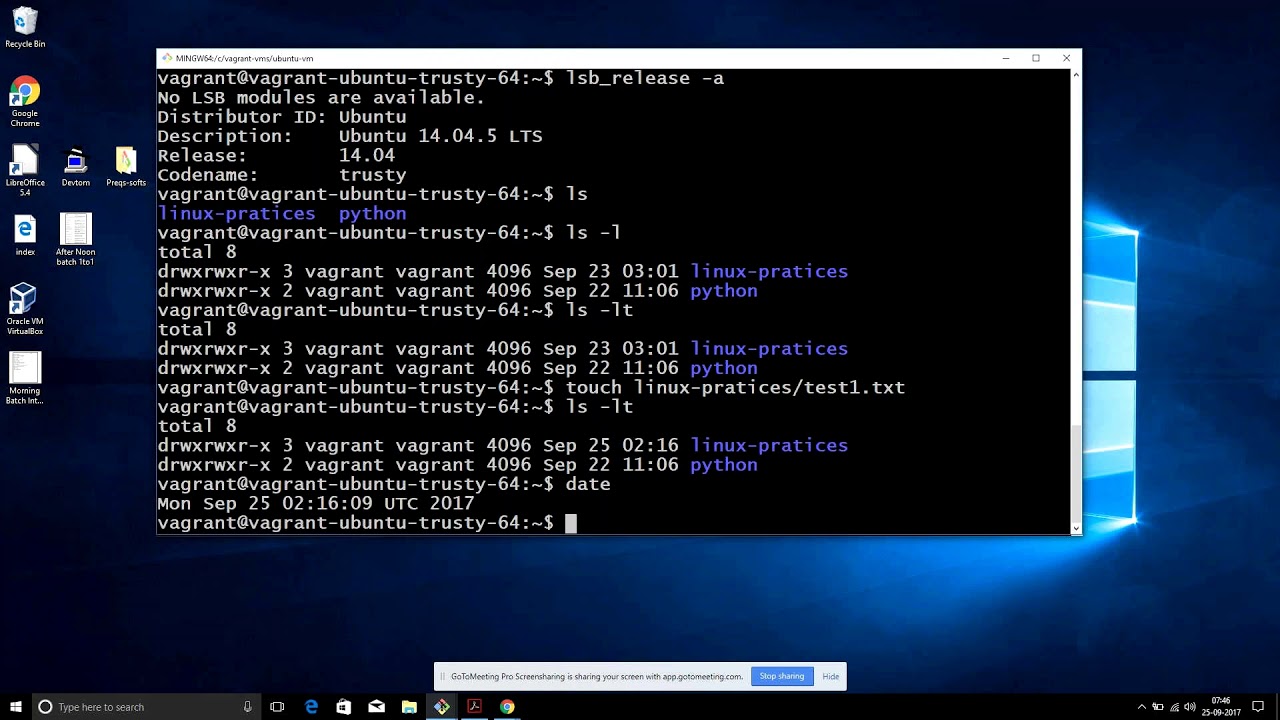
Basic Linux Part 2 Vagrant DEVOPS ONLINE TRAINING
July 17, 2026 — LiveStream
🛒 Recommended gear on AmazonDisclosure: some links above are affiliate links — if you buy through them I may earn a small commission at no extra cost to you. Thanks for supporting the channel!
As an Amazon Associate I earn from qualifying purchases.
Vagrant is an indispensable tool for DevOps engineers, streamlining the setup and management of consistent, reproducible virtual development environments right on your local machine. This guide dives deep into why Vagrant is a big deal for anyone building on their basic Linux knowledge, offering a robust platform for local development, testing, and ensuring your code "just works" across different setups, mimicking production environments with ease.
Kya Hai Yeh Vagrant? – The DevOps Superpower for Reproducible Environments
Imagine this, junior. You're working on a big project with a team. Everyone needs the exact same development environment – same OS, same dependencies, same configurations. *Lekin*, someone's using an older version of Node.js, someone else forgot to install a specific Python library, and suddenly, the application jo *aapke machine pe chal rahi thi*, is throwing errors on someone else's. "It works on my machine!" – this common developer frustration, *yeh jo problem hai*, is exactly what **Vagrant** solves.
Vagrant, *bhai*, is an open-source tool from HashiCorp designed to create and manage portable, reproducible development environments. Think of it as a wrapper around virtualization software like VirtualBox, VMware, or Hyper-V. Instead of manually installing an operating system, configuring network settings, and setting up all your tools inside a virtual machine, Vagrant lets you define your entire environment in a simple text file called a `Vagrantfile`. This file becomes your infrastructure-as-code blueprint for a consistent development setup, shared and version-controlled with your team.
Why Vagrant is a Must-Have for DevOps Engineers
For us DevOps folks, consistency is king. We live by the principle that development, staging, and production environments should be as similar as possible to avoid nasty surprises. Vagrant helps achieve this locally by:
* **Eliminating "It works on my machine" Syndrome:** With a shared `Vagrantfile`, every team member provisions an identical VM. No more dependency mismatches or OS version issues. *Ekdum smooth chalega kaam*.
* **Rapid Environment Provisioning:** Need a new environment for a feature branch? `vagrant up` and you're good to go in minutes, not hours. This drastically reduces setup time and onboarding for new team members.
* **Realistic Local Testing:** You can test your code, scripts, and deployment processes in an environment that closely mirrors your production Linux servers. This means fewer bugs making it to staging or production.
* **Disposable Environments:** Done with a task? `vagrant destroy` cleans up the VM and all its resources. No lingering junk, no resource hogging. Start fresh anytime.
* **Collaboration Made Easy:** The `Vagrantfile` lives with your code in version control (Git, SVN). This means any changes to the environment are tracked, reviewed, and applied across the team transparently.
* **Bridging Basic Linux to Practical Applications:** Once you've got your basic Linux commands down – how to navigate files, install packages, manage services – Vagrant provides the perfect sandbox to apply that knowledge. You're no longer just learning about `apt install` or `systemctl start`; you're using them within a controlled, project-specific Linux environment. It’s like *school ki padhai ab practical mein kaam aa rahi hai*.
Vagrant elevates your local development setup from a collection of ad-hoc installations to a professionally managed, version-controlled, and instantly reproducible infrastructure. It’s a foundational piece of the puzzle for any modern DevOps workflow, empowering you to move faster and with greater confidence.
Setting Up Your DevOps Lab: Vagrant Installation and Your First Box
Okay, *chai pe charcha karte hain*. Let's get our hands dirty and set up Vagrant. This is where your basic Linux knowledge will come in handy. Before Vagrant can do its magic, it needs a **provider**. The most common and free provider is **VirtualBox**. So, *pehle yeh do cheezein install karni padengi*.
Prerequisites: The Foundation Stones
1. **A Virtualization Provider:** For this tutorial, we'll assume **VirtualBox**. Make sure it's installed on your host machine (the machine you're running Vagrant from).
* On Ubuntu/Debian:
sudo apt update
sudo apt install virtualbox
* On CentOS/RHEL:
sudo yum install VirtualBox
* *Make sure your system's BIOS/UEFI has virtualization enabled (Intel VT-x or AMD-V), otherwise, VirtualBox will throw errors.*
2. **Basic Linux Familiarity:** You know your `cd`, `ls`, `mkdir`, `sudo`, `apt`/`yum` commands. That's *kaafi* for now.
Installing Vagrant on Linux
Vagrant itself is pretty straightforward to install. You can download the package from the official Vagrant website, or often, it's available in your distribution's repositories.
1. **Download from HashiCorp:** This is usually the recommended way to get the latest version.
* Go to [Vagrant Downloads](https://www.vagrantup.com/downloads).
* Download the appropriate package for your Linux distribution (e.g., `.deb` for Debian/Ubuntu, `.rpm` for RHEL/CentOS).
* Install it:
* For `.deb` (Ubuntu/Debian):
wget -O vagrant.deb https://releases.hashicorp.com/vagrant/2.3.7/vagrant_2.3.7_x86_64.deb # Check for latest version
sudo dpkg -i vagrant.deb
sudo apt --fix-broken install # In case of dependency issues
rm vagrant.deb
* For `.rpm` (CentOS/RHEL):
wget -O vagrant.rpm https://releases.hashicorp.com/vagrant/2.3.7/vagrant_2.3.7_x86_64.rpm # Check for latest version
sudo yum localinstall vagrant.rpm
rm vagrant.rpm
2. **Verify Installation:** Once installed, open your terminal and type:
vagrant --version
You should see the installed Vagrant version. *Agar dikha raha hai, toh badhiya!*
Your First Vagrant Box: Hello World of Virtual Machines
Now that Vagrant is installed, let’s create our first virtual environment.
1. **Create a Project Directory:** Always good practice to keep your Vagrant files organized.
mkdir my-first-vagrant-box
cd my-first-vagrant-box
2. **Initialize Vagrant:** This command creates a `Vagrantfile` in your current directory. We'll use a common base box called `ubuntu/focal64` (Ubuntu 20.04 LTS).
vagrant init ubuntu/focal64
You’ll see a `Vagrantfile` created. Open it up, you’ll see a lot of commented-out lines. Don't worry, *ab hum yeh samjhenge*.
3. **Spin Up the VM:** This is where the magic happens. Vagrant will download the `ubuntu/focal64` box (if it's not already cached locally), import it into VirtualBox, and boot it up.
vagrant up
This might take a few minutes the first time as it downloads the box. *Patience rakho, beta*.
You'll see output indicating it's importing the base box, creating the VM, forwarding ports, and booting the guest OS.
4. **Connect to Your VM:** Once `vagrant up` completes, your virtual Ubuntu machine is running. You can SSH into it like any other Linux server:
vagrant ssh
*Leh lo, you're inside your brand new Ubuntu VM!* You can now run Linux commands, install software, *jo bhi karna hai, karo*.
5. **Basic Vagrant Commands for Management:**
* `vagrant halt`: Gracefully shuts down the running VM.
* `vagrant suspend`: Suspends the VM, saving its current state to disk. You can `vagrant up` later to resume from where you left off.
* `vagrant resume`: Resumes a suspended VM.
* `vagrant reload`: Reboots the VM, applying any changes made to the `Vagrantfile`.
* `vagrant destroy`: *Dhyaan se!* This command stops the VM and permanently deletes all its associated resources (including its virtual hard disk) from your system. Use it when you're done with an environment.
* `vagrant status`: Checks the current state of your Vagrant machine(s).
* `vagrant global-status`: Shows all active Vagrant environments on your host machine.
This initial setup gives you a solid base. You’ve just used Vagrant to provision a fully functional Linux development environment with minimal effort. *Hai na kamaal?*
Deep Dive into Vagrantfile: Your Infrastructure Blueprint
The `Vagrantfile` is the heart of your Vagrant environment. It's a Ruby-based configuration file, but don't worry, you don't need to be a Ruby expert to use it. It's designed to be human-readable and straightforward. Let's explore its key components.
When you ran `vagrant init`, a default `Vagrantfile` was generated with many commented-out options. We'll focus on the most important ones that turn this file into powerful infrastructure-as-code.
Vagrant.configure("2") do |config|
  # The most important part: specifying the base box
  config.vm.box = "ubuntu/focal64"

  # Optional: customize VM resources (CPU, RAM)
  config.vm.provider "virtualbox" do |vb|
    vb.memory = "2048"
    vb.cpus = "2"
  end

  # Network configurations
  # Forward a port from host to guest
  # config.vm.network "forwarded_port", guest: 80, host: 8080

  # Create a private network (host-only)
  # config.vm.network "private_network", ip: "192.168.33.10"

  # Create a public network (bridged)
  # config.vm.network "public_network"

  # Shared folders
  # config.vm.synced_folder "../data", "/vagrant_data"

  # Provisioning scripts
  # config.vm.provision "shell", path: "setup.sh"
  # config.vm.provision "ansible_local" do |ansible|
  #   ansible.playbook = "playbook.yml"
  # end

  # Multi-machine setup (for complex environments)
  # config.vm.define "webserver" do |web|
  #   web.vm.box = "ubuntu/focal64"
  #   web.vm.network "private_network", ip: "192.168.33.11"
  #   web.vm.provision "shell", inline: "echo 'Hello from webserver' > /etc/motd"
  # end

  # config.vm.define "dbserver" do |db|
  #   db.vm.box = "ubuntu/focal64"
  #   db.vm.network "private_network", ip: "192.168.33.12"
  #   db.vm.provision "shell", inline: "echo 'Hello from dbserver' > /etc/motd"
  # end
end
Let's break down the critical configurations:
1.
config.vm.box: The Base Image
This line specifies the **base box** your VM will be built upon. A box is a pre-packaged Vagrant environment, typically an OS image.
config.vm.box = "ubuntu/focal64"
Here, "ubuntu/focal64" refers to an Ubuntu 20.04 LTS 64-bit box. You can find many official and community-contributed boxes on [Vagrant Cloud](https://app.vagrantup.com/boxes/search). *Socho, yeh tumhara OS ka template hai*.
2.
config.vm.provider: Customizing Provider Settings
You can customize settings specific to your virtualization provider (e.g., VirtualBox, VMware). This is where you allocate resources like CPU and RAM.
config.vm.provider "virtualbox" do |vb|
    vb.memory = "2048"  # 2 GB RAM
    vb.cpus = "2"       # 2 CPU cores
    vb.name = "MyDevBox" # Custom VM name in VirtualBox UI
  end
This ensures your VM has enough juice to run your applications smoothly. *Agar bade projects hain, toh zyaada RAM dena padega.*
3.
config.vm.network: Connecting Your VM to the World
Networking is crucial for any application. Vagrant offers several networking options:
* **Forwarded Port:** Maps a port on your host machine to a port on your guest VM.
config.vm.network "forwarded_port", guest: 80, host: 8080, auto_correct: true
Now, if a web server runs on port 80 inside your VM, you can access it from your host browser at `http://localhost:8080`.
* **Private Network (Host-Only):** Creates a dedicated network between your host and the VM, inaccessible from the outside world. Useful for internal communication between multiple VMs or direct access from your host machine.
config.vm.network "private_network", ip: "192.168.33.10"
You can now SSH into your VM using `ssh vagrant@192.168.33.10` from your host, in addition to `vagrant ssh`.
* **Public Network (Bridged):** Connects your VM directly to your physical network interface, making it appear as a separate machine on your network. *Yeh tab use karte hain jab VM ko network mein dusri machines se communicate karna ho.*
config.vm.network "public_network"
Vagrant will ask you to choose a network interface if you have multiple.
4.
config.vm.synced_folder: Sharing Files Between Host and Guest
This is incredibly useful. You can edit your code on your host machine with your favorite IDE and have those changes instantly reflected inside the VM, and vice-versa.
config.vm.synced_folder "./src", "/var/www/html"
This shares the `src` directory from your Vagrant project on the host to `/var/www/html` inside the guest VM. By default, Vagrant also shares the project root directory (`./`) to `/vagrant` inside the VM.
5.
config.vm.provision: Automating VM Configuration (The DevOps Heart)
This is where Vagrant truly shines in a DevOps context. After the VM boots, you often need to install software, configure services, or run scripts. Provisioners automate this.
* **Shell Script Provisioner:** The simplest way to run commands.
config.vm.provision "shell", inline: <<-SHELL
          echo "Updating apt..."
          sudo apt update
          echo "Installing Nginx..."
          sudo apt install -y nginx
          echo "Nginx installed and running!"
          SHELL
For more complex scripts, you can point to a file:
config.vm.provision "shell", path: "scripts/setup_webserver.sh"
This `setup_webserver.sh` script would reside in a `scripts` directory within your Vagrant project.
* **Ansible, Puppet, Chef, SaltStack:** For more robust and complex infrastructure automation, Vagrant integrates smoothly with popular configuration management tools.
config.vm.provision "ansible_local" do |ansible|
          ansible.playbook = "playbook.yml"
          ansible.become = true # Run tasks with sudo
        end
This tells Vagrant to install Ansible inside the guest and then run the specified `playbook.yml`. *Yeh toh next level automation hai!* This is where your infrastructure-as-code truly comes alive, defining not just the VM, but also its entire software stack and configuration.
6.
config.vm.define: Multi-Machine Environments
For applications requiring multiple servers (e.g., a web server, a database server, and a caching server), Vagrant allows you to define multiple VMs within a single `Vagrantfile`.
Vagrant.configure("2") do |config|
      # Define the web server VM
      config.vm.define "webserver" do |web|
        web.vm.box = "ubuntu/focal64"
        web.vm.network "private_network", ip: "192.168.33.11"
        web.vm.hostname = "webserver.local" # Set hostname
        web.vm.provision "shell", path: "provision/web.sh"
      end

      # Define the database server VM
      config.vm.define "dbserver" do |db|
        db.vm.box = "ubuntu/focal64"
        db.vm.network "private_network", ip: "192.168.33.12"
        db.vm.hostname = "dbserver.local"
        db.vm.provision "shell", path: "provision/db.sh"
      end
    end
Now, when you run `vagrant up`, both VMs will be provisioned. You can manage them individually: `vagrant ssh webserver`, `vagrant halt dbserver`, etc. *Yeh toh poora local cloud bana diya humne!*
By mastering the `Vagrantfile`, you’re not just spinning up VMs; you're defining a portable, version-controlled, and automated infrastructure that your entire team can benefit from. This significantly streamlines the onboarding process and reduces environment-related discrepancies, which are common pain points in development workflows.
Advanced Vagrant Scenarios and DevOps Best Practices
Now that you've got the basics down, let's talk about some advanced uses and best practices that elevate your Vagrant game from "useful tool" to "essential DevOps component."
Beyond VirtualBox: Other Providers
While VirtualBox is popular for its free and open-source nature, Vagrant supports other virtualization providers.
* **VMware Workstation/Fusion:** For paid commercial projects that demand better performance or specific VMware features, Vagrant has a VMware provider. It generally offers tighter integration and sometimes better I/O performance.
* **Hyper-V:** If you're on Windows Professional/Enterprise, Hyper-V is Microsoft's native hypervisor. Vagrant has a provider for it, offering seamless integration for Windows users.
* **Docker:** *Yeh toh ek alag hi duniya hai*. Vagrant can even provision Docker containers. While Docker is primarily for containerization (lighter weight than VMs), using Vagrant with Docker can simplify the setup of complex multi-container environments, particularly when you need to abstract away the Docker installation and networking details. It's often used for development environments where you want the *feel* of a VM but the speed of containers.
To use a different provider, you often need to install a Vagrant plugin (e.g., `vagrant plugin install vagrant-vmware-utility`) and specify it in your `Vagrantfile`:
config.vm.provider "vmware_fusion" do |v|
  v.vmx["memsize"] = "4096"
end
Vagrant Plugins: Extending Functionality
The Vagrant ecosystem is rich with plugins that extend its core functionality. Here are a few useful ones:
* **`vagrant-disksize`:** Allows you to easily increase the disk size of your Vagrant VM. Base boxes often come with small disks, which can be limiting for development.
vagrant plugin install vagrant-disksize
Then in your `Vagrantfile`:
config.disksize.size = '50GB'
* **`vagrant-cachier`:** Caches downloaded packages (e.g., `apt`, `yum`, `npm` packages) from inside the VM on your host machine. This significantly speeds up `vagrant up` or `vagrant reload` operations after the first run, as packages don't need to be downloaded repeatedly.
vagrant plugin install vagrant-cachier
In `Vagrantfile`:
config.cache.scope = :box
* **`vagrant-share`:** Allows you to share your Vagrant environment with anyone in the world via a public URL, making it easy to demo local work or collaborate.
vagrant plugin install vagrant-share
vagrant share
Integrating Vagrant into CI/CD Pipelines (for testing)
While Vagrant VMs are primarily for local development, their ability to create reproducible environments makes them valuable for certain aspects of CI/CD, especially for integration and acceptance testing.
* **Reproducible Testing Environments:** You can define a `Vagrantfile` that provisions a test environment identical to your local dev setup (or even production). Your CI server can then spin up this VM, deploy your application, and run tests against it. This ensures tests are run in a consistent, isolated environment.
* **Testing Infrastructure as Code:** If you're using configuration management tools (Ansible, Puppet) to provision your production servers, you can use Vagrant to spin up VMs and test your configuration management playbooks/manifests against them *before* deploying to actual servers. This is known as "testing your infrastructure as code" and is a critical DevOps practice.
*Remember*, for production deployments and scalable CI/CD, cloud-native solutions, Docker, and Kubernetes are usually preferred. Vagrant's strength is in local, developer-centric environment management.
Managing Multiple Vagrant Environments
As you work on multiple projects, you'll accumulate many Vagrant environments.
* **Organization:** Keep each project's `Vagrantfile` in its own directory. Always `cd` into the project directory before running `vagrant` commands.
* **`vagrant global-status`:** This command is your friend! It lists all running or suspended Vagrant machines across your system, along with their IDs and directories. You can then use `vagrant ssh
` or `vagrant destroy ` from any directory to interact with them.
* **Resource Management:** Running too many VMs can hog your host's resources. Be mindful of how many environments you have `up` or `suspended`. Use `vagrant halt` or `vagrant destroy` when a VM is not needed.
Troubleshooting Common Vagrant Issues
Even with the best planning, you might encounter issues. *Yeh toh engineering ka hissa hai, beta*.
* **Virtualization Not Enabled:** If `vagrant up` fails with messages about VT-x/AMD-V being disabled, you need to enable it in your computer's BIOS/UEFI settings. This is a common *pehle-pehle* problem.
* **Network Conflicts:** If you're using `private_network` and choose an IP address already in use on your network, or if VirtualBox's DHCP server has issues, networking can fail. Try a different IP range (e.g., `192.168.56.x`) or reset VirtualBox host-only networks.
* **Box Not Found:** If `vagrant init` or `vagrant up` complains about `config.vm.box` not being found, double-check the box name for typos. Make sure it exists on [Vagrant Cloud](https://app.vagrantup.com/boxes/search).
* **Provisioning Failures:** If your shell scripts or Ansible playbooks fail during `vagrant up`, inspect the output carefully. Vagrant usually prints the script's output, helping you debug. You can also `vagrant ssh` into the machine after it boots and manually run the provisioning steps to pinpoint the issue. Use `vagrant provision` to re-run only the provisioning steps without rebooting the VM.
* **Resource Exhaustion:** If your VM is sluggish or crashes, it might not have enough RAM or CPU. Adjust `vb.memory` and `vb.cpus` in your `Vagrantfile`.
Security Considerations
While primarily for development, a few security points are worth noting:
* **Default Credentials:** Vagrant boxes typically come with a default `vagrant` user with passwordless `sudo` access. While convenient for development, never use these boxes or their default settings for anything close to a production environment.
* **Network Exposure:** Be cautious with `public_network` (bridged networking) as it exposes your VM directly to your local network. For most development, `private_network` or `forwarded_port` is safer.
* **Updates:** Ensure your base boxes are reasonably up-to-date, or use provisioning to apply security updates (e.g., `sudo apt update && sudo apt upgrade -y`) on boot.
By incorporating these advanced techniques and best practices, Vagrant transforms into a central piece of your DevOps toolkit, ensuring efficient, consistent, and robust development environments. It’s all about making your life easier and your projects more reliable.
Key Takeaways
- Vagrant solves "it works on my machine" syndrome by creating consistent, reproducible virtual development environments for local use.
- It acts as an abstraction layer over virtualization providers (like VirtualBox), simplifying VM creation and management through a single configuration file.
- The `Vagrantfile` is your infrastructure-as-code blueprint, defining everything from the base OS box to network settings, shared folders, and automated provisioning.
- Provisioning (using shell scripts, Ansible, etc.) automates software installation and configuration within the VM, ensuring a fully prepared development environment with a single command.
- Vagrant is essential for rapid environment setup, realistic local testing, fostering team collaboration, and bridging basic Linux knowledge into practical DevOps applications.
Frequently Asked Questions
What's the difference between Vagrant and Docker?
Vagrant provisions full-fledged virtual machines (VMs), which include a guest operating system, providing strong isolation and mimicking physical servers closely. Docker, on the other hand, uses containers, which share the host OS kernel and are much lighter-weight and faster to start. Vagrant is ideal for environments that need a full OS experience (e.g., testing different OS versions, running system-level tools), while Docker is excellent for packaging and running applications with their dependencies in isolated processes.
Why use Vagrant instead of just spinning up a VM directly with VirtualBox?
While you can manually create VMs with VirtualBox, Vagrant automates and standardizes the entire process. It manages box downloads, network configuration, shared folders, SSH key setup, and provisioning scripts through a simple, version-controlled `Vagrantfile`. This ensures consistency across team members, rapid environment creation, and easy disposability, significantly reducing manual effort and errors compared to direct VirtualBox usage.
Can Vagrant be used for production environments?
No, Vagrant is primarily designed for local development and testing environments, not for production deployments. Production environments require scalability, high availability, advanced monitoring, and robust security features that Vagrant does not provide. For production, container orchestration platforms like Kubernetes, or cloud-native solutions from AWS, Azure, or GCP are the standard.
Which virtualization provider is best for Vagrant?
The "best" provider depends on your operating system, budget, and specific needs. For most users, **VirtualBox** is the de facto choice due to being free, open-source, and widely supported across Linux, Windows, and macOS. For commercial use or specific performance requirements, **VMware Workstation/Fusion** (paid) can offer better integration and I/O performance. On Windows Professional/Enterprise, **Hyper-V** (built-in) is a viable native option.
Ready to see Vagrant in action and solidify your Basic Linux skills with practical DevOps training? Watch the full video on the @explorenystream channel for a hands-on demonstration and in-depth explanations. Don't forget to like, share, and subscribe for more amazing DevOps content that simplifies complex topics!