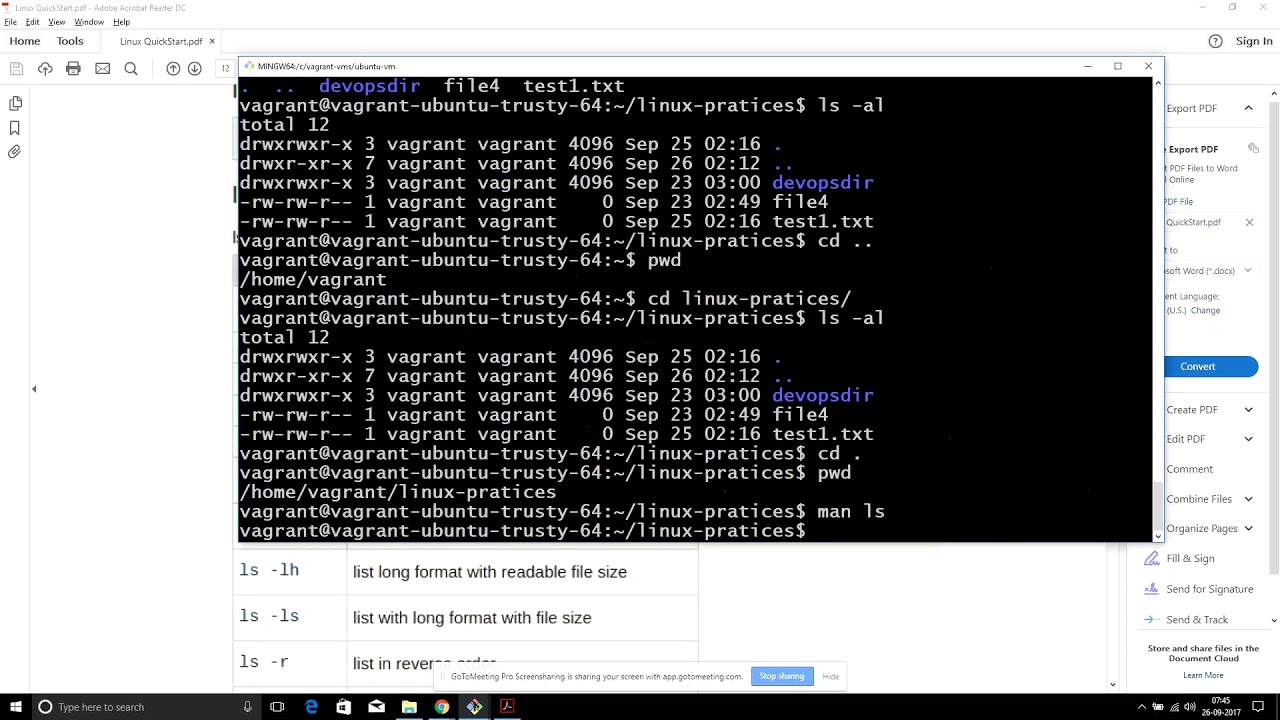
Basic Linux Part 3 Vagrant DEVOPS ONLINE TRAINING
July 14, 2026 — LiveStream
🛒 Recommended gear on AmazonDisclosure: some links above are affiliate links — if you buy through them I may earn a small commission at no extra cost to you. Thanks for supporting the channel!
As an Amazon Associate I earn from qualifying purchases.
Ever found yourself saying, "It works on my machine!" only to see your code crash and burn in production? This classic developer's lament is a signal for a more consistent development environment, and that's where Vagrant steps in as a big deal for any aspiring DevOps engineer. Mastering Vagrant is a fundamental step in building reproducible, portable, and efficient local development setups, allowing you to simulate production environments right on your laptop, ensuring seamless transitions from development to testing to deployment.
In the fast-paced world of DevOps, consistency is king, and manual configuration is the enemy. Whether you're a junior just starting your journey into the world of Linux and server management, or an experienced engineer streamlining workflows, understanding Vagrant is absolutely critical. It abstracts away the complexities of virtualisation providers like VirtualBox or VMware, letting you define your entire virtual machine setup using a simple, human-readable file. So, grab your chai, let's deep dive into why Vagrant for DevOps is not just a tool, but a mindset, and how it simplifies your life when dealing with Linux environments.
Vagrant 101: Your Personal Sandbox for DevOps Excellence
So, senior engineer bol raha hai, "Chai pe charcha karte hain, Vagrant kya hai aur kyon itna zaroori hai?" Basically, Vagrant is an open-source tool for building and managing virtual machine environments. Think of it as your personal sandbox, where you can spin up isolated Linux instances (or Windows, or macOS, if you're feeling fancy) with all the necessary software and configurations pre-installed. For anyone learning Linux basics for DevOps, this is gold. Instead of messing up your main system with installations and dependencies, you get a clean slate, every single time.
The core concept behind Vagrant is Infrastructure as Code (IaC). Instead of manually clicking through a GUI to set up a VM, you write a simple text file called a Vagrantfile. This file defines everything: what operating system (called a "box") you want, how much RAM it should have, what network settings it needs, and even what scripts to run inside the VM to install your applications. This means your entire team can use the exact same development environment, eliminating those dreaded "it works on my machine" issues.
Getting Started: Installation aur Pehla Vagrant Up
To kick things off with Vagrant, you'll need two main components:
- Vagrant itself: Download it from the official website (vagrantup.com) and install it like any other application on your OS.
- A Virtualization Provider: This is the engine that actually runs the virtual machines. VirtualBox is the most popular choice because it's free, open-source, and widely supported by Vagrant. Make sure you install VirtualBox before Vagrant. Other providers include VMware, Hyper-V, Docker, etc., but for beginners, VirtualBox is the way to go.
Once both are installed, you can open your terminal (or command prompt) and verify the installation:
vagrant --version
vboxmanage --version
If you see version numbers, you're good to go! Now, let's create your first Vagrant environment. Navigate to an empty directory where you want to store your project, and then run:
mkdir my_dev_env
cd my_dev_env
vagrant init hashicorp/bionic64
What just happened? vagrant init created a Vagrantfile in your current directory. hashicorp/bionic64 is the name of a Vagrant "box," which is essentially a pre-packaged virtual machine image. This particular box is based on Ubuntu 18.04 LTS (Bionic Beaver), a popular choice for Linux development environments. Open the Vagrantfile with your favourite text editor; you'll see a lot of commented-out lines. Don't worry, we'll get to the important ones.
To actually bring up your virtual machine, run:
vagrant up
The first time you run this, Vagrant will download the hashicorp/bionic64 box (it might take a while, depending on your internet connection). After that, it will start the VM using VirtualBox. Once it's up, you can SSH into it:
vagrant ssh
Leh, ho gaya! You're now inside a pristine Ubuntu Linux environment, ready to practice your basic Linux commands without fear of breaking your host machine. When you're done, you can stop the VM with vagrant halt or completely remove it (along with its data) using vagrant destroy.
Essential Vagrant Commands for Daily Use
Understanding these commands is crucial for your daily workflow with Vagrant:
vagrant init [box_name]: Creates a new Vagrantfile.vagrant up: Starts and provisions the Vagrant environment. If the VM is not created, it will create and boot it.vagrant ssh: Connects to the VM via SSH.vagrant status: Shows the current state of the Vagrant machine(s).vagrant halt: Gracefully shuts down the VM.vagrant suspend: Pauses the VM, saving its current state to disk. Quicker to resume than vagrant up after a halt.vagrant resume: Resumes a suspended VM.vagrant reload: Restarts the VM, applying any changes made to the Vagrantfile (e.g., networking, provisioning scripts).vagrant provision: Runs the provisioners again without restarting the VM. Useful when you modify provisioning scripts.vagrant destroy: Stops and deletes all resources related to the Vagrant environment. Use with caution!vagrant global-status: Shows the status of all Vagrant environments on your machine, not just the current directory.vagrant box add [box_name]: Manually downloads and adds a box to your local Vagrant box repository.vagrant box list: Lists all boxes installed on your system.vagrant box prune: Removes old versions of boxes.
These commands are your bread and butter when working with Vagrant for local development. Master them, and you'll be zipping through your setups like a pro.
Customising Your Virtual Playground: Vagrantfile Configuration Deep Dive
The real power of Vagrant lies in its Vagrantfile. This Ruby-based configuration file allows you to define every aspect of your virtual machine. It's not just about spinning up a bare OS; it's about creating a fully functional development or testing environment. Let's look at some key configurations you'll use regularly.
Networking: Connectivity ke liye
A VM that can't talk to the outside world or your host machine is not very useful, hain na? Vagrant provides several networking options within the Vagrantfile:
config.vm.network "private_network", ip: "192.168.33.10": This sets up a host-only private network. The VM gets a static IP address (like 192.168.33.10) that only your host machine and other Vagrant VMs on the same private network can access. This is ideal for development as it isolates your VM from your main network, preventing IP conflicts.config.vm.network "public_network": This bridges your VM to one of your host machine's network interfaces (like Wi-Fi or Ethernet). Your VM will appear as another device on your local network, potentially getting an IP address from your router. Useful if you need external devices to access your VM or if your VM needs to talk to other physical machines on your network. You might need to specify a bridge interface: config.vm.network "public_network", bridge: "en0: Wi-Fi (AirPort)" (Mac example).config.vm.network "forwarded_port", guest: 80, host: 8080: This is super common. It forwards a port from your host machine to a port on your guest VM. For example, if your web server inside the VM is listening on port 80, you can access it from your host's browser at http://localhost:8080. You can add multiple port forwards.
Here's how it looks in your Vagrantfile:
Vagrant.configure("2") do |config|
  config.vm.box = "hashicorp/bionic64"

  # Private network
  config.vm.network "private_network", ip: "192.168.33.10"

  # Port forwarding for a web server
  config.vm.network "forwarded_port", guest: 80, host: 8080, host_ip: "127.0.0.1"

  # Optionally, increase RAM and CPU
  config.vm.provider "virtualbox" do |vb|
    vb.memory = "2048"
    vb.cpus = 2
  end
end
Shared Folders: Code Share karna Asaan
How do you get your code from your host machine into the VM? Shared folders are the answer. Vagrant automatically shares the directory containing your Vagrantfile (the project root) with the VM at /vagrant. This means any changes you make to your code on your host machine instantly reflect inside the VM, and vice-versa. No need for manual copying or FTP!
You can also define additional shared folders:
config.vm.synced_folder "./data", "/home/vagrant/data_folder"
This line shares the data folder from your host (relative to your Vagrantfile) to /home/vagrant/data_folder inside the VM. You can also specify owner, group, and permissions for the shared folder for more control.
For high-performance scenarios or specific file system needs, Vagrant supports different shared folder types like NFS or SMB. For most basic use cases with VirtualBox, the default shared folders work perfectly, making local development with Vagrant incredibly smooth.
Choosing the Right Box: Operating System ka Sahi Chunav
Vagrant boxes are pre-packaged OS images. You can find a vast collection on Vagrant Cloud. When selecting a box, consider:
- OS Distribution: Ubuntu, CentOS, Debian, Fedora – choose what you're familiar with or what matches your production environment.
- Version: Always pick a stable, well-maintained version (e.g., Ubuntu LTS releases).
- Provider: Ensure the box supports your chosen virtualization provider (e.g.,
virtualbox, vmware_desktop).
- Minimal vs. Desktop: For DevOps, you usually want a minimal server installation without a GUI to keep it lightweight.
Popular choices include hashicorp/bionic64, ubuntu/focal64, centos/8. To use a different box, just change the config.vm.box line in your Vagrantfile and run vagrant up. Vagrant will automatically download it if not present locally.
Automating Setup with Provisioning: Infrastructure as Code ka Asli Power
Once your VM is up and running, you'll need to install software, configure services, and set up your application. This is where Vagrant provisioning comes in. Instead of manually SSHing in and typing commands, you define these setup steps directly in your Vagrantfile. This is the essence of infrastructure as code, ensuring that every time you spin up a new VM, it's configured identically.
Shell Script Provisioning: Simple aur Effective
For simpler setups, or when you're just starting, the shell provisioner is your best friend. You can either inline shell commands or point to an external script file. This is perfect for installing packages, updating the system, or cloning repositories.
Inline Shell Provisioning:
Vagrant.configure("2") do |config|
  config.vm.box = "ubuntu/focal64"
  config.vm.provision "shell", inline: <<-SHELL
    sudo apt-get update
    sudo apt-get install -y apache2 php libapache2-mod-php
    sudo systemctl enable apache2
    sudo systemctl start apache2
    echo "Hello from Vagrant!" > /var/www/html/index.html
  SHELL
end
In this example, Vagrant will execute these commands inside the VM after it boots up. This sets up a basic Apache web server with PHP and a custom index page.
External Shell Script Provisioning:
For more complex setups, it's better to keep your provisioning logic in separate shell scripts. Create a file, say bootstrap.sh, in the same directory as your Vagrantfile:
#!/bin/bash
echo "--- Starting Provisioning ---"
# Update package lists
sudo apt-get update -y
# Install Nginx
sudo apt-get install -y nginx
# Start and enable Nginx
sudo systemctl start nginx
sudo systemctl enable nginx
# Create a simple index file
echo "Welcome to Nginx on Vagrant!
" | sudo tee /usr/share/nginx/html/index.html
echo "--- Provisioning Complete ---"
And in your Vagrantfile:
Vagrant.configure("2") do |config|
  config.vm.box = "ubuntu/focal64"
  config.vm.provision "shell", path: "bootstrap.sh"
end
When you run vagrant up, Vagrant will copy bootstrap.sh into the VM and execute it. You can re-run provisioning without restarting the VM using vagrant provision, which is super handy when you're iterating on your setup scripts.
Beyond Shell Scripts: Configuration Management Tools
While shell scripts are great for simple tasks, for complex, multi-server environments or production-grade configurations, you'll eventually move to dedicated configuration management tools. Vagrant has built-in support for integrating with these tools, which is another reason it's so popular in DevOps training.
Ansible: A very popular agentless automation tool. You can tell Vagrant to run an Ansible playbook against your VM. This allows you to use the same Ansible playbooks for your local development, staging, and production environments.Chef/Puppet: Other powerful configuration management tools. Vagrant can integrate with these as well, allowing you to apply Chef recipes or Puppet manifests to your VMs.
Integrating these tools elevates your DevOps automation game significantly. It means your entire infrastructure, from a single development VM to a cluster of production servers, can be managed consistently from code.
Advanced Vagrant Tips aur Best Practices for DevOps Juniors
As you get comfortable with the basics, you'll start exploring more advanced Vagrant features that make your life even easier. Aur suno, kuch best practices bhi hain jo follow karne se kaam ekdum smooth chalta hai.
Multi-Machine Environments: Simulating Distributed Systems
What if your application needs a web server, a database server, and a message queue server, all running on separate machines? Vagrant can handle this easily by defining multiple VMs in a single Vagrantfile.
Vagrant.configure("2") do |config|
  # Web server machine
  config.vm.define "web" do |web_config|
    web_config.vm.box = "ubuntu/focal64"
    web_config.vm.hostname = "web-server"
    web_config.vm.network "private_network", ip: "192.168.33.11"
    web_config.vm.provision "shell", inline: "sudo apt-get update -y && sudo apt-get install -y nginx"
    web_config.vm.network "forwarded_port", guest: 80, host: 8080
  end

  # Database server machine
  config.vm.define "db" do |db_config|
    db_config.vm.box = "ubuntu/focal64"
    db_config.vm.hostname = "db-server"
    db_config.vm.network "private_network", ip: "192.168.33.12"
    db_config.vm.provision "shell", inline: "sudo apt-get update -y && sudo apt-get install -y postgresql"
  end
end
Now, you can manage them individually (vagrant up web, vagrant ssh db) or together (vagrant up to bring both up). This is invaluable for testing distributed applications and understanding how different services interact, a core concept in modern DevOps architectures.
Vagrant Plugins: Extending Functionality
The Vagrant ecosystem is rich with plugins that extend its functionality. Some popular ones include:
vagrant-vbguest: Automatically installs VirtualBox Guest Additions, essential for shared folders and better performance.vagrant-proxyconf: Helps configure proxy settings within your VMs, useful in corporate environments.vagrant-cachier: Caches downloaded packages (e.g., apt, yum) to speed up provisioning.
You can install plugins using vagrant plugin install [plugin_name]. For instance, to install vagrant-vbguest:
vagrant plugin install vagrant-vbguest
Plugins add a lot of flexibility and can significantly improve your Vagrant experience.
Troubleshooting Common Vagrant Issues
Like any tool, you might hit a snag sometimes. Here are some common issues and their solutions:
- VM not booting/stuck: Check your VirtualBox logs. Ensure your host machine has enough RAM and disk space. Sometimes, a simple
vagrant reload or vagrant destroy && vagrant up can fix it.
- Networking issues: Double-check IP addresses, port forwards. Is your firewall on the host blocking connections? For private networks, ensure no IP conflicts with other network interfaces on your host.
- Provisioning failures: Read the output carefully. Vagrant usually shows which command failed. SSH into the VM (
vagrant ssh) and try running the failing commands manually to debug.
- Guest Additions not installing: This can lead to shared folder issues or poor performance. Install
vagrant-vbguest or manually install them after SSHing in.
- "Box not found": Ensure the box name in your
Vagrantfile is correct and that it's available on Vagrant Cloud or locally added.
Remember, the terminal output is your friend. Read error messages carefully; they usually point you in the right direction.
Why Vagrant is a Cornerstone for Junior DevOps Engineers
For someone venturing into DevOps careers, Vagrant isn't just another tool; it's a foundational skill. It teaches you:
- Infrastructure as Code (IaC): How to define and manage infrastructure through code, a core DevOps principle.
- Reproducibility: The importance of consistent environments across development, testing, and production.
- Virtualization Concepts: Hands-on experience with VMs, networking, and resource allocation.
- Automation: How to automate system setup and software installations.
- Collaboration: How to share consistent development environments with a team effortlessly.
Mastering Vagrant, alongside basic Linux commands and concepts, prepares you for more advanced tools like Docker, Kubernetes, and cloud infrastructure management. It bridges the gap between traditional manual setup and modern automated deployments. Understanding Docker as the next step often feels natural after grasping Vagrant.
So, the next time you think about setting up a new project or experimenting with a new technology, resist the urge to install everything directly on your host system. Spin up a Vagrant VM, define your environment in a Vagrantfile, and enjoy the peace of mind that comes with an isolated, reproducible, and disposable development playground. This disciplined approach is what defines a true DevOps professional.
For further reading and strengthening your core Linux knowledge, consider checking out our article on essential Linux commands.
Key Takeaways
- Reproducible Environments: Vagrant provides a consistent and disposable local development environment using a simple
Vagrantfile.
- Infrastructure as Code (IaC): Define your entire VM setup (OS, network, provisioning) in a single code file, ensuring consistency across teams and stages.
- Essential Commands: Master
vagrant up, vagrant ssh, vagrant halt, vagrant reload, and vagrant destroy for efficient workflow.
- Customization Power: Configure networking (private, public, forwarded ports), shared folders, and VM resources within the
Vagrantfile.
- Automation through Provisioning: Automate software installation and configuration using shell scripts or integrate with tools like Ansible, making setup effortless and repeatable.
Frequently Asked Questions
What is the difference between Vagrant and Docker?
Vagrant and Docker both aim to create isolated environments, but they operate at different levels. Vagrant creates full virtual machines (VMs), providing a complete operating system (e.g., Ubuntu, CentOS) with its own kernel. This is ideal for simulating a multi-server setup, experimenting with different OSes, or ensuring a development environment perfectly mirrors a production VM. Docker, on the other hand, uses containers, which share the host OS's kernel. Containers are much lighter, faster to start, and consume fewer resources than VMs. Docker is excellent for packaging applications and their dependencies into portable units and is often preferred for microservices and cloud-native deployments. Think of Vagrant for infrastructure-level isolation and Docker for application-level isolation.
Can Vagrant be used for production environments?
While Vagrant is designed for building and managing development and testing environments, it is generally not recommended for production environments. The overhead of a full virtual machine provider (like VirtualBox) on a production server is usually inefficient. For production, you'd typically deploy directly to cloud VMs (e.g., AWS EC2, Azure VMs, Google Cloud Compute Engine) or use container orchestration platforms like Kubernetes or managed services. Vagrant's strength lies in ensuring that your development environment closely mimics these production targets, allowing you to develop and test locally with high fidelity to the actual deployment environment.
How do I share my Vagrant environment with a team?
Sharing a Vagrant environment is straightforward because it's defined by a Vagrantfile. You simply commit your Vagrantfile (and any associated provisioning scripts, like bootstrap.sh) to your version control system (e.g., Git). When a team member clones the repository, they just need to run vagrant up in the project directory. Vagrant will automatically download the specified box and provision the VM identically for them, ensuring everyone on the team is working with the exact same setup. This eliminates environment inconsistencies and streamlines onboarding for new team members.
What if I need to use a specific Linux distribution not listed in common Vagrant boxes?
You have a few options if your desired Linux distribution isn't readily available as a public Vagrant box. Firstly, search on Vagrant Cloud (or other community box repositories) for more niche boxes; sometimes, a user has already created one. Secondly, you can create your own custom Vagrant box. This usually involves installing your chosen Linux distribution in a virtual machine (e.g., VirtualBox), configuring it as desired, and then using tools like Vagrant's vagrant package command or Packer (a HashiCorp tool often used with Vagrant) to create a reusable box image. This gives you ultimate control over your VM's base configuration.
I hope this deep dive into Vagrant has demystified things for you, junior! It’s a powerful tool that will save you countless hours and headaches. Now, why not see it all in action? Watch the original video, "Basic Linux Part 3 Vagrant DEVOPS ONLINE TRAINING" on the @explorenystream channel to get a hands-on walk-through of these concepts. Don't forget to like the video and subscribe to @explorenystream for more such insightful DevOps training!