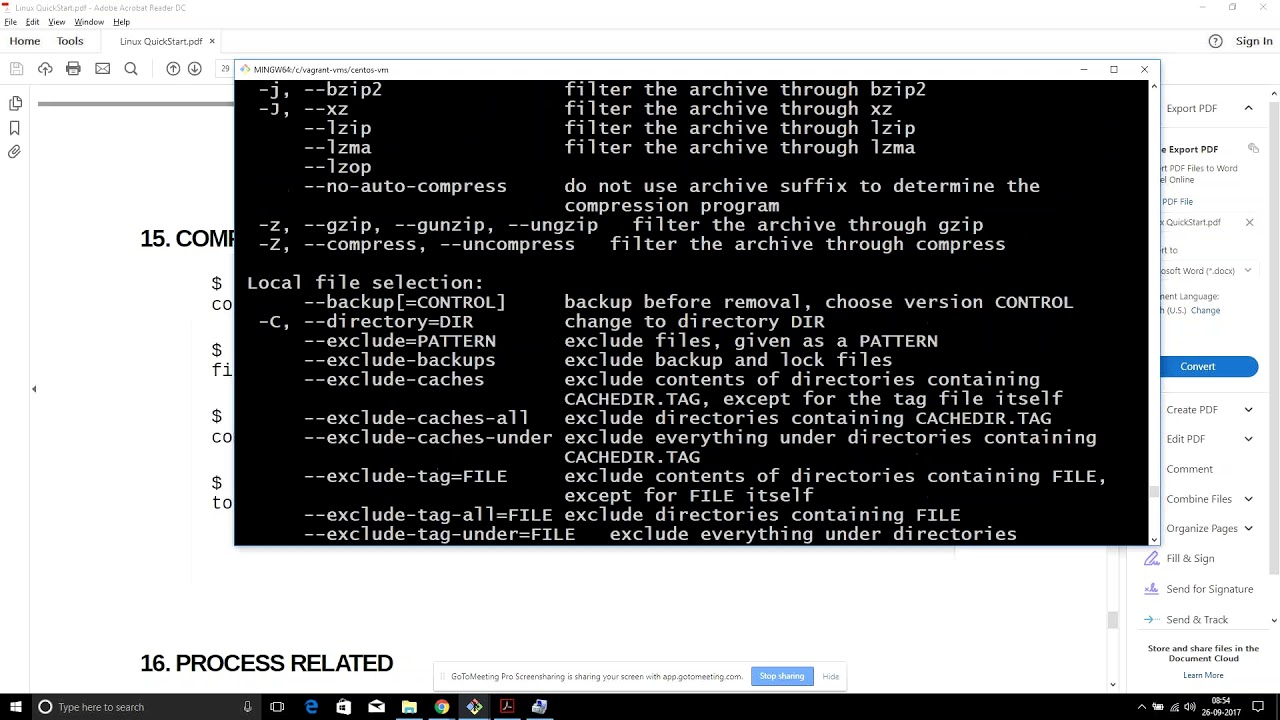
Basic Linux Part 4 Vagrant DEVOPS ONLINE TRAINING
July 16, 2026 — LiveStream
🛒 Recommended gear on AmazonDisclosure: some links above are affiliate links — if you buy through them I may earn a small commission at no extra cost to you. Thanks for supporting the channel!
As an Amazon Associate I earn from qualifying purchases.
Setting up consistent development and testing environments is a cornerstone of modern DevOps, and that's precisely where Vagrant shines. This powerful tool acts as a wrapper around virtualization technologies, providing an elegant, consistent, and portable way to manage virtual machines, making your software development lifecycle smoother and your deployments more reliable. This comprehensive guide will deep-dive into Vagrant, covering everything from its core concepts and installation to advanced Vagrantfile configurations and best practices for creating reproducible environments crucial for any DEVOPS online training curriculum.
If you’ve ever found yourself debugging a "works on my machine" bug or struggling to onboard a new team member due to environment setup complexities, then understanding Vagrant in DEVOPS workflows is your ultimate solution. It simplifies virtual machine provisioning and management, making sure every developer, tester, and even your CI/CD pipeline runs on an identical setup. Let's explore how Vagrant, especially in a Linux context, can transform your development experience and make your basic Linux skills truly shine.
Demystifying Vagrant: Your DevOps Sandbox ke Ustaad
Chalo, aaj ekdum basic se shuru karte hain. Imagine you're working on a new application. You've got your laptop, your favourite OS, and a bunch of tools installed. Now, a new team member joins, or you need to test your app on a different version of Node.js or a specific database. What happens? They install everything, and suddenly, some things don't work. "Mere machine pe toh chal raha tha!" – this common phrase highlights a fundamental problem in software development: environment inconsistencies. This is where Vagrant DEVOPS comes in, acting as the ultimate solution for creating and distributing consistent, disposable development environments.
What Exactly Is Vagrant?
At its heart, Vagrant is an open-source tool for building and managing portable virtual development environments. It sits on top of existing virtualization software like VirtualBox, VMware, Hyper-V, or KVM, abstracting away the complexities of directly interacting with these providers. Think of it as a blueprint for your virtual machine. Instead of manually clicking through a wizard to set up a VM, installing an OS, and then all your dependencies, Vagrant lets you define your entire environment in a simple, text-based file called a Vagrantfile.
This Vagrantfile specifies everything: which base operating system (called a "box") to use, how much RAM and CPU the VM should have, network configurations, shared folders with your host machine, and even the provisioning steps to install software and configure services inside the VM. This "infrastructure as code" approach is critical for modern DevOps practices, ensuring repeatability and reducing the chances of configuration drift.
Why Vagrant is a big deal for DevOps
The benefits of integrating Vagrant into your DevOps toolkit are immense, especially when you're dealing with diverse teams and complex application stacks. Here’s why it’s a must-have:
- Consistent Environments: This is the biggest win. Everyone on the team, from developers to QA engineers, works on an identical environment. No more "it works on my machine" excuses. This consistency extends to CI/CD pipelines, ensuring that what passes locally will also pass in automated tests.
- Rapid Onboarding: New team members can spin up a fully configured development environment with just a few commands. No more lengthy setup documents or days lost to configuration issues. Just
vagrant up, and you're good to go!
- Disposable Environments: Need to test a new library or a risky configuration change? Spin up a new Vagrant VM, test it, and then destroy it with
vagrant destroy. This makes experimentation safe and efficient without polluting your host machine.
- Portability: A
Vagrantfile can be committed to version control (like Git), making your environment definition shareable and versionable. This means your environment evolves alongside your application code.
- Isolation: Each project can have its own isolated environment, preventing conflicts between different project dependencies on your host machine.
- Local Simulation of Production: You can configure your Vagrant VMs to closely mimic your production servers, allowing you to catch environment-specific issues much earlier in the development cycle.
For anyone undergoing DEVOPS online training, understanding these fundamental principles of environment management is key. Vagrant isn't just a tool; it's a paradigm shift in how we approach development infrastructure, making the life of a DevOps engineer or a basic Linux user much, much easier.
Getting Started with Vagrant: Installation aur Pehla Kadam
Chalo, ab practically dekhte hain. Setting up Vagrant is a straightforward process, but you need to ensure you have a virtualization provider installed first. For most users, especially when you're just getting started with Basic Linux Vagrant setups, VirtualBox is the go-to choice because it's free and widely supported. Let's walk through the installation and your first Vagrant machine.
Prerequisites: Virtualization Provider
Before installing Vagrant itself, you need a "provider." This is the software that actually runs the virtual machines.
For Linux, Windows, and macOS:
- VirtualBox: Download from virtualbox.org. Follow the installation instructions for your specific OS. This typically involves downloading an installer and running it.
Once VirtualBox is installed, verify it by opening it or checking its version from the terminal. On Linux, for instance, you might run:
vboxmanage --version
Installing Vagrant
Vagrant itself is available for all major operating systems. The easiest way is to download the appropriate package from the official Vagrant website:
- Go to vagrantup.com/downloads.
- Download the installer for your operating system (e.g., .deb for Debian/Ubuntu, .rpm for Fedora/CentOS, .msi for Windows, .dmg for macOS).
- Run the installer. This usually involves a few clicks.
After installation, open a new terminal or command prompt and verify Vagrant is installed correctly:
vagrant --version
You should see the Vagrant version number. Agar version dikh gaya, toh samajh jao, installation ekdum set hai!
Your First Vagrant Machine: A Basic Linux Sandbox
Now that Vagrant and VirtualBox are ready, let's create your first virtual machine. This is where the magic of Vagrant online training truly begins to unfold.
-
Create a Project Directory: It's good practice to keep each Vagrant environment in its own directory.
mkdir my-first-vagrant-vm
cd my-first-vagrant-vm
-
Initialize a Vagrantfile: This command creates a
Vagrantfile in your current directory. It specifies the base "box" (a pre-packaged Vagrant environment) you want to use. We'll start with a common Ubuntu box.
vagrant init ubuntu/focal64
This command tells Vagrant to initialize a project using the ubuntu/focal64 box, which is a popular Ubuntu 20.04 LTS image. If you open the Vagrantfile with a text editor, you'll see a lot of commented-out configuration options. Don't worry about them for now.
-
Bring Up the VM: This is the command that actually downloads the specified box (if not already cached) and provisions the virtual machine according to the
Vagrantfile.
vagrant up
The first time you run this, it will download the ubuntu/focal64 box, which might take some time depending on your internet connection. Subsequent runs will be much faster as the box will be cached locally.
-
Access the VM (SSH): Once the VM is up and running, you can connect to it via SSH.
vagrant ssh
This command automatically logs you into your virtual machine. You are now inside a fresh Ubuntu 20.04 environment! You can run any Linux command here, just like on a real server. Try ls -l / or uname -a.
-
Manage the VM Lifecycle: You have several commands to control your Vagrant VM.
vagrant status: Checks the current state of your Vagrant machine (running, powered off, saved).vagrant halt: Gracefully shuts down the guest operating system.vagrant suspend: Saves the current running state of the VM to disk, allowing you to resume it quickly later.vagrant resume: Resumes a suspended VM.vagrant destroy: Permanently stops and deletes everything related to the Vagrant machine. Use this when you're done with an environment and want to free up resources.
Congratulations! You've successfully created, accessed, and managed your first Vagrant DEVOPS environment. This is the foundational skill, aur yahan se hi sab kuch shuru hota hai.
Mastering the Vagrantfile: Configuration ka Blueprint
The true power of Vagrant lies in its Vagrantfile. This single file is your declarative blueprint for defining and provisioning your virtual environments. Samajh jao, this is where you customize your VM to exactly match your project's needs. Let's peel back the layers of this Ruby-based configuration file.
Anatomy of a Vagrantfile
When you run vagrant init, Vagrant generates a template Vagrantfile with many commented-out examples. The core structure generally looks like this:
Vagrant.configure("2") do |config|
  config.vm.box = "ubuntu/focal64"

  # Other configurations go here
  # config.vm.network "private_network", ip: "192.168.33.10"
  # config.vm.synced_folder ".", "/vagrant"
  # config.vm.provision "shell", inline: "echo Hello from inside the VM"
end
Let's break down the most important configuration options:
1. Specifying the Base Box: config.vm.box
This is the most fundamental setting. It defines the base operating system image for your VM. Vagrant Hub (previously Vagrant Cloud) is the primary source for publicly available boxes.
- Example:
config.vm.box = "ubuntu/focal64"
- Custom Boxes: You can also use local boxes or private boxes, especially important for large organizations or when internet connectivity is a concern. For instance,
config.vm.box = "my_custom_debian_box" if you've added it locally.
2. Network Configurations: config.vm.network
Networking is crucial for communication between your host machine and the VM, or even between multiple VMs. Vagrant supports several types of network configurations:
-
Forwarded Ports: Maps a port on your host machine to a port on the guest VM. Ideal for accessing services running inside the VM (like a web server) from your host browser.
config.vm.network "forwarded_port", guest: 80, host: 8080
Now, if a web server runs on port 80 inside the VM, you can access it via http://localhost:8080 on your host.
-
Private Network: Creates a host-only network, allowing your host and Vagrant VMs to communicate on a private, isolated network. This is common for database access or API endpoints.
config.vm.network "private_network", ip: "192.168.33.10"
Your host can access the VM at 192.168.33.10, and the VM can be addressed by this IP within your local network.
-
Public Network (Bridged): Connects your VM directly to your physical network interface, making it appear as another physical machine on your network. Useful if your VM needs to be accessible from other devices on your LAN.
config.vm.network "public_network"
Vagrant will ask you to choose a network interface. Be careful with this, as it might expose your VM to external networks.
3. Shared Folders: config.vm.synced_folder
This feature allows you to smoothly share files and directories between your host machine and the guest VM. This means you can use your favourite editor on your host OS and have the changes immediately reflected inside the VM. The default shared folder is always your project root on the host mapped to /vagrant on the guest.
- Example:
config.vm.synced_folder "./data", "/var/www/html"
This maps the data folder from your Vagrant project directory on the host to /var/www/html inside the VM.
- Options: You can specify different sync types (NFS, SMB, rsync for performance) or user/group permissions.
4. Provider-Specific Configurations: config.vm.provider
You can fine-tune the virtualization provider (like VirtualBox) settings directly within the Vagrantfile.
- Example (VirtualBox):
config.vm.provider "virtualbox" do |vb|
  vb.memory = "2048"    # Allocate 2GB RAM
  vb.cpus = 2         # Allocate 2 CPU cores
  vb.name = "MyDevVM" # Set VM name in VirtualBox GUI
end
This allows you to control resources like RAM and CPU, or even change the name that appears in your VirtualBox GUI. Ye settings bahut zaroori hain for optimal performance.
5. Provisioning: Automating Software Installation and Configuration
This is where the "DEVOPS" aspect truly shines. Provisioning allows Vagrant to automatically install software, configure services, and run scripts inside your VM after it's booted. This ensures your environment is fully set up without any manual intervention. Vagrant supports several provisioners:
-
Shell Script Provisioner: The simplest way to run commands.
config.vm.provision "shell", inline: "sudo apt-get update && sudo apt-get install -y nginx"
Or, for more complex scripts, you can point to a file:
config.vm.provision "shell", path: "bootstrap.sh"
The bootstrap.sh script would then contain all your installation commands (e.g., install Git, Node.js, PHP, database server).
-
Ansible, Chef, Puppet, SaltStack: For more complex, multi-machine environments and advanced configuration management, Vagrant integrates smoothly with popular configuration management tools. These allow you to define your desired state in a much more powerful and scalable way.
config.vm.provision "ansible" do |ansible|
  ansible.playbook = "provisioning/playbook.yml"
end
This would execute an Ansible playbook to configure your VM. Understanding these integrations is a key part of any advanced Vagrant DEVOPS training.
By mastering the Vagrantfile, you gain complete control over your development environments, making them consistent, robust, and easily shareable. This is the foundation for truly reproducible and efficient DevOps workflows. Kabhi bhi koi naya project aaye, toh Vagrantfile tumhara pehla saathi hoga!
Advanced Vagrant Scenarios and Best Practices: Production-Ready Environments
Once you've got the basics down, you'll realize Vagrant is capable of much more than just a single VM. It's designed to handle complex scenarios, replicate multi-tier architectures, and integrate smoothly into larger DevOps pipelines. Let's look at some advanced usages and best practices that elevate your Vagrant DEVOPS game.
Multi-Machine Environments: Simulating Complex Architectures
Most real-world applications aren't confined to a single server. You might have a web server, a database server, and an application server, all communicating with each other. Vagrant allows you to define multiple interconnected virtual machines within a single Vagrantfile.
Vagrant.configure("2") do |config|
  config.vm.define "web" do |web|
    web.vm.box = "ubuntu/focal64"
    web.vm.hostname = "web-server"
    web.vm.network "private_network", ip: "192.168.33.11"
    web.vm.provision "shell", inline: "sudo apt-get update && sudo apt-get install -y nginx"
  end

  config.vm.define "db" do |db|
    db.vm.box = "ubuntu/focal64"
    db.vm.hostname = "db-server"
    db.vm.network "private_network", ip: "192.168.33.12"
    db.vm.provision "shell", inline: "sudo apt-get update && sudo apt-get install -y postgresql"
  end
end
With this configuration:
vagrant up will bring up both "web" and "db" VMs.vagrant up web will only bring up the "web" VM.vagrant ssh web will connect to the web server.- The web server can communicate with the DB server at
192.168.33.12, and vice-versa.
This capability is invaluable for testing distributed systems locally before deploying them to production. For serious DevOps online training, understanding multi-machine environments is non-negotiable.
Vagrant Cloud and Box Management
Vagrant Cloud (app.vagrantup.com/boxes/search) is HashiCorp's official catalog of Vagrant boxes. You can search for boxes, discover different OS versions, and even host your own private boxes. When you run vagrant init box-name or vagrant up, Vagrant automatically tries to download the specified box from Vagrant Cloud if it's not available locally.
You can also manage your local boxes:
vagrant box list: Shows all boxes downloaded and available on your system.vagrant box add name url: Manually adds a box from a URL (e.g., a local file or a private server).vagrant box remove name: Deletes a cached box from your system.
Using Different Providers (Beyond VirtualBox)
While VirtualBox is popular for local development, Vagrant also supports other providers for different use cases:
- VMware (Fusion/Workstation): Offers better performance and tighter integration with host OS in some scenarios, but requires a paid license for the provider plugin.
- Hyper-V (Windows): Native virtualization for Windows, useful for Windows-centric development.
- KVM (Linux): Open-source virtualization for Linux, often used in server environments.
- Cloud Providers (AWS, Azure, GCP): There are Vagrant plugins that allow you to provision instances directly on cloud platforms, essentially using your
Vagrantfile to define cloud infrastructure. This blurs the line between local development and cloud deployment even further.
Switching providers is usually as simple as installing the corresponding plugin (e.g., vagrant plugin install vagrant-vmware-utility) and configuring the Vagrantfile's provider block accordingly. This flexibility makes Vagrant a powerful tool for a wide array of environments.
Common Pitfalls and Troubleshooting
Even with Vagrant's simplicity, you might encounter issues. Here are some common problems and solutions:
- Network Issues: If your VM can't connect to the internet or your host, check your network configurations in the
Vagrantfile. Ensure VirtualBox network adapters are correctly configured. A quick vagrant reload --provision often resolves transient network glitches.
- Resource Constraints: If your VM is slow, increase RAM and CPU in the
config.vm.provider block. Remember to vagrant reload for changes to take effect.
- "Provider 'virtualbox' not found" Error: Make sure VirtualBox (or your chosen provider) is installed correctly and its path is in your system's PATH environment variable.
- Provisioning Errors: If a shell script fails, Vagrant will often stop. Carefully read the output for error messages. You can re-run provisioning without destroying the VM using
vagrant provision or vagrant reload --provision.
- Disk Space: Vagrant boxes and VMs can consume significant disk space. Regularly use
vagrant destroy for environments you no longer need, and vagrant box prune to remove old, unused cached boxes.
- Vagrant Global Status: To see all active Vagrant machines across your system, use
vagrant global-status. This helps identify rogue VMs that might be consuming resources.
Troubleshooting is an essential skill in DevOps, aur yeh sab cheezein tumhein real-world mein bahut kaam aayengi.
Integrating with CI/CD
Vagrant environments, defined by version-controlled Vagrantfiles, are perfect for CI/CD pipelines. You can spin up an identical environment for automated testing, run your tests, and then destroy the environment, ensuring that tests are always run in a clean, consistent state. This capability is a cornerstone of reliable automated deployments and continuous integration, which is why Vagrant DEVOPS is so important in modern software development.
By incorporating these advanced techniques and best practices, you can leverage Vagrant to build incredibly robust, scalable, and production-like development and testing environments, making your DevOps journey smooth and efficient.
Key Takeaways
- Vagrant Ensures Environment Consistency: It eliminates "works on my machine" issues by defining reproducible virtual development environments via a
Vagrantfile.
- Foundation is Virtualization: Vagrant acts as an abstraction layer over virtualization providers like VirtualBox, VMware, or Hyper-V, making VM management simple and portable.
- Vagrantfile is Your Blueprint: This Ruby-based file dictates VM specifications (box, network, resources) and provisioning steps, functioning as infrastructure as code.
- Streamlined DevOps Workflows: Vagrant accelerates developer onboarding, enables disposable environments for testing, and facilitates seamless integration with CI/CD pipelines.
- Master Essential Commands: Familiarity with
vagrant init, vagrant up, vagrant ssh, vagrant halt, and vagrant destroy is crucial for daily operations and managing your Basic Linux Vagrant setups.
Frequently Asked Questions
What is the primary benefit of using Vagrant in a DevOps context?
The primary benefit of using Vagrant in DevOps is achieving environment consistency across development, testing, and even staging environments. This eliminates discrepancies that lead to "it works on my machine" problems, speeds up developer onboarding, and ensures that code behaves identically from local development to production-like environments, thus improving reliability and reducing deployment risks.
Can Vagrant be used with any operating system as a guest VM?
Yes, Vagrant can provision virtual machines with almost any operating system as a guest, provided there's a compatible Vagrant "box" available. While Linux distributions (like Ubuntu, CentOS, Debian) are most common for Basic Linux Vagrant environments, there are also boxes available for Windows Server, FreeBSD, and other operating systems, allowing for highly flexible development setups.
How does Vagrant differ from Docker?
Vagrant and Docker both facilitate reproducible environments but operate at different layers. Vagrant provisions full virtual machines, complete with their own guest OS, offering isolation at the hardware virtualization level. It's ideal for replicating complex multi-server architectures locally or for development that requires a full OS environment. Docker, on the other hand, utilizes containerization, sharing the host OS kernel and providing process-level isolation. Containers are lighter, faster to start, and consume fewer resources, making them excellent for microservices and application packaging. Often, they are complementary; one might run Docker *inside* a Vagrant VM.
A big thanks for sticking with us through this deep dive into Vagrant and its pivotal role in DevOps. We hope this guide has given you a solid understanding and the confidence to start building your own consistent development environments. Don't forget to watch the original video, "Basic Linux Part 4 Vagrant DEVOPS ONLINE TRAINING," to see these concepts in action and get hands-on experience. Make sure to hit that subscribe button on @explorenystream for more insightful content and future parts of this amazing online training series!