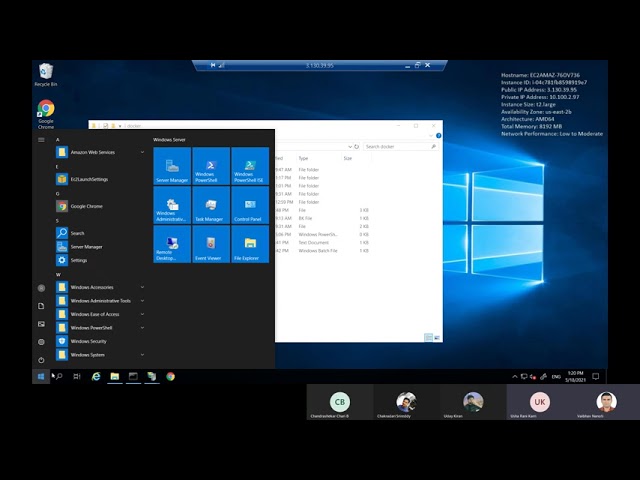
🐳 Creating a Docker Image for IIS Web Applications | Step-by-Step Guide
July 08, 2026 — LiveStream
🛒 Recommended gear on AmazonDisclosure: some links above are affiliate links — if you buy through them I may earn a small commission at no extra cost to you. Thanks for supporting the channel!
As an Amazon Associate I earn from qualifying purchases.
Ever wondered how to package your traditional Windows-based IIS web applications into sleek, portable Docker containers? If you're looking to modernize your deployment strategy and embrace the world of containerization for your .NET or ASP.NET applications running on IIS, then you're in the right place. This comprehensive guide will walk you through creating a Docker image for IIS web applications, transforming your conventional setup into a dynamic, reproducible, and scalable solution.
In the evolving landscape of DevOps, containerizing applications is no longer a luxury but a necessity. For many enterprises, a significant portion of their codebase still relies on the robust, albeit sometimes unwieldy, Internet Information Services (IIS) on Windows Server. Moving these applications to Docker can seem daunting, especially when compared to their Linux counterparts. But fear not, junior DevOps padawan! Today, we’re going to demystify the process of how to Dockerize IIS web applications, giving you the power to deploy your ASP.NET apps with unprecedented speed and consistency. We'll explore everything from choosing the right base image to configuring IIS within your container and ensuring your application runs smoothly.
Why Dockerize Your IIS Web Applications, Yaar?
Dekho, the world is moving fast, and traditional deployments can be a real headache. You build an application, test it on your machine, and then when it hits production, "it works on my machine" becomes a sad echo. That's where Docker shines, even for Windows-based applications. While Windows containers might have a slightly larger footprint than Linux ones, the benefits they bring to your IIS web applications are simply too good to ignore.
- Consistency Across Environments: The biggest win, hands down. Your development, staging, and production environments all run the exact same container image. No more "DLL hell" or missing dependencies. It's like carrying your entire server environment in a neat little package.
- Portability: Once you have a Docker image, it can run on any system that has Docker installed, be it a developer's laptop, an on-premises server, or a cloud VM. This makes moving applications between environments a breeze.
- Faster Deployment Cycles: With a standardized container image, deployments become significantly quicker and less prone to manual errors. This is a big deal for CI/CD pipelines.
- Isolation: Each application runs in its own isolated container, preventing conflicts between different applications or services on the same host. This enhances security and stability.
- Scalability: Need to handle more traffic? Just spin up more instances of your IIS application container. Docker Swarm or Kubernetes can orchestrate this automatically, allowing your application to scale horizontally with ease.
- Resource Efficiency: While Windows containers are larger, they still share the host OS kernel, making them more efficient than full virtual machines for running multiple isolated applications.
So, if you've got existing .NET Framework or .NET Core applications running on IIS, and you're thinking about modernization, creating a Docker image for IIS web applications is a fantastic step forward. It allows you to leverage modern DevOps practices without a complete rewrite, preserving your investment in Windows-specific technologies.
Setting Up Your Dev Environment for IIS Docker Magic
Before we dive into the Dockerfile, let's make sure your workstation is ready for some Windows container action. This process assumes you're working on a Windows 10 Pro/Enterprise or Windows Server machine.
Prerequisites: What You'll Need
- Windows Operating System:
- Windows 10 Pro/Enterprise/Education (version 1809 or higher): With Hyper-V enabled.
- Windows Server 2016/2019/2022: With the Containers feature enabled.
- Docker Desktop: The easiest way to get Docker up and running on your local machine. Download and install it from the official Docker website.
- Your ASP.NET/IIS Web Application: For this guide, we'll assume you have a simple ASP.NET application ready to be deployed. This could be a .NET Framework web app or a .NET Core app configured to run on IIS.
- PowerShell or Command Prompt: To run Docker commands.
- A Text Editor or IDE: Like VS Code, to create your Dockerfile.
Switching to Windows Containers
Once Docker Desktop is installed, you'll need to ensure it's running in "Windows containers" mode. By default, it often starts in Linux containers mode. To switch:
- Right-click on the Docker icon in your system tray.
- Select "Switch to Windows containers."
Docker Desktop will restart, and you'll be ready to work with Windows-based images. You can verify this by opening a command prompt and running:
docker info | findstr "Operating System"
You should see something like Operating System: Windows 10 Enterprise or Windows Server 2019 Datacenter, indicating it's using the host's Windows kernel for containers.
Crafting the Perfect Dockerfile for Your IIS App
The Dockerfile is the heart of your Docker image. It's a script containing a series of instructions that Docker uses to build your image layer by layer. Let's break down each key component involved in creating a Docker image for IIS web applications.
Choosing Your Base Image: The Foundation
The first instruction in any Dockerfile is `FROM`, which specifies the base image your application will build upon. For IIS applications, you'll typically use a Microsoft-provided Windows Server Core or Nano Server image that includes IIS or allows for easy installation.
FROM mcr.microsoft.com/windows/servercore/iis:ltsc2019
Let's unpack this:
mcr.microsoft.com: This is the Microsoft Container Registry, where official Microsoft images are hosted.windows/servercore/iis: This specific image is built on Windows Server Core and comes with IIS pre-installed. It's often the most convenient choice for traditional IIS applications.ltsc2019: This is the tag, indicating the Long-Term Servicing Channel (LTSC) version, specifically Windows Server 2019. It's crucial to match the LTSC version of your base image with your Docker host's Windows version for compatibility. Common tags include ltsc2019, ltsc2022, or newer versions like 1809 (for Semi-Annual Channel - SAC releases, less common for production).
Alternative Base Images:
mcr.microsoft.com/windows/servercore:ltsc2019: This is just Windows Server Core without IIS. You'd have to install IIS manually using DISM commands (which we'll cover later). It gives you more control but means more lines in your Dockerfile.mcr.microsoft.com/windows/nanoserver:ltsc2019: Nano Server is a much smaller, container-optimized version of Windows Server. However, it has significant limitations. It only supports .NET Core applications (not .NET Framework), and many traditional Windows APIs are missing. It's not suitable for full-blown IIS with ASP.NET Framework applications.
For most ASP.NET Framework applications, windows/servercore/iis is your best bet, providing a balance of functionality and image size.
Setting the Shell and Arguments
# Escape character for PowerShell commands
SHELL ["powershell", "-Command"]

# Build arguments (optional, but good for dynamic builds)
ARG source
ENV sourcePath=C:\inetpub\wwwroot
SHELL ["powershell", "-Command"]: This line is crucial for Windows Dockerfiles. It sets the default shell used for `RUN`, `CMD`, and `ENTRYPOINT` instructions to PowerShell. Without this, Docker would try to use `cmd.exe`, which might not correctly interpret some commands.ARG source: `ARG` allows you to define variables that can be passed at build time (e.g., `docker build --build-arg source=MyApp .`). This is useful for dynamically specifying paths or versions without modifying the Dockerfile.ENV sourcePath=C:\inetpub\wwwroot: `ENV` sets environment variables within the container. These are persistent and available to your application at runtime. Here, we're setting a default path where our application files will reside. This makes subsequent `COPY` and `WORKDIR` commands cleaner.
Installing IIS and Essential Features (If not using pre-installed IIS image)
If you opted for a base image without IIS (e.g., windows/servercore), you'd need to install it. Even with the `iis` base image, you might need to add specific IIS features for your application, such as ASP.NET support, WebSocket Protocol, etc.
# If using windows/servercore instead of windows/servercore/iis, you'd install IIS like this:
# RUN Install-WindowsFeature -Name Web-Server -IncludeManagementTools

# Install ASP.NET 4.8 and required features for traditional ASP.NET applications
RUN Install-WindowsFeature Web-Asp-Net48 ; `
    Install-WindowsFeature NET-Framework-45-ASPNET ; `
    Install-WindowsFeature Web-Default-Doc ; `
    Install-WindowsFeature Web-Dir-Browsing ; `
    Install-WindowsFeature Web-Static-Content ; `
    Install-WindowsFeature Web-Http-Errors ; `
    Install-WindowsFeature Web-Http-Logging ; `
    Install-WindowsFeature Web-Request-Monitor ; `
    Install-WindowsFeature Web-Filtering ; `
    Install-WindowsFeature Web-Stat-Compression ; `
    Install-WindowsFeature Web-Mgmt-Console ; `
    Install-WindowsFeature Web-Metabase ; `
    Install-WindowsFeature Web-Lgcy-Mgmt-Console ; `
    Install-WindowsFeature Web-Lgcy-Scripting ; `
    Remove-WindowsFeature Web-DAV-Publishing ; `
    Remove-WindowsFeature Web-Ftp-Server ; `
    # Clean up temporary files to reduce image size
    # This command may vary slightly depending on the Windows Server version
    # For Server Core, this might not yield significant results for feature installations
    # dism /online /cleanup-image /startcomponentcleanup /resetbase
Each `Install-WindowsFeature` command adds a specific role or feature. For .NET Framework applications, `Web-Asp-Net48` (or the appropriate version) is absolutely critical. The backtick (`) at the end of each line acts as a line continuation character in PowerShell, allowing you to chain multiple commands into a single `RUN` instruction. Chaining commands reduces the number of layers in your image, leading to a smaller and more efficient final image.
Note on .NET Core: If you're running a .NET Core application, you'd typically install the .NET Core Hosting Bundle using a separate `RUN` command or use a base image that already includes it (e.g., `mcr.microsoft.com/dotnet/aspnet:6.0-windowsservercore-ltsc2019`).
Prepping the Application Directory
# Set the working directory for subsequent instructions
WORKDIR $sourcePath

# Copy the application files into the container
# The '$source' ARG is used here to specify the build context subfolder
COPY $source .
WORKDIR $sourcePath: This instruction sets the working directory for any subsequent `RUN`, `CMD`, `ENTRYPOINT`, `COPY`, or `ADD` instructions. In IIS, the default website content typically resides in `C:\inetpub\wwwroot`.COPY $source .: This is where your application code gets moved into the container.
- `$source`: This refers to the `ARG source` we defined earlier. When you build the image, you'd typically run `docker build --build-arg source=MyAppFolder .`. `MyAppFolder` would contain your published application files.
- `.`: This signifies the current `WORKDIR` inside the container (`C:\inetpub\wwwroot`).
Important: The .dockerignore file! Just like `.gitignore`, a `.dockerignore` file prevents unnecessary files (like `bin/debug`, `obj`, `.git`, `node_modules`, `config.Debug.json`, etc.) from being copied into your Docker image. This dramatically reduces image size and speeds up builds. Make sure you have one at the root of your build context.
Configuring IIS for Your Application
Once the files are in place, you need to tell IIS about your application. This often involves creating an application pool and a website or virtual directory. For simple deployments, the default website works, but for best practices, create a dedicated one.
# Remove the default IIS start page if not needed
RUN Remove-Item -Path C:\inetpub\wwwroot\iisstart.htm -Force

# Create a new application pool for your app
RUN New-WebAppPool -Name 'MyWebAppPool' -Force ; `
    Set-ItemProperty "IIS:\AppPools\MyWebAppPool" -Name "managedRuntimeVersion" -Value "v4.0" ; `
    Set-ItemProperty "IIS:\AppPools\MyWebAppPool" -Name "enable32BitAppOnWin64" -Value "false" ; `
    Set-ItemProperty "IIS:\AppPools\MyWebAppPool" -Name "managedPipelineMode" -Value "Integrated" ; `
    Set-ItemProperty "IIS:\AppPools\MyWebAppPool" -Name "startMode" -Value "AlwaysRunning" ; `
    Set-ItemProperty "IIS:\AppPools\MyWebAppPool" -Name "autoStart" -Value "true"

# Create a new website pointing to your application
# For simplicity, we are replacing the Default Web Site.
# In production, you might create a new site on a different port or host header.
RUN Remove-Website -Name 'Default Web Site' ; `
    New-Website -Name 'MyWebApp' -PhysicalPath $sourcePath -Port 80 -ApplicationPool 'MyWebAppPool'

# Grant appropriate permissions to the application folder for IIS
# IIS_IUSRS typically needs read/execute, and write if your app writes files
RUN icacls C:\inetpub\wwwroot /grant "IIS_IUSRS:(OI)(CI)RX" ; `
    # If your application needs write permissions (e.g., for logs or uploads)
    # icacls C:\inetpub\wwwroot\logs /grant "IIS_IUSRS:(OI)(CI)F"
Here, we are using PowerShell cmdlets specifically designed for IIS administration (which are available after installing `Web-Mgmt-Console` and `Web-Metabase` features). If you don't use the `windows/servercore/iis` base image, you might need to install the `Web-Management-Tools` feature.
New-WebAppPool: Creates an application pool. We set properties like managedRuntimeVersion (for .NET Framework versions, e.g., v4.0), enable32BitAppOnWin64, and managedPipelineMode.New-Website: Creates a new website. Here, we're actually replacing the default website for simplicity. For multiple apps, you'd assign unique ports or host headers.icacls: This command is used to set file system permissions. It's crucial to grant the `IIS_IUSRS` group appropriate permissions to your application's folder so IIS can read and execute your application files. If your application writes logs or uploads files, you'll need to grant write permissions to specific subfolders.
Alternatively, you could use appcmd.exe for IIS configuration, but PowerShell cmdlets are generally preferred for scripting in modern Windows environments.
Exposing Ports and Keeping IIS Alive
# Expose the port your web application listens on (default HTTP is 80)
EXPOSE 80

# Command to run when the container starts
# ServiceMonitor.exe is crucial for keeping Windows containers alive
# It ensures that services like IIS continue to run in the foreground
CMD ["ServiceMonitor.exe", "w3svc"]
EXPOSE 80: This informs Docker that the container listens on port 80 at runtime. It's purely documentation; you still need to map the port when you run the container (e.g., `docker run -p 8080:80`).CMD ["ServiceMonitor.exe", "w3svc"]: This is probably the most unique and critical part for Windows IIS containers.
- In Linux containers, the `CMD` or `ENTRYPOINT` usually runs your application directly (e.g., `nginx -g "daemon off;"`).
- In Windows containers, you typically start the `w3svc` (World Wide Web Publishing Service) via `ServiceMonitor.exe`. This utility, provided by Microsoft in their base images, ensures that the specified service runs in the foreground. If `w3svc` stops, `ServiceMonitor.exe` will exit, causing the container to stop. This is vital because if `CMD` just exited after starting a service, Docker would assume the container's main process finished and stop the container.
Putting It All Together: A Sample Dockerfile
# escape=`

# Use a Windows Server Core image with IIS pre-installed
FROM mcr.microsoft.com/windows/servercore/iis:ltsc2019

SHELL ["powershell", "-Command"]

# Build arguments for source path (e.g., the folder containing your published app)
ARG source
ENV sourcePath=C:\inetpub\wwwroot\MyWebApp

# Install ASP.NET 4.8 and other required IIS features
RUN Write-Host "Installing IIS features..."; `
    Install-WindowsFeature Web-Asp-Net48 ; `
    Install-WindowsFeature NET-Framework-45-ASPNET ; `
    Install-WindowsFeature Web-Default-Doc ; `
    Install-WindowsFeature Web-Dir-Browsing ; `
    Install-WindowsFeature Web-Static-Content ; `
    Install-WindowsFeature Web-Http-Errors ; `
    Install-WindowsFeature Web-Http-Logging ; `
    Install-WindowsFeature Web-Request-Monitor ; `
    Install-WindowsFeature Web-Filtering ; `
    Install-WindowsFeature Web-Stat-Compression ; `
    Install-WindowsFeature Web-Mgmt-Console ; `
    Install-WindowsFeature Web-Metabase ; `
    Install-WindowsFeature Web-Lgcy-Mgmt-Console ; `
    Install-WindowsFeature Web-Lgcy-Scripting ; `
    Remove-WindowsFeature Web-DAV-Publishing ; `
    Remove-WindowsFeature Web-Ftp-Server ; `
    Write-Host "IIS features installation complete."

# Set the working directory to where the app will live
WORKDIR $sourcePath

# Copy the published application files from the build context into the container
# Ensure your .dockerignore file excludes unnecessary items
COPY $source .

# Remove the default IIS start page if not needed
RUN Write-Host "Removing default IIS start page..."; `
    Remove-Item -Path C:\inetpub\wwwroot\iisstart.htm -Force -ErrorAction SilentlyContinue

# Create and configure the application pool
RUN Write-Host "Configuring application pool 'MyWebAppPool'..."; `
    New-WebAppPool -Name 'MyWebAppPool' -Force ; `
    Set-ItemProperty "IIS:\AppPools\MyWebAppPool" -Name "managedRuntimeVersion" -Value "v4.0" ; `
    Set-ItemProperty "IIS:\AppPools\MyWebAppPool" -Name "enable32BitAppOnWin64" -Value "false" ; `
    Set-ItemProperty "IIS:\AppPools\MyWebAppPool" -Name "managedPipelineMode" -Value "Integrated" ; `
    Set-ItemProperty "IIS:\AppPools\MyWebAppPool" -Name "startMode" -Value "AlwaysRunning" ; `
    Set-ItemProperty "IIS:\AppPools\MyWebAppPool" -Name "autoStart" -Value "true" ; `
    Write-Host "Application pool configured."

# Remove the default website and create a new one for your application
# Ensure it points to your application's directory and uses the correct app pool
RUN Write-Host "Configuring IIS website 'MyWebApp'..."; `
    Remove-Website -Name 'Default Web Site' -ErrorAction SilentlyContinue ; `
    New-Website -Name 'MyWebApp' -PhysicalPath $sourcePath -Port 80 -ApplicationPool 'MyWebAppPool' ; `
    Write-Host "IIS website configured."

# Grant appropriate permissions to the application folder for IIS
# IIS_IUSRS needs read/execute. Add write if your app needs to write files (e.g., logs, uploads)
RUN Write-Host "Setting file permissions..."; `
    icacls $sourcePath /grant "IIS_IUSRS:(OI)(CI)RX" ; `
    # Example for write permissions if needed:
    # icacls $sourcePath\Logs /grant "IIS_IUSRS:(OI)(CI)F"
    Write-Host "File permissions set."

# Expose the HTTP port
EXPOSE 80

# Command to run when the container starts - keeps IIS (w3svc) running
CMD ["ServiceMonitor.exe", "w3svc"]
A little note: The first line # escape=` tells Docker to use the backtick as the escape character instead of the default backslash. This is particularly useful in Windows Dockerfiles when you have multi-line PowerShell commands, as PowerShell also uses backticks for line continuation. It prevents conflicts and makes the Dockerfile more readable.
Building and Running Your IIS Docker Container
Now that your Dockerfile is ready, it's time to build the image and spin up a container.
Building the Docker Image
Navigate to the directory where your Dockerfile and published application files (e.g., in a subfolder named `MyAppPublish`) are located. Then execute the `docker build` command:
docker build --build-arg source=MyAppPublish -t myiisapp:1.0 .
- `--build-arg source=MyAppPublish`: This passes the value "MyAppPublish" to the `source` `ARG` defined in your Dockerfile. `MyAppPublish` should be the folder containing your compiled and published ASP.NET application files relative to your Dockerfile.
- `-t myiisapp:1.0`: This tags your image with a name (`myiisapp`) and a version (`1.0`). It's good practice to tag your images.
- `.`: This specifies the build context – the current directory, meaning Docker will look for the Dockerfile and source files here.
The build process will take some time, especially the first time, as Docker downloads the base image and runs each instruction. Subsequent builds will be faster thanks to Docker's layer caching.
Running Your IIS Docker Container
Once the image is built, you can run a container from it:
docker run -d -p 8080:80 --name my-running-iis-app myiisapp:1.0
- `-d`: Runs the container in detached mode (in the background).
- `-p 8080:80`: This is port mapping. It maps port 8080 on your host machine to port 80 inside the container. So, when you access `http://localhost:8080` from your host, it will hit your IIS application inside the container.
- `--name my-running-iis-app`: Gives your container a memorable name. This makes it easier to refer to later (e.g., for stopping or removing it).
- `myiisapp:1.0`: The name and tag of the image you just built.
Verifying Your Application
After running the container, give it a minute or two to start up fully. Then, open your web browser and navigate to `http://localhost:8080` (or whatever port you mapped). You should see your ASP.NET application running!
You can check the container status using:
docker ps
And view its logs if something goes wrong:
docker logs my-running-iis-app
Advanced Tips & Best Practices for Production-Ready IIS Docker Images
Building a basic image is one thing, but making it robust, secure, and efficient for production requires a few more tricks up your sleeve. Chaliye, let's look at some best practices.
1. Multi-Stage Builds for .NET Applications
For .NET Framework applications, this is less common, but for .NET Core apps, multi-stage builds are a big deal. They allow you to use a larger image with all SDKs and build tools in the "build" stage, and then copy only the compiled application artifacts to a much smaller "runtime" stage, drastically reducing your final image size.
# .NET Core Multi-Stage Build Example
FROM mcr.microsoft.com/dotnet/sdk:6.0-windowsservercore-ltsc2019 AS build-env
WORKDIR /app

# Copy csproj and restore as distinct layers
COPY MyWebApp/*.csproj ./MyWebApp/
RUN dotnet restore ./MyWebApp/MyWebApp.csproj

# Copy everything else and build
COPY MyWebApp/. ./MyWebApp/
WORKDIR /app/MyWebApp
RUN dotnet publish -c Release -o out

# Runtime stage
FROM mcr.microsoft.com/dotnet/aspnet:6.0-windowsservercore-ltsc2019 AS runtime
WORKDIR /inetpub/wwwroot/MyWebApp
COPY --from=build-env /app/MyWebApp/out .

# (Remaining IIS configuration and CMD as per previous example)
# Install IIS features if aspnet base image doesn't include them
# RUN Install-WindowsFeature ...
# CMD ["ServiceMonitor.exe", "w3svc"]
2. Optimizing Image Size
Windows container images can be quite large. Minimizing their size is critical for faster builds, pulls, and deployments.
- Choose the Smallest Base Image: Always go for Server Core or Nano Server variants that meet your application's needs. Avoid full Windows Server images.
- Chain `RUN` Commands: As shown, combine multiple PowerShell commands into a single `RUN` instruction using backticks. Each `RUN` creates a new layer, and fewer layers mean a smaller image and faster builds.
- Clean Up After Installation: After installing features or packages, remove any temporary files, caches, or installers within the *same* `RUN` command. For example, `Remove-Item -Path $env:TEMP\* -Force -Recurse` (use with caution!) or `dism /online /cleanup-image /startcomponentcleanup /resetbase`.
- Use `.dockerignore`: Prevent irrelevant files from being copied into the build context.
- Avoid Unnecessary Installations: Only install what's absolutely required for your application to run.
3. Security Considerations
- Least Privilege: Ensure your application pool identity has only the necessary permissions on the file system and other resources.
- Vulnerability Scanning: Regularly scan your Docker images for known vulnerabilities using tools like Trivy, Clair, or Docker Scout.
- Update Base Images: Keep your base images up-to-date to get the latest security patches.
- Don't Store Secrets: Never hardcode sensitive information (passwords, API keys, connection strings) directly in the Dockerfile or image. Use environment variables, Docker Secrets, or external secret management solutions (like Azure Key Vault, AWS Secrets Manager, HashiCorp Vault) at runtime.
4. Configuration Management
Externalize configuration as much as possible. Instead of baking configuration into the image, use environment variables (`ENV`) or mount configuration files at runtime. This allows you to use the same image across different environments (dev, test, prod) with varying configurations.
5. CI/CD Integration
Automate the build and push of your Docker images as part of your Continuous Integration (CI) pipeline. Tools like Azure DevOps, Jenkins, GitLab CI, or GitHub Actions can trigger builds whenever code changes are pushed, ensuring your images are always up-to-date and ready for deployment.
6. Troubleshooting Common Issues
Mastering these advanced techniques will elevate your game from just creating a Docker image for IIS web applications to deploying production-grade, efficient, and secure containerized applications.
Key Takeaways
- Windows Containers are Different: Be mindful of larger image sizes and the need for `SHELL` and `ServiceMonitor.exe` when working with IIS apps.
- Base Image Choice is Crucial: Select `mcr.microsoft.com/windows/servercore/iis` for most .NET Framework IIS apps, matching the LTSC version with your host.
- Dockerfile is Your Recipe: Use `RUN` to install features, `COPY` for application files, and configure IIS with PowerShell cmdlets.
- Permissions are Key: Always ensure `IIS_IUSRS` has the necessary read/execute permissions on your application directory.
- Optimize and Secure: Employ multi-stage builds, minimize image size, externalize configuration, and prioritize security for production deployments.
Frequently Asked Questions
Can I run a .NET Framework 3.5 application in a Docker IIS container?
Yes, you absolutely can. You would need to modify your Dockerfile to install the .NET Framework 3.5 features. Instead of Install-WindowsFeature Web-Asp-Net48, you would use Install-WindowsFeature NET-Framework-Core ; Install-WindowsFeature NET-Framework-35-ASPNET along with other necessary IIS features. Ensure your base image supports .NET Framework 3.5.
What's the difference between `COPY` and `ADD` in a Dockerfile?
COPY and ADD both copy files from your host to the container. The key difference is that ADD has additional capabilities: it can automatically extract compressed archives (tar, gzip, bzip2) if the source is a local archive, and it can fetch files from remote URLs. For simple file copying, `COPY` is generally preferred because it's more explicit and less prone to unexpected behavior.
How can I debug my IIS application inside a Docker container?
Debugging directly inside a running Windows container can be done by attaching Visual Studio to the process. You'll need to know the container's IP address or use the container name. First, ensure the container is running with debugging tools or at least the Remote Debugging Monitor. Then, use docker inspect <container_id> to get the container's IP, and from Visual Studio, use "Debug > Attach to Process..." and specify the remote connection. For more complex scenarios, consider logging extensively and analyzing logs or using tools like WinDbg within the container.
My container exits immediately after running. What could be wrong?
This is a very common issue with Windows containers. The most likely culprit is that the `CMD` instruction in your Dockerfile isn't keeping a foreground process alive. For IIS applications, this almost always means that ServiceMonitor.exe w3svc is either missing or incorrectly configured. The container will stop if its primary process (defined by `CMD` or `ENTRYPOINT`) exits. Ensure `ServiceMonitor.exe w3svc` is the last instruction and is correct.
Aur bhai, there you have it! A comprehensive breakdown of creating a Docker image for IIS web applications. This knowledge empowers you to containerize your legacy ASP.NET apps, bringing them into the modern DevOps era. It's a journey, not a destination, so keep experimenting, optimizing, and learning!
For a visual walkthrough and to see these steps in action, make sure to check out the original video on the @explorenystream channel. Don't forget to like the video and subscribe for more insightful DevOps content!