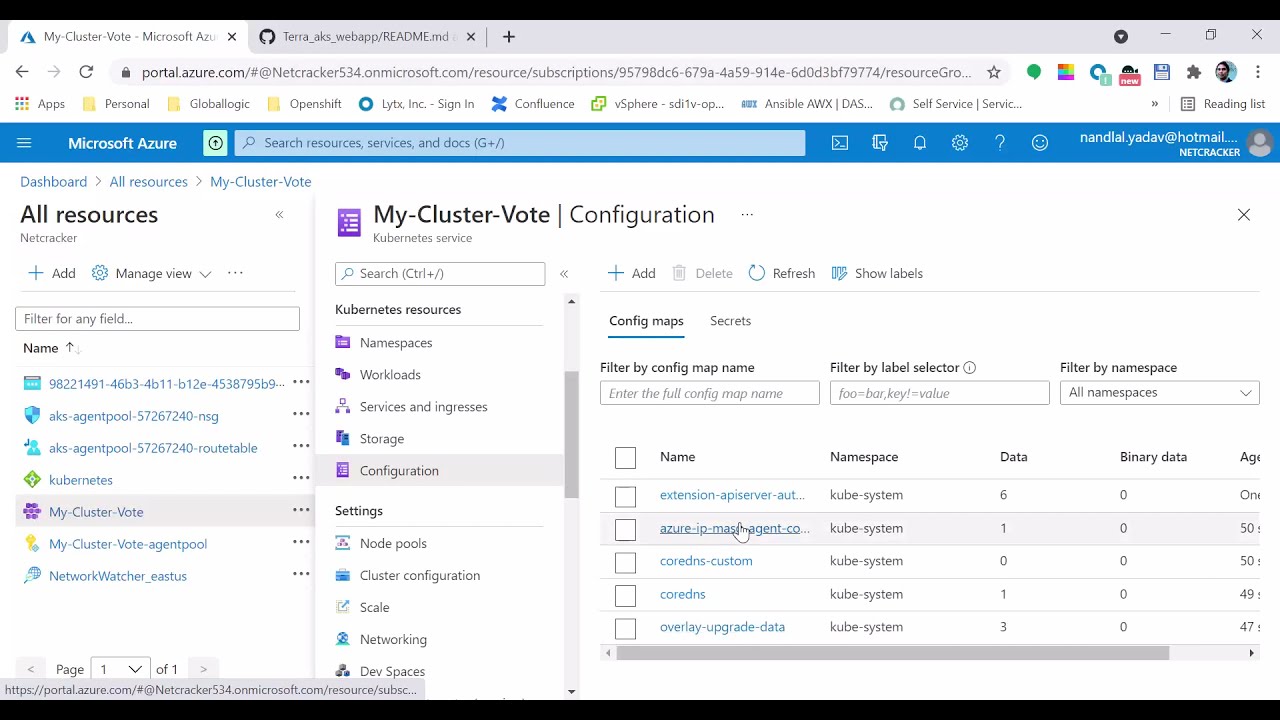
Deploy AKS Kubernetes Cluster & a simple web app Using Terraform
July 11, 2026 — LiveStream
🛒 Recommended gear on AmazonDisclosure: some links above are affiliate links — if you buy through them I may earn a small commission at no extra cost to you. Thanks for supporting the channel!
As an Amazon Associate I earn from qualifying purchases.
Deploying robust, scalable applications in the cloud often feels like a complex dance, especially when you're juggling container orchestration with infrastructure provisioning. But what if I told you there's a smooth, repeatable way to set up your entire Azure Kubernetes Service (AKS) cluster and even deploy a simple web application using Terraform? This guide provides a comprehensive, step-by-step walkthrough for automating your cloud infrastructure and container orchestration on Azure, ensuring consistency and efficiency.
Yaar, in today's fast-paced tech world, manually clicking through portals for every infrastructure setup is just not sustainable. You need a setup that's as reliable as your morning chai – consistent, potent, and ready every single time. That’s exactly why mastering how to deploy AKS Kubernetes cluster & a simple web app using Terraform is a big deal for any DevOps engineer. We're talking about automating the creation of your Azure Kubernetes Service cluster and then smoothly deploying your application on it, all managed by code. No more "it worked on my machine" issues, just pure, version-controlled cloud power.
Think about it: every time you need a new environment – dev, staging, production – you just run a few commands, and boom! Your entire AKS cluster, complete with networking, identity, and node pools, is up and running. Then, we’ll take it a step further and get a basic web app live on this shiny new Kubernetes cluster. Chal, let's dive into the core components that make this magic happen.
Understanding the Arsenal: AKS, Kubernetes, and Terraform
Before we start writing code, it’s crucial to understand the pillars of our deployment strategy. Each component plays a vital role, and knowing their strengths helps us leverage them effectively. Boss, this is the foundational knowledge; skip this, and you might get confused later.
Kubernetes: The Container Orchestration Maestro
At its heart, Kubernetes (K8s) is an open-source system for automating deployment, scaling, and management of containerized applications. Imagine you have a fleet of containers running your microservices. Kubernetes makes sure they are always healthy, scaled appropriately, and discoverable. It handles things like:
- Automated rollouts and rollbacks: smoothly update your application without downtime.
- Service discovery and load balancing: Your services can find each other, and traffic is distributed efficiently.
- Self-healing: If a container crashes, Kubernetes automatically restarts it.
- Resource management: Efficiently allocates CPU and memory across your cluster.
It's like having a super-smart manager for all your application containers, keeping everything in perfect harmony.
Azure Kubernetes Service (AKS): Kubernetes, Azure Style
While Kubernetes is powerful, managing a raw Kubernetes cluster can be a beast. This is where Azure Kubernetes Service (AKS) steps in. AKS is a managed Kubernetes offering from Microsoft Azure. It takes away much of the operational overhead of running Kubernetes:
- Managed control plane: Azure handles the Kubernetes control plane (API server, scheduler, controller manager, etcd), so you don't have to worry about patching, upgrading, or maintaining it.
- Simplified cluster operations: Easy scaling, upgrades, and monitoring.
- Integrated with Azure services: Seamless integration with Azure networking, identity (Azure AD), monitoring (Azure Monitor), and storage.
- Cost-effective: You only pay for the virtual machines (VMs) and associated resources consumed by your node pools, not for the managed control plane (though there are premium tiers that include uptime SLAs).
Essentially, AKS gives you the power of Kubernetes without the headache of managing the underlying infrastructure. It's Kubernetes made easy for the Azure ecosystem.
Terraform: Infrastructure as Code (IaC) for the Win
Now, how do we efficiently provision this AKS cluster? Enter Terraform. Developed by HashiCorp, Terraform is an open-source Infrastructure as Code (IaC) tool that allows you to define and provision cloud and on-prem resources using a declarative configuration language (HashiCorp Configuration Language or HCL). Think of it as writing a blueprint for your infrastructure.
- Declarative: You describe the desired state of your infrastructure, and Terraform figures out how to get there.
- Idempotent: Running the same Terraform configuration multiple times will result in the same infrastructure state, preventing unintended side effects.
- Version control: Your infrastructure definition lives in code, which can be version-controlled like any other application code. This brings auditability, collaboration, and easy rollbacks.
- Multi-cloud: While we're focusing on Azure, Terraform supports many cloud providers (AWS, GCP, etc.), making it a versatile tool for hybrid or multi-cloud strategies.
Using Terraform to deploy AKS Kubernetes cluster means your infrastructure provisioning is automated, repeatable, and less prone to human error. It’s the smart way to manage your cloud resources, yaar.
Prerequisites and Setting the Stage for AKS Deployment
Before we jump into the Terraform code, there are a few prerequisites we need to sort out. It's like setting up your kitchen before you start cooking – gotta have all your ingredients and tools ready. Make sure you have the following installed and configured on your local machine:
1. Azure Subscription
This is a no-brainer. You need an active Azure subscription. If you don't have one, you can sign up for a free Azure account.
2. Azure CLI
The Azure Command-Line Interface (CLI) is essential for interacting with your Azure subscription from the terminal. We'll use it to log in and fetch credentials for `kubectl` later.
Install it from the official Azure documentation. Once installed, log in to your Azure account:
az login
This will open a browser window for authentication. After successful login, you'll see your subscription details in the terminal.
3. Terraform
You need Terraform installed on your machine. You can download the appropriate package for your OS from the Terraform website.
Verify the installation:
terraform --version
You should see the Terraform version printed.
4. Service Principal for Terraform Authentication (Recommended)
While you can use your personal Azure CLI login, for automated and secure deployments, it's best practice to use an Azure Service Principal. This gives Terraform specific, scoped permissions to manage resources.
Create a Service Principal with "Contributor" role at the subscription or resource group level (we'll create the resource group first):
# First, set an environment variable for your resource group name
RESOURCE_GROUP_NAME="myaksrg"
LOCATION="eastus" # Choose your preferred Azure region

# Create the resource group
az group create --name $RESOURCE_GROUP_NAME --location $LOCATION

# Create the Service Principal
az ad sp create-for-rbac --name "terraform-aks-sp" --role "Contributor" --scopes "/subscriptions/<YOUR_SUBSCRIPTION_ID>/resourceGroups/$RESOURCE_GROUP_NAME" --json-auth
The output will be a JSON object containing `clientId`, `clientSecret`, `subscriptionId`, and `tenantId`. Save these credentials securely. We'll set these as environment variables for Terraform:
export ARM_CLIENT_ID="<YOUR_CLIENT_ID>"
export ARM_CLIENT_SECRET="<YOUR_CLIENT_SECRET>"
export ARM_SUBSCRIPTION_ID="<YOUR_SUBSCRIPTION_ID>"
export ARM_TENANT_ID="<YOUR_TENANT_ID>"
This ensures Terraform has the necessary permissions to create and manage resources within your designated resource group.
5. Kubectl (for Application Deployment)
kubectl is the command-line tool for running commands against Kubernetes clusters. We’ll need it to interact with our AKS cluster once it’s deployed to get our simple web app up and running. Install it from the official Kubernetes documentation.
Verify installation:
kubectl version --client
With all these prerequisites in place, we are now fully geared up to write our Terraform configuration. Ready to write some awesome Infrastructure as Code?
Crafting Your AKS Terraform Manifests: A Step-by-Step Guide
This is where the real fun begins! We'll define our Azure resources using HCL. Create a new directory for your Terraform project (e.g., `terraform-aks-deployment`) and create the following files within it. Bhai, organizing your files is key for readability and maintainability.
1. `main.tf`: The Core Configuration
This file will contain the primary resources for our AKS cluster.
# Configure the AzureRM Provider
terraform {
  required_providers {
    azurerm = {
      source  = "hashicorp/azurerm"
      version = "~> 3.0"
    }
  }
}

provider "azurerm" {
  features {}
}

# --- Resource Group ---
resource "azurerm_resource_group" "aks_rg" {
  name     = var.resource_group_name
  location = var.location
}

# --- Virtual Network and Subnets ---
# It's good practice to define networking explicitly.
# We'll create a VNet with a dedicated subnet for AKS.
resource "azurerm_virtual_network" "aks_vnet" {
  name                = "${var.cluster_name}-vnet"
  address_space       = ["10.0.0.0/16"]
  location            = azurerm_resource_group.aks_rg.location
  resource_group_name = azurerm_resource_group.aks_rg.name
}

resource "azurerm_subnet" "aks_subnet" {
  name                 = "${var.cluster_name}-subnet"
  resource_group_name  = azurerm_resource_group.aks_rg.name
  virtual_network_name = azurerm_virtual_network.aks_vnet.name
  address_prefixes     = ["10.0.1.0/24"] # A /24 subnet is usually sufficient for a small cluster
}

# --- Azure Kubernetes Service (AKS) Cluster ---
resource "azurerm_kubernetes_cluster" "aks_cluster" {
  name                = var.cluster_name
  location            = azurerm_resource_group.aks_rg.location
  resource_group_name = azurerm_resource_group.aks_rg.name
  dns_prefix          = var.cluster_name # DNS prefix for the AKS API server
  sku_tier            = "Free" # Use "Standard" for production workloads with uptime SLA

  # Managed identity for AKS (recommended over Service Principal for cluster identity)
  identity {
    type = "SystemAssigned"
  }

  # Default Node Pool configuration
  default_node_pool {
    name       = "systempool" # Name of the default node pool
    node_count = var.node_count
    vm_size    = var.vm_size # e.g., "Standard_DS2_v2"
    vnet_subnet_id = azurerm_subnet.aks_subnet.id # Attach to our custom subnet
    os_disk_size_gb = 30 # Disk size for node VMs
    type = "VirtualMachineScaleSets" # Required for auto-scaling
  }

  # Network profile configuration (Azure CNI is generally preferred for production)
  # For simplicity, Kubenet is often used in basic demos.
  network_profile {
    network_plugin     = "kubenet" # "kubenet" or "azure" (Azure CNI)
    dns_service_ip     = "10.0.0.10" # Must be within your VNet's address space but outside subnet ranges
    docker_bridge_cidr = "172.17.0.1/16"
    service_cidr       = "10.0.0.0/16" # Range for Kubernetes services
  }

  # RBAC enabled for secure access to the cluster
  role_based_access_control_enabled = true

  # Kubernetes version (use a stable, supported version)
  kubernetes_version = "1.28" # Check Azure documentation for latest supported versions

  # Optional: Enable Azure Monitor for containers
  addon_profile {
    oms_agent {
      enabled = true
      log_analytics_workspace_id = azurerm_log_analytics_workspace.aks_logs_workspace.id
    }
  }

  tags = {
    Environment = var.environment
    Project     = "AKS-Terraform-Demo"
  }
}

# --- Log Analytics Workspace (for Azure Monitor) ---
resource "azurerm_log_analytics_workspace" "aks_logs_workspace" {
  name                = "${var.cluster_name}-logs"
  location            = azurerm_resource_group.aks_rg.location
  resource_group_name = azurerm_resource_group.aks_rg.name
  sku                 = "PerGB2018"
}
Explanation of Key Blocks:
- `provider "azurerm"`: Tells Terraform we're working with Azure. The `features {}` block is required for the AzureRM provider.
- `azurerm_resource_group.aks_rg`: Creates an Azure resource group, a logical container for all our related resources.
- `azurerm_virtual_network.aks_vnet` & `azurerm_subnet.aks_subnet`: Defines our Virtual Network and a dedicated subnet where the AKS cluster nodes will reside. This is crucial for network isolation and integration with other Azure services. For production, consider using Azure CNI for more advanced networking.
- `azurerm_kubernetes_cluster.aks_cluster`: This is the main block defining our AKS cluster.
- `name`, `location`, `resource_group_name`: Standard resource identifiers.
- `dns_prefix`: Used for the FQDN of the Kubernetes API server.
- `sku_tier`: "Free" is fine for dev/test. "Standard" offers an SLA for the control plane.
- `identity`: Using `SystemAssigned` managed identity for the cluster. This is more secure than a service principal for the cluster's internal operations.
- `default_node_pool`: Defines the initial set of VMs (nodes) that will run your containers. We specify `node_count`, `vm_size`, and crucially, `vnet_subnet_id` to place them in our custom subnet.
- `network_profile`: This is important! `network_plugin = "kubenet"` is simpler, assigning IPs from a logical network overlay. `network_plugin = "azure"` (Azure CNI) is more advanced, giving each pod an IP from the VNet subnet, useful for complex networking scenarios.
- `role_based_access_control_enabled`: Always `true` for security.
- `kubernetes_version`: Specify a supported Kubernetes version.
- `addon_profile`: Here we enable `oms_agent` for Azure Monitor Container insights, which provides valuable telemetry.
- `azurerm_log_analytics_workspace`: This workspace is where logs and metrics collected by Azure Monitor for AKS will be stored.
2. `variables.tf`: Parameterizing Your Configuration
Good practice dictates using variables to make your configurations reusable and flexible. This file declares the input variables used in `main.tf`.
variable "resource_group_name" {
  description = "The name of the resource group in which to create the AKS cluster."
  type        = string
  default     = "myaksrg-tf"
}

variable "location" {
  description = "The Azure region where the resources will be created."
  type        = string
  default     = "East US"
}

variable "cluster_name" {
  description = "The name of the AKS cluster."
  type        = string
  default     = "explorenystream-aks"
}

variable "node_count" {
  description = "The number of nodes in the default node pool."
  type        = number
  default     = 2
}

variable "vm_size" {
  description = "The size of the Virtual Machine nodes in the default node pool."
  type        = string
  default     = "Standard_DS2_v2" # Good balance for demo
}

variable "environment" {
  description = "The environment tag for the resources."
  type        = string
  default     = "Development"
}
3. `outputs.tf`: Extracting Useful Information
After deployment, you'll need information like the Kubernetes cluster's `kubeconfig`. `outputs.tf` defines what data Terraform should display after a successful `apply`.
output "kube_config" {
  description = "The KubeConfig for connecting to the AKS cluster."
  value       = azurerm_kubernetes_cluster.aks_cluster.kube_config_raw
  sensitive   = true # Mark as sensitive to prevent logging secrets
}

output "cluster_id" {
  description = "The ID of the AKS cluster."
  value       = azurerm_kubernetes_cluster.aks_cluster.id
}
4. `versions.tf`: Locking Provider Versions (Good Practice)
Always pin your provider versions to prevent unexpected changes when new versions are released.
terraform {
  required_version = "~> 1.5" # Use your desired Terraform CLI version

  required_providers {
    azurerm = {
      source  = "hashicorp/azurerm"
      version = "~> 3.0" # Lock to a major version
    }
  }

  # Recommended: Configure a remote backend for state management, especially for teams.
  # For a demo, local is fine, but for production, use azurerm backend (Azure Storage Account)
  # backend "azurerm" {
  #   resource_group_name  = "tfstate-rg"
  #   storage_account_name = "tfsatelogs"
  #   container_name       = "tfstate"
  #   key                  = "aks-prod.tfstate"
  # }
}
For production deployments, consider configuring a remote backend like Azure Storage Account to store your Terraform state file. This is crucial for team collaboration and state locking.
Deploying the AKS Cluster with Terraform
Now that our Terraform configuration files are ready, let's deploy our AKS cluster. Navigate to your `terraform-aks-deployment` directory in your terminal.
- Initialize Terraform: This command downloads the necessary provider plugins.
terraform init
You should see a message confirming successful initialization.
- Plan the Deployment: This command creates an execution plan, showing you exactly what Terraform will do (create, modify, or destroy resources) without actually performing any actions. Always review the plan!
terraform plan -out aks_plan
Review the output carefully. Look for `+` signs (create), `~` (modify), or `-` (destroy). Ensure it aligns with your expectations.
- Apply the Configuration: If the plan looks good, execute it to create your AKS cluster.
terraform apply "aks_plan"
Terraform will start provisioning the resources. This process can take 10-15 minutes, so grab another chai! Once complete, you'll see the outputs defined in `outputs.tf`, including your `kube_config`.
Congratulations, boss! You've just provisioned a fully functional Azure Kubernetes Service cluster using Infrastructure as Code. Kitna smooth hai, right?
Deploying Your Web Application on AKS
Now that our AKS cluster is humming along, let's get a simple web application deployed onto it. For this demo, we'll deploy a basic NGINX web server, but the principles apply to any containerized application.
1. Get Kubeconfig Credentials
To interact with your new AKS cluster using `kubectl`, you need to fetch its credentials. The Azure CLI makes this super easy:
az aks get-credentials --resource-group ${var.resource_group_name} --name ${var.cluster_name} --overwrite-existing
Replace `${var.resource_group_name}` and `${var.cluster_name}` with the actual values you used (e.g., `myaksrg-tf` and `explorenystream-aks`). The `--overwrite-existing` flag ensures your local `~/.kube/config` file is updated correctly.
2. Verify Kubectl Connection
Once credentials are set, check if `kubectl` can connect to your cluster:
kubectl get nodes
You should see a list of your AKS nodes in a "Ready" state. If you do, mission accomplished on the connectivity front!
3. Define Your Web App with Kubernetes Manifests
Create two YAML files for our simple NGINX web app: `nginx-deployment.yaml` and `nginx-service.yaml`.
`nginx-deployment.yaml`
apiVersion: apps/v1
kind: Deployment
metadata:
  name: nginx-web-app
  labels:
    app: nginx-app
spec:
  replicas: 2 # We want two instances of our NGINX app
  selector:
    matchLabels:
      app: nginx-app
  template:
    metadata:
      labels:
        app: nginx-app
    spec:
      containers:
      - name: nginx
        image: nginx:latest # Using the official NGINX image
        ports:
        - containerPort: 80 # NGINX listens on port 80
This deployment defines that we want two replicas of an NGINX container, using the `nginx:latest` Docker image, exposing port 80 within the container.
`nginx-service.yaml`
apiVersion: v1
kind: Service
metadata:
  name: nginx-service
spec:
  selector:
    app: nginx-app # Selects pods with this label
  ports:
    - protocol: TCP
      port: 80 # Service listens on port 80
      targetPort: 80 # Forwards traffic to container's port 80
  type: LoadBalancer # Exposes the service externally via an Azure Load Balancer
This service exposes our `nginx-web-app` deployment. By setting `type: LoadBalancer`, Azure will provision a public Load Balancer and assign a public IP address, allowing external access to our NGINX web app.
4. Deploy the Web App
Apply these YAML manifests to your AKS cluster:
kubectl apply -f nginx-deployment.yaml
kubectl apply -f nginx-service.yaml
You'll see confirmation that the deployment and service have been created.
5. Verify Web App Deployment
It takes a few moments for Kubernetes to pull the image, create the pods, and for Azure to provision the Load Balancer. Check the status:
kubectl get pods -l app=nginx-app
You should see two NGINX pods running and in a `Running` state.
kubectl get services
Look for `nginx-service`. It will eventually show an `EXTERNAL-IP`. Initially, it might show `<pending>`. Keep checking until a public IP address appears:
NAME            TYPE           CLUSTER-IP     EXTERNAL-IP    PORT(S)        AGE
nginx-service   LoadBalancer   10.0.X.X       20.X.X.X       80:3XXXX/TCP   2m
kubernetes      ClusterIP      10.0.0.1       <none>         443/TCP        15m
Once you have the `EXTERNAL-IP`, copy it and paste it into your web browser. You should see the "Welcome to nginx!" page. Congrats! Your simple web app is now live on AKS!
Verification, Cleanup, and Best Practices
Deploying is one thing; verifying and managing it effectively is another. Aur haan, cleanup is super important to avoid unnecessary cloud bills.
Post-Deployment Verification
- Check AKS Cluster Health: In the Azure portal, navigate to your AKS cluster. Check the "Overview" and "Node pools" sections for health and status.
- Monitor Logs and Metrics: Since we enabled Azure Monitor, you can go to the "Monitoring" section of your AKS cluster in the Azure portal to see container logs, CPU/memory usage, and other vital metrics. This is crucial for troubleshooting and performance analysis.
- Network Connectivity: Ensure your application is accessible from where it needs to be. Test from different locations if it's a public-facing app.
Important Best Practices
- Terraform State Management: For production, always use a remote backend (like Azure Storage Account) for your Terraform state. This allows team collaboration and provides state locking.
- Modular Terraform: Break down your Terraform configuration into modules for better organization and reusability. For example, a module for networking, a module for AKS, etc.
- Service Principal Permissions: Grant your Service Principal the minimum necessary permissions (Least Privilege Principle). "Contributor" is good for a demo, but for production, scope it down (e.g., custom role with specific permissions for AKS, Network, Storage).
- Kubernetes RBAC: Configure Kubernetes Role-Based Access Control (RBAC) to manage who can do what within your cluster. Integrate with Azure Active Directory for centralized identity management.
- Security: Consider using Azure Key Vault for managing secrets accessed by your applications, Private AKS Clusters for enhanced network security, and Azure Policy for enforcing organizational standards.
- Cost Management: Monitor your AKS costs using Azure Cost Management. Right-size your node pools (VM size and count) and leverage auto-scaling features. For more tips on this, check out our guide on Azure Cost Optimization Strategies.
- Updates and Upgrades: Regularly update your AKS cluster's Kubernetes version and node images. Terraform can help manage node pool updates.
Cleaning Up Your Resources
Once you're done experimenting, it’s vital to tear down your resources to avoid incurring unnecessary costs. Terraform makes this incredibly simple:
# First, delete your Kubernetes deployments and services
# (Optional, as terraform destroy will also remove the underlying cluster)
kubectl delete -f nginx-service.yaml
kubectl delete -f nginx-deployment.yaml

# Then, destroy the infrastructure created by Terraform
terraform destroy
Terraform will present a plan of all the resources it will destroy. Type `yes` when prompted to confirm. This will gracefully deprovision your AKS cluster, resource group, virtual network, and all associated components.
See? Cloud resources managing and cleaning up, all through code! This is the power of Infrastructure as Code and managed services combined.
Key Takeaways
- Automation is Key: Using Terraform for AKS deployment ensures repeatable, consistent, and version-controlled infrastructure provisioning, significantly reducing manual errors and accelerating deployments.
- Managed Kubernetes Benefits: AKS simplifies Kubernetes management by handling the control plane, allowing you to focus on your applications rather than infrastructure upkeep.
- Comprehensive Cloud Management: Terraform allows you to define and manage not just your AKS cluster, but also its associated networking, monitoring, and identity components from a single codebase.
- Structured Deployment Workflow: The `init`, `plan`, `apply`, and `destroy` workflow of Terraform provides a predictable and safe way to manage your cloud infrastructure lifecycle.
- Application Deployment Efficiency: Once the AKS cluster is provisioned, `kubectl` allows you to quickly deploy and manage your containerized applications using standard Kubernetes manifests.
Frequently Asked Questions
What is the main advantage of deploying AKS with Terraform?
The primary advantage is achieving Infrastructure as Code (IaC). This means your entire AKS infrastructure is defined in code, making it version-controlled, auditable, repeatable, and less prone to manual configuration errors. It enables faster provisioning of new environments (dev, test, prod) and easy disaster recovery.
How do I manage Kubernetes secrets securely with Terraform and AKS?
While Terraform can define Kubernetes secrets, storing sensitive data directly in HCL is not recommended. For secure secret management with AKS, integrate Azure Key Vault. Your applications can retrieve secrets from Key Vault using Managed Identities, ensuring secrets never touch your Terraform state or code directly. You can use the Azure Key Vault Provider for Kubernetes or the CSI driver for Key Vault secrets.
Can I deploy a private AKS cluster using Terraform?
Yes, absolutely! Terraform fully supports deploying private AKS clusters. You would configure the `api_server_access_profile` block within the `azurerm_kubernetes_cluster` resource to specify `private_cluster_enabled = true` and optionally configure `private_dns_zone_id`. This restricts API server access to your virtual network, enhancing security.
What are common issues during AKS deployment with Terraform?
Common issues include incorrect Service Principal permissions (ensure it has Contributor role or custom role on the resource group), networking misconfigurations (incorrect subnet CIDRs, `network_plugin` choice), exceeding Azure subscription limits (e.g., number of cores, public IPs), or using deprecated Kubernetes versions. Reviewing the Terraform `plan` and Azure activity logs is crucial for troubleshooting.
Phew! That was a comprehensive walkthrough, right? From setting up your environment to deploying a fully functional AKS cluster and even a simple web app, you've seen the power of automating your cloud infrastructure with Terraform. If you found this guide helpful and want to see these steps performed live, make sure to watch the full video tutorial on @explorenystream to see these steps in action and subscribe to the channel for more expert DevOps content! Your journey to becoming a DevOps guru is just beginning!