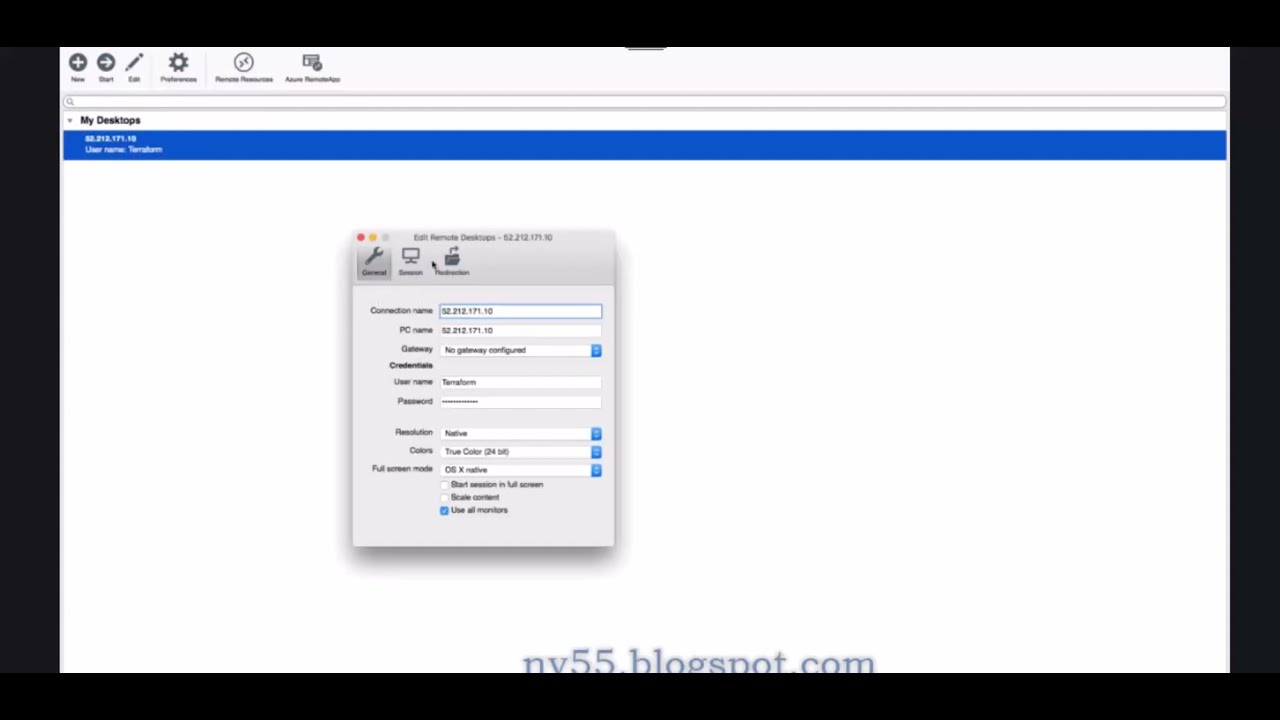
🖥️ Deploying a Windows Machine Using Terraform on Cloud | Step-by-Step Guide
July 09, 2026 — LiveStream
🛒 Recommended gear on AmazonDisclosure: some links above are affiliate links — if you buy through them I may earn a small commission at no extra cost to you. Thanks for supporting the channel!
As an Amazon Associate I earn from qualifying purchases.
Deploying a Windows machine on the cloud can feel like a complex puzzle, but with Terraform, it becomes an automated, repeatable, and scalable process. This comprehensive guide will walk you through deploying a Windows EC2 instance using Terraform on AWS, transforming manual chores into elegant Infrastructure as Code (IaC) solutions.
Picture this, yaar: You've got a new project, and you need a Windows Server ASAP. Traditionally, it's a click-fest in the cloud console—launch instance, configure network, set up security groups, wait, install stuff. Time consuming, error-prone, and definitely not "DevOps." But what if I told you there’s a better way, an automated way to deploy Windows machines using Terraform on cloud infrastructure? Sun le bhai, with Terraform, we write code once, and it provisions our infrastructure consistently, every single time. No more manual errors, no more forgotten steps. We're talking about bringing the power of Infrastructure as Code (IaC) to Windows Server deployment, making your life as a DevOps engineer significantly smoother.
Why Terraform is Your Best Friend for Windows Server Deployment
Chai pe charcha karte hain, why is Terraform such a big deal, especially with provisioning Windows instances in the cloud? Historically, Windows environments were a bit behind in the IaC adoption curve compared to Linux. But those days are long gone. Terraform, being cloud-agnostic and declarative, makes deploying and managing Windows servers on platforms like AWS, Azure, or GCP not just possible, but preferable.
The Magic of Infrastructure as Code (IaC)
First off, what even is IaC? In simple terms, it means managing and provisioning your infrastructure using configuration files instead of manual processes or interactive tools. Think of it like version-controlling your entire data center. You define what you want your infrastructure to look like, and the tool (in our case, Terraform) makes it happen.
- Consistency: No more "works on my machine" issues. Every deployment is identical.
- Speed: Provision entire environments in minutes, not hours or days.
- Repeatability: Spin up and tear down environments as needed for testing, development, or disaster recovery.
- Version Control: Track changes, revert to previous states, and collaborate effectively using Git.
- Cost Optimization: Easily manage and destroy resources you no longer need, preventing cloud sprawl and unexpected bills.
Terraform's Edge for Windows on Cloud
While there are other IaC tools, Terraform stands out for several reasons, especially for multi-cloud strategies and complex deployments involving various services:
- Declarative Language: You describe the desired end state, and Terraform figures out how to get there. It's like telling your car, "Go to Mumbai," instead of giving it turn-by-turn directions.
- Provider Ecosystem: Terraform has a massive ecosystem of providers for almost any cloud service or third-party API you can imagine. This means you can manage AWS EC2, Azure VMs, Google Compute Engine, and even GitHub repositories all from the same Terraform codebase.
- State Management: Terraform keeps track of the real-world state of your infrastructure in a state file. This is crucial for understanding what resources Terraform manages and for planning changes efficiently.
- Execution Plan: Before making any changes, Terraform shows you an execution plan. This is your "review before you deploy" step, ensuring you understand exactly what will happen.
For Windows, specifically, Terraform simplifies tasks that might otherwise be cumbersome:
- AMI Selection: Easily specify the correct Windows Server Amazon Machine Image (AMI) for your region and desired version.
- Network Configuration: Define VPCs, subnets, and security groups for RDP access and other services with code.
- User Data Scripts: Automate initial setup like installing roles, features, or applications using PowerShell scripts passed via user data. This is super powerful for getting your Windows server ready out-of-the-box.
- Key Pair Management: Securely generate or reference key pairs needed to retrieve the administrator password for RDP connections.
So, the takeaway is, Terraform isn't just a tool; it's a paradigm shift for how you'll manage your cloud infrastructure, especially those crucial Windows servers that often require more specialized configuration.
Setting the Stage: Prerequisites & Core Concepts
Before we jump into writing actual Terraform code, let's make sure we have all our ducks in a row. Thodi taiyaari toh banti hai, right? Think of this as getting your toolkit ready before you start building something awesome.
What You'll Need (Prerequisites)
- An AWS Account: Our example will focus on AWS, as it's a widely used cloud provider. Make sure you have an active account with appropriate permissions.
- Terraform CLI Installed: Download and install the Terraform command-line interface from the official HashiCorp website. You can verify your installation by running
terraform --version.
- AWS CLI Installed and Configured: The AWS Command Line Interface allows you to interact with AWS services from your terminal. Configure it with your access key ID, secret access key, default region, and output format using
aws configure. Ensure the IAM user associated with these credentials has permissions to create EC2 instances, VPCs, security groups, and key pairs.
- Basic Understanding of Cloud Concepts: Familiarity with terms like VPC, subnet, security groups, AMIs, and instance types will be helpful.
- An IDE or Text Editor: VS Code with the HashiCorp Terraform extension is highly recommended for syntax highlighting and auto-completion.
Terraform's Core Workflow (The Basics, Yaar!)
Terraform has a straightforward workflow that you'll use for almost every project:
terraform init: This command initializes your working directory. It downloads the necessary provider plugins (like the AWS provider) and sets up the backend for state management. Think of it as preparing your workspace.terraform plan: This is a dry run. It shows you exactly what Terraform plans to do—which resources will be created, updated, or destroyed—without actually making any changes. It’s your safety net!terraform apply: This command executes the actions proposed in the plan, creating, updating, or deleting resources in your cloud environment. It will prompt for confirmation before proceeding.terraform destroy: Use this command to tear down all the infrastructure defined in your configuration. It's super useful for cleaning up test environments or when a project is complete. Be very careful with this in production!
Key Terraform Configuration Blocks
Your Terraform files (.tf extension) will primarily consist of these blocks:
provider: Defines which cloud or service Terraform will interact with (e.g., aws, azurerm, google).resource: The fundamental building block. It defines a piece of infrastructure you want to create (e.g., aws_instance for an EC2 instance, aws_security_group for a firewall).variable: Allows you to parameterize your configurations, making them reusable and dynamic. You can pass values via command line, environment variables, or a .tfvars file.output: Exports specific values from your infrastructure that you might need later, like a public IP address or a DNS name.
With these prerequisites and basic concepts clear, we are now ready to get our hands dirty and start coding our Windows Server deployment with Terraform on AWS!
Step-by-Step: Deploying Your Windows EC2 Instance with Terraform
Chalo, ab asli kaam karte hain! We'll go through this step-by-step, explaining each part of the Terraform configuration needed to provision a Windows EC2 instance. We'll build a simple, yet robust, setup.
Initial Setup: Project Structure and Provider Configuration
First, create a new directory for your Terraform project, say terraform-windows-ec2. Inside this directory, create a file named provider.tf. This file tells Terraform which cloud provider to use and in which region.
provider.tf:
provider "aws" {
  region = "us-east-1" # You can choose your preferred AWS region
}
Expert Tip: Always start by defining your provider. For production, you'd also configure a remote state backend here, like an S3 bucket, for team collaboration and state locking. This prevents state file corruption and ensures everyone works with the latest infrastructure definition.
Crafting Your Network: VPC and Security Group
Even for a single instance, it's good practice to define your network components. We'll create a new VPC, a public subnet within it, and a security group. If you prefer to use your default VPC, you can skip the VPC/subnet creation and just fetch its ID. But for a clean deployment, let's create our own.
network.tf:
resource "aws_vpc" "windows_vpc" {
  cidr_block           = "10.0.0.0/16"
  enable_dns_hostnames = true
  enable_dns_support   = true

  tags = {
    Name = "windows-terraform-vpc"
  }
}

resource "aws_subnet" "windows_subnet" {
  vpc_id                  = aws_vpc.windows_vpc.id
  cidr_block              = "10.0.1.0/24"
  map_public_ip_on_launch = true # Instances in this subnet get a public IP

  tags = {
    Name = "windows-terraform-public-subnet"
  }
}

resource "aws_internet_gateway" "windows_igw" {
  vpc_id = aws_vpc.windows_vpc.id

  tags = {
    Name = "windows-terraform-igw"
  }
}

resource "aws_route_table" "windows_route_table" {
  vpc_id = aws_vpc.windows_vpc.id

  route {
    cidr_block = "0.0.0.0/0" # Allow all outbound traffic
    gateway_id = aws_internet_gateway.windows_igw.id
  }

  tags = {
    Name = "windows-terraform-route-table"
  }
}

resource "aws_route_table_association" "windows_route_table_association" {
  subnet_id      = aws_subnet.windows_subnet.id
  route_table_id = aws_route_table.windows_route_table.id
}
Now, for the security group. This is your virtual firewall, controlling inbound and outbound traffic. For a Windows server, we absolutely need to allow RDP (Remote Desktop Protocol) on port 3389. For security, restrict the source IP (cidr_blocks) to your own IP address range if possible, instead of 0.0.0.0/0 (which allows access from anywhere).
security_group.tf:
resource "aws_security_group" "windows_sg" {
  name        = "windows-rdp-sg"
  description = "Allow RDP access to Windows instance"
  vpc_id      = aws_vpc.windows_vpc.id

  ingress {
    from_port   = 3389 # RDP port
    to_port     = 3389
    protocol    = "tcp"
    cidr_blocks = ["YOUR_PUBLIC_IP/32"] # Replace with your actual public IP or a secure range
    description = "Allow RDP from specific IP"
  }

  ingress {
    from_port   = 80 # Optional: If you plan to host a web server
    to_port     = 80
    protocol    = "tcp"
    cidr_blocks = ["0.0.0.0/0"]
    description = "Allow HTTP access"
  }

  ingress {
    from_port   = 443 # Optional: If you plan to host a secure web server
    to_port     = 443
    protocol    = "tcp"
    cidr_blocks = ["0.0.0.0/0"]
    description = "Allow HTTPS access"
  }

  egress {
    from_port   = 0
    to_port     = 0
    protocol    = "-1" # Allow all outbound traffic
    cidr_blocks = ["0.0.0.0/0"]
  }

  tags = {
    Name = "windows-terraform-sg"
  }
}
Security Note: Never use 0.0.0.0/0 for RDP in a production environment. Always restrict it to known IP ranges or use a VPN/Bastion host for secure access. Seriously, this is a big deal, don't skimp on this!
Securing Access: Key Pair Management
For Windows EC2 instances, AWS uses a key pair to encrypt the administrator password. You'll need the private key to decrypt it. We can either import an existing public key or let Terraform create a new one.
key_pair.tf:
resource "tls_private_key" "pk" {
  algorithm = "RSA"
  rsa_bits  = 4096
}

resource "aws_key_pair" "windows_key" {
  key_name   = "windows-terraform-key"
  public_key = tls_private_key.pk.public_key_openssh
}

resource "local_file" "windows_private_key" {
  content  = tls_private_key.pk.private_key_pem
  filename = "windows-terraform-key.pem"
}
This configuration generates a new RSA key pair and saves the private key as windows-terraform-key.pem in your project directory. Keep this file secure, because without it, you cannot retrieve the password!
Defining the Windows EC2 Instance: The Heart of Your Setup
This is where we define the actual EC2 instance. We need to specify the AMI, instance type, associate it with our network components, and crucially, add user data for initial configuration.
main.tf:
data "aws_ami" "windows_server" {
  most_recent = true
  owners      = ["801119661308"] # Amazon's official Windows AMIs (varies by region, check AWS console)

  filter {
    name   = "name"
    values = ["Windows_Server-2022-English-Full-Base-*"] # Adjust for your desired Windows Server version
  }

  filter {
    name   = "virtualization-type"
    values = ["hvm"]
  }
}

resource "aws_instance" "windows_web_server" {
  ami                         = data.aws_ami.windows_server.id
  instance_type               = "t2.medium" # Choose an appropriate instance type
  key_name                    = aws_key_pair.windows_key.key_name
  vpc_security_group_ids      = [aws_security_group.windows_sg.id]
  subnet_id                   = aws_subnet.windows_subnet.id
  associate_public_ip_address = true # Get a public IP for direct RDP access

  # User data for initial server configuration (PowerShell script)
  user_data = <<-EOF
<powershell>
# Rename computer (optional, requires reboot)
Rename-Computer -NewName "TerraformWinServer" -Restart

# Install IIS and its management tools
Install-WindowsFeature -Name Web-Server -IncludeManagementTools
Write-Host "IIS installation completed."

# Create a simple IIS default page
$iisPath = "C:\inetpub\wwwroot\index.html"
$content = "<h1>Hello from Terraform-deployed Windows Server!</h1><p>This server was provisioned using Infrastructure as Code.</p>"
Set-Content -Path $iisPath -Value $content

# Example: Install Chocolatey (a package manager for Windows)
Set-ExecutionPolicy Bypass -Scope Process -Force; [System.Net.ServicePointManager]::SecurityProtocol = [System.Net.ServicePointManager]::SecurityProtocol -bor 3072; iex ((New-Object System.Net.WebClient).DownloadString('https://community.chocolatey.org/install.ps1'))
Write-Host "Chocolatey installation initiated."

# Example: Use Chocolatey to install Notepad++
choco install notepadplusplus -y
Write-Host "Notepad++ installation initiated via Chocolatey."
</powershell>
EOF

  tags = {
    Name        = "Terraform-Windows-Web-Server"
    Environment = "Dev"
    Project     = "ExploreNYStream"
  }
}
Let's break down the user_data block. This is where the real automation for Windows servers happens. It's a PowerShell script that runs the first time the EC2 instance starts up. Here, we're:
- Renaming the computer (requires a reboot, which Windows will handle).
- Installing IIS (Web-Server) and its management tools.
- Creating a simple
index.html page.
- Installing Chocolatey, a package manager for Windows, which is like
apt or yum for Linux. This makes installing software incredibly easy.
- Using Chocolatey to install Notepad++.
You can customize this PowerShell script to install any roles, features, or applications your Windows server needs. This makes your server production-ready right after deployment.
Gathering Information: Terraform Outputs
Once the instance is deployed, you'll want to know its public IP address or DNS name to connect to it. We use output blocks for this.
outputs.tf:
output "windows_instance_public_ip" {
  description = "Public IP address of the Windows EC2 instance"
  value       = aws_instance.windows_web_server.public_ip
}

output "windows_instance_public_dns" {
  description = "Public DNS name of the Windows EC2 instance"
  value       = aws_instance.windows_web_server.public_dns
}
Executing the Plan: Init, Plan, Apply
Alright, boss, all our Terraform files are written. Now let's make it happen!
Initialize Terraform: Open your terminal in the project directory and run:
terraform init
This downloads the AWS provider and sets up the workspace.
Review the Plan: This is a crucial step. It shows you everything Terraform is about to create.
terraform plan
Carefully review the output. You should see resources like aws_vpc, aws_subnet, aws_security_group, aws_key_pair, and aws_instance marked for creation.
Apply the Configuration: If the plan looks good, proceed with the apply:
terraform apply
Terraform will once again show you the plan and ask for confirmation. Type yes and press Enter. Grab a cup of chai; this might take a few minutes as AWS provisions the resources.
Once terraform apply completes, you'll see the outputs displayed in your terminal, including the public IP and DNS name of your new Windows server!
Connecting to Your New Windows Server
This is a bit different from Linux. For Windows, we use RDP.
- Retrieve the Administrator Password: In the AWS EC2 Console, navigate to "Instances." Select your newly created Windows instance. Click "Connect" -> "RDP client" -> "Get password."
- Upload Private Key: You'll be prompted to upload the private key file (
windows-terraform-key.pem) that Terraform generated earlier.
- Decrypt Password: AWS will then decrypt and display the Administrator password. Copy this password.
- Connect via RDP: Open your Remote Desktop Connection client (search for "mstsc" on Windows). Enter the Public IP or DNS name from your Terraform outputs. When prompted, use "Administrator" as the username and the copied password.
And there you have it! You should now be logged into your fully provisioned Windows Server, complete with IIS and Chocolatey, all set up with just a few Terraform commands. Dekha, kitna simple tha!
Cleaning Up: The Responsible DevOps Way
When you're done experimenting or if this was a temporary environment, remember to clean up to avoid unnecessary cloud costs.
terraform destroy
This command will delete all the resources that Terraform provisioned. Again, type yes to confirm. Always destroy resources you no longer need; otherwise, you might get a surprise bill at the end of the month.
Beyond the Basics: Advanced Terraform Techniques for Windows
Ab thodi aur gehri baat karte hain. As a senior DevOps engineer, your job isn't just to deploy, but to deploy *efficiently*, *securely*, and *scalably*. Let's look at some advanced techniques to make your Terraform Windows deployments truly robust.
Managing State Remotely for Team Collaboration
The terraform.tfstate file stores the state of your infrastructure. Locally, this is fine for solo projects, but in a team, it's a disaster. Multiple engineers applying changes can lead to state corruption.
The solution is remote state management. For AWS, an S3 bucket with DynamoDB table for state locking is the de-facto standard. This ensures consistency and prevents concurrent operations from clashing.
Example Remote Backend Configuration (in provider.tf):
terraform {
  backend "s3" {
    bucket         = "your-terraform-state-bucket" # Create this bucket manually
    key            = "windows-ec2/terraform.tfstate"
    region         = "us-east-1"
    dynamodb_table = "terraform-state-locking" # Create this DynamoDB table manually with primary key 'LockID'
    encrypt        = true
  }
}
After adding this, run terraform init again. It will prompt you to migrate your local state to the S3 backend.
Parameterizing Your Deployments with Variables
Hardcoding values like instance types or regions is bad practice. Use variables to make your configurations flexible and reusable.
variables.tf:
variable "aws_region" {
  description = "AWS region for deployment"
  type        = string
  default     = "us-east-1"
}

variable "instance_type" {
  description = "EC2 instance type for the Windows server"
  type        = string
  default     = "t2.medium"
}

variable "ami_name_filter" {
  description = "Filter string for Windows Server AMI name"
  type        = string
  default     = "Windows_Server-2022-English-Full-Base-*"
}
Then, reference these in your main.tf or provider.tf:
provider "aws" {
  region = var.aws_region
}

resource "aws_instance" "windows_web_server" {
  ami           = data.aws_ami.windows_server.id
  instance_type = var.instance_type
  # ...
}

data "aws_ami" "windows_server" {
  # ...
  filter {
    name   = "name"
    values = [var.ami_name_filter]
  }
  # ...
}
You can provide values for these variables via a terraform.tfvars file, environment variables, or on the command line using -var "key=value".
Post-Deployment Configuration with Provisioners and User Data
While user_data is excellent for initial setup, sometimes you need more complex, multi-step configurations or actions that depend on the instance being fully available.
user_data (as seen): Runs only on first boot. Ideal for installing basic roles, features, or lightweight applications.provisioner "remote-exec": Executes a script on a remote resource after it has been created. Requires SSH (for Linux) or WinRM (for Windows) connectivity. This is often used for more complex software installations or configurations that need to run after the OS is fully booted and network is ready.provisioner "local-exec": Executes a script on the machine running Terraform. Useful for local post-deployment tasks like running a local health check or updating a configuration file.
Example remote-exec for Windows (using WinRM):
resource "aws_instance" "windows_web_server" {
  # ... (instance configuration) ...

  provisioner "remote-exec" {
    inline = [
      "Set-ItemProperty -Path 'HKLM:\\System\\CurrentControlSet\\Services\\WinRM\\Service\\Auth' -Name 'Basic' -Value 1",
      "Restart-Service WinRM",
      "Write-Host 'WinRM Basic auth enabled and service restarted.'"
    ]

    connection {
      type     = "winrm"
      user     = "Administrator"
      password = # You'd need to dynamically fetch this, perhaps from AWS Secrets Manager or a local vault.
      host     = self.public_ip
    }
  }
}
Note: Using remote-exec with WinRM directly from Terraform can be tricky due to password management. For production-grade configuration management, it's often better to combine Terraform with a dedicated configuration management tool like Ansible, Chef, or Puppet, or use AWS Systems Manager (SSM) for agent-based automation.
Structuring Large Deployments with Modules
As your infrastructure grows, single monolithic Terraform files become unmanageable. Modules allow you to encapsulate and reuse pieces of your configuration. You can create a module for a "Windows Web Server," another for a "Windows Database Server," etc.
Imagine having a module for your Windows EC2 setup, which takes variables like instance_type, desired_ami, and user_data script, and outputs the public IP. You can then use this module multiple times in your root configuration.
Example Module Usage:
module "my_web_server" {
  source        = "./modules/windows-web-server" # Path to your module
  instance_name = "WebServer01"
  instance_type = "t3.medium"
  ami_id        = "ami-0abcdef1234567890" # Example: specific AMI ID
  # ... other variables the module expects
}
This promotes DRY (Don't Repeat Yourself) principles and keeps your code organized. Modules are a powerful way to scale your Terraform usage.
Security Best Practices for Windows on Cloud
Deploying is one thing; deploying securely is another. Here are some pointers:
- Least Privilege IAM: Ensure your AWS IAM user/role running Terraform has only the minimum necessary permissions to create and manage the resources.
- Restrict RDP Access: As mentioned, never leave port 3389 open to
0.0.0.0/0. Use specific IP ranges, VPN, or Session Manager for access.
- Patch Management: Automate Windows updates. AWS Systems Manager Patch Manager is a great tool for this.
- Endpoint Protection: Install antivirus/anti-malware solutions on your Windows instances.
- Secure User Data: Avoid putting sensitive information directly in user data scripts. Use AWS Secrets Manager or Parameter Store to retrieve secrets securely.
- Disk Encryption: Encrypt your EBS volumes for data at rest. Terraform can configure this during instance creation.
By incorporating these advanced techniques and best practices, your Terraform-based Windows deployments on AWS will not only be automated but also resilient, scalable, and secure. Kaam ho jaayega ek dum professional level ka!
Key Takeaways
- Terraform Automates Windows Deployments: It transforms manual, error-prone Windows server provisioning into consistent, repeatable Infrastructure as Code.
- User Data is Critical for Windows: Leveraging PowerShell scripts in
user_data allows for robust initial setup, including installing roles, features (like IIS), and software packages (like Chocolatey) on first boot.
- Network Security is Paramount: Carefully configure security groups, especially restricting RDP (port 3389) access to known IP addresses or through secure tunnels.
- Key Pairs are for Password Retrieval: For Windows EC2 instances, a key pair is essential for decrypting the default Administrator password, allowing RDP access. Keep your private key secure.
- Adopt Advanced Practices: Utilize remote state management for team collaboration, variables for flexibility, modules for reusability, and provisioners for complex post-deployment tasks to build robust and scalable infrastructure.
Frequently Asked Questions
What is the main advantage of using Terraform for Windows machine deployment over manual cloud console clicks?
The main advantage is automation and consistency (Infrastructure as Code). Manual deployments are prone to human error, are slow, and lack version control. Terraform allows you to define your Windows server and its surrounding infrastructure (VPC, security groups, etc.) as code, enabling repeatable, fast, and error-free deployments. It integrates with version control systems like Git, facilitating collaboration and audit trails.
How do I handle sensitive information like passwords or API keys in my Terraform Windows deployment?
Never hardcode sensitive information directly into your Terraform configuration files or user_data scripts. Instead, use secure methods like AWS Secrets Manager or AWS Parameter Store (especially for non-secret configurations) to store and retrieve sensitive data. Your PowerShell user_data script or `remote-exec` provisioners can then query these services at runtime to fetch the necessary credentials or keys.
Can Terraform install software and configure services on a Windows machine after it's deployed?
Yes, absolutely! Terraform offers several ways to achieve this. The most common is using user_data scripts (PowerShell for Windows) which execute on the instance's first boot. For more complex, multi-step configurations or actions that need to run after the OS is fully ready, you can use provisioner "remote-exec" with WinRM. For production-grade configuration management, however, it's often recommended to integrate Terraform with dedicated configuration management tools like Ansible, Chef, or AWS Systems Manager (SSM) for post-deployment software installation and configuration.
What if I want to update my Windows EC2 instance configuration after it's already deployed by Terraform?
If you modify your Terraform configuration (e.g., change the instance type, update the security group rules, or alter tags) and run terraform apply, Terraform will attempt to apply those changes. For some changes (like instance type), it might require stopping and restarting the instance. For others (like security group rules), it might apply them dynamically. If a change cannot be applied directly (e.g., changing the AMI for an existing instance), Terraform might propose destroying and recreating the instance. Always review the terraform plan output carefully to understand the impact of your proposed changes before executing terraform apply.
So, there you have it, folks! Deploying a Windows machine on the cloud using Terraform is not just a fancy trick; it’s a fundamental shift in how we build and manage infrastructure. Hope this in-depth guide helps you get started and elevates your DevOps game. If you found this helpful, definitely check out the original video on @explorenystream for a visual walkthrough and more practical insights. Don't forget to like and subscribe to their channel for more awesome content!