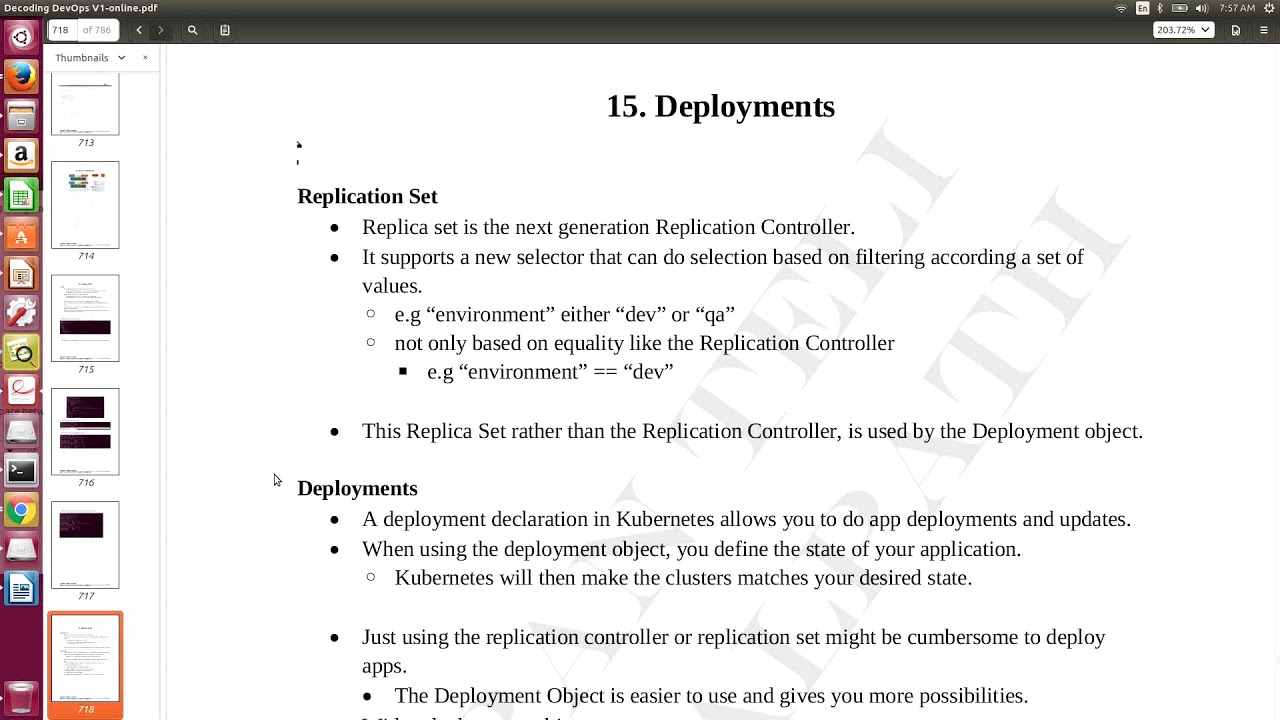
Docker Kubernetes Part 2 - DevOps Online Training
July 12, 2026 — LiveStream
🛒 Recommended gear on AmazonDisclosure: some links above are affiliate links — if you buy through them I may earn a small commission at no extra cost to you. Thanks for supporting the channel!
As an Amazon Associate I earn from qualifying purchases.
So, you’ve mastered the art of containerizing your applications with Docker, right? You’ve built your images, run your containers, aur sab set hai. But ab kya? What happens when your application needs to scale to thousands of users, or you have dozens of microservices all talking to each other? Managing individual Docker containers manually? Yaar, that’s like trying to herd cats!
This is precisely where Kubernetes steps in, taking your container management skills to the next level. If you’re serious about your DevOps online training, understanding Kubernetes after Docker is not just an option, it's a necessity. This article, inspired by "Docker Kubernetes Part 2," is going to demystify the core concepts, architecture, and practical commands you need to orchestrate your applications like a pro. We’ll dive deep into what makes Kubernetes the powerhouse it is, and how you can leverage it to deploy, manage, and scale your containerized applications efficiently.
Basically, Kubernetes (often shortened to K8s) is an open-source container orchestration platform that automates the deployment, scaling, and management of containerized applications. Think of it as the conductor of an orchestra, making sure all your application components (containers) play in harmony, no matter how many there are. In this 'Part 2' of our journey, we're not just scratching the surface; we're getting into the nitty-gritty of how K8s actually works, from its fundamental architecture to the critical resources you'll be interacting with daily. Let's get our hands dirty, shall we?
Decoding the Kubernetes Architecture: Your Foundation to Orchestration
Dekho, before you start deploying anything, it’s super important to understand the fundamental architecture of a Kubernetes cluster. Just like a well-oiled machine, every component has a specific role, and knowing these roles helps you troubleshoot and design your deployments better. A Kubernetes cluster is essentially a set of nodes, at least one master node (or Control Plane) and multiple worker nodes, that run your containerized applications.
The Control Plane: The Brains of the Operation
The Control Plane is the core of Kubernetes. It's where all the orchestration decisions are made, acting as the global brain of your cluster. It maintains the desired state of your applications and makes sure the worker nodes are doing their job. A single Control Plane might be enough for a small setup, but for production, you typically run multiple Control Planes for high availability.
- Kube-APIServer: This is the front-end of the Kubernetes Control Plane. All interactions with the cluster, whether from the
kubectl command-line tool, other cluster components, or external entities, go through the API server. It's the only component that directly talks to the etcd data store.
- etcd: This is a highly available and reliable key-value store that Kubernetes uses to store all cluster data. Think of it as the single source of truth for your cluster's state – every configuration, desired state, and actual state of your pods, deployments, services, etc., lives here. It's critical to back up
etcd regularly.
- Kube-Scheduler: This component watches for newly created Pods with no assigned node and selects a node for them to run on. It considers various factors like resource requirements (CPU, memory), hardware/software/policy constraints, affinity and anti-affinity specifications, data locality, inter-workload interference, and deadlines.
- Kube-Controller-Manager: This runs controller processes. Controllers regulate the state of the cluster, constantly working to move the current state closer to the desired state. For example, the Node controller is responsible for noticing and responding when nodes go down. The Replication controller maintains the correct number of pods for a replication controller object. There are many such controllers, each with a specific task.
Worker Nodes: The Muscle Doing the Heavy Lifting
Worker nodes (formerly called Minions) are where your actual containerized applications run. These are the machines that execute the tasks assigned by the Control Plane.
- Kubelet: This agent runs on each node in the cluster. It ensures that containers are running in a Pod. It registers the node with the API server, watches for Pod specifications assigned to its node, and starts/stops containers as required by the Control Plane.
- Kube-proxy: This network proxy runs on each node and maintains network rules on the nodes. These rules allow network communication to your Pods from inside or outside of the cluster. It handles network forwarding for Services and can operate in different modes (
iptables, ipvs).
- Container Runtime (Docker, containerd, CRI-O): This is the software responsible for running containers. While Docker was initially the de-facto choice, Kubernetes now supports other container runtimes that adhere to the Container Runtime Interface (CRI), like
containerd and CRI-O. These are the engines that pull images, create containers, and manage their lifecycle on the node.
Understanding the Interaction: A Real-World Analogy
Imagine a busy construction site. The Control Plane is like the project manager's office. The API server is the communication window where everyone submits requests and gets updates. etcd is the master blueprint and daily logbook, holding every detail of the project. The scheduler is the assignment manager, deciding which team (worker node) gets which task. The controller manager is like the various supervisors ensuring tasks are completed as planned (e.g., ensuring enough workers are present, materials are delivered).
The worker nodes are the actual construction zones. Each Kubelet is a foreman at a specific zone, ensuring the workers (containers) are doing their job according to the plan received from the project manager. Kube-proxy is like the traffic controller, ensuring that resources and personnel can move efficiently between different parts of the site.
You can quickly check the status of your nodes with:
kubectl get nodes
This command will show you all the worker nodes connected to your cluster and their current status, giving you a quick health check of your infrastructure.
Building Blocks of Kubernetes: Pods, Deployments, and Services
Now that we understand the architecture, let's talk about the primary resources you'll be interacting with daily. These are the fundamental building blocks that you'll use to define and run your applications in Kubernetes.
Pods: The Smallest Deployable Unit
Bhai, Pods are the smallest, most basic deployable objects in Kubernetes. A Pod represents a single instance of a running process in your cluster. Sounds simple, right? But there’s a nuance here: a Pod can contain one or more containers. Typically, a Pod will host a single primary container for your application.
Why multiple containers in one Pod? Sometimes, you have what's called a "sidecar" pattern. Imagine your main application container needs a logging agent, a metrics collector, or a file synchronizer that always runs alongside it, sharing the same network namespace, storage, and lifecycle. In such cases, you’d put them in the same Pod. They can communicate with each other via localhost. This ensures that these tightly coupled processes are always co-located and managed as a single unit.
Pods are designed to be ephemeral. Their lifecycle is transient. If a Pod dies (e.g., due to a node failure or application crash), Kubernetes doesn't try to heal it directly. Instead, a higher-level controller (like a Deployment, which we'll discuss next) will create a new Pod to replace it. This stateless design is crucial for building resilient, cloud-native applications.
Here’s a simple Pod YAML definition:
apiVersion: v1
kind: Pod
metadata:
  name: my-nginx-pod
  labels:
    app: nginx
spec:
  containers:
  - name: nginx
    image: nginx:latest
    ports:
    - containerPort: 80
In this example, we're defining a Pod named my-nginx-pod that runs a single Nginx container, exposing port 80. Simple, yet powerful, samajh rahe ho?
Deployments: Managing Application Lifecycles with Ease
Directly managing individual Pods is tedious and error-prone. What if you need 5 instances of your Nginx application? Or want to upgrade it without downtime? That’s where Deployments come in. A Deployment is a higher-level resource that provides declarative updates for Pods and ReplicaSets.
The beauty of a Deployment lies in its declarative nature. You tell Kubernetes the *desired state* of your application (e.g., "I want 3 replicas of Nginx version 1.25"), and Kubernetes works tirelessly to achieve and maintain that state. It handles creating, updating, and deleting Pods automatically.
Key features of Deployments:
- Scaling: Easily scale up or down the number of Pod replicas.
- Rolling Updates: Deploy new versions of your application with zero downtime. Kubernetes gracefully replaces old Pods with new ones, ensuring continuous availability.
- Rollbacks: If a new deployment goes wrong, you can quickly revert to a previous stable version.
- Self-healing: If a Pod crashes or a node goes down, the Deployment controller automatically replaces the lost Pods to maintain the desired replica count.
This is a big deal for production environments. You define your application once, and Kubernetes takes care of its entire lifecycle, making it highly available and resilient. Let's look at a Deployment YAML:
apiVersion: apps/v1
kind: Deployment
metadata:
  name: nginx-deployment
  labels:
    app: nginx
spec:
  replicas: 3 # We want 3 instances of Nginx
  selector:
    matchLabels:
      app: nginx
  template: # This describes the Pods that this Deployment will create
    metadata:
      labels:
        app: nginx
    spec:
      containers:
      - name: nginx
        image: nginx:1.25 # New version of Nginx
        ports:
        - containerPort: 80
To deploy this, you'd simply run:
kubectl apply -f nginx-deployment.yaml
And to scale it up or down:
kubectl scale deployment nginx-deployment --replicas=5 # Scale to 5 instances
Deployments are the workhorse for most stateless applications in Kubernetes. For stateful applications, you'd typically use StatefulSets, which is a topic for another deep dive!
Services: The Gateway to Your Applications
Now, you have Pods running, managed by Deployments. But remember, Pods are ephemeral; their IP addresses can change when they are restarted or rescheduled. How do other Pods or external users reliably access your application? You can’t hardcode Pod IPs. This is the problem that Services solve.
A Kubernetes Service is an abstraction that defines a logical set of Pods and a policy by which to access them. It provides a stable network endpoint (a static IP address and DNS name) for a group of Pods. When a client sends a request to the Service IP, the Service's internal load balancer (Kube-proxy) forwards the request to one of the healthy Pods backing that Service.
There are several types of Services, each designed for a different access pattern:
- ClusterIP: The default type. It exposes the Service on an internal IP in the cluster. This Service is only reachable from within the cluster. Perfect for internal microservice communication.
- NodePort: Exposes the Service on each Node's IP at a static port (the NodePort). A ClusterIP Service is automatically created, and the NodePort Service routes to it. This makes the Service accessible from outside the cluster using
<NodeIP>:<NodePort>.
- LoadBalancer: This type is used when running on a cloud provider (AWS, GCP, Azure, etc.). It provisions a cloud load balancer that routes external traffic to your Service (which in turn routes to Pods). This type also creates a NodePort and ClusterIP Service.
- ExternalName: Maps a Service to a DNS name, not to a selector. Useful for external services or legacy applications.
Here’s a basic Service YAML:
apiVersion: v1
kind: Service
metadata:
  name: my-nginx-service
spec:
  selector:
    app: nginx # This connects the Service to Pods with label app: nginx
  ports:
    - protocol: TCP
      port: 80 # Service port
      targetPort: 80 # Container port
  type: ClusterIP # Or NodePort, LoadBalancer
Notice the selector field. This is how the Service knows which Pods to target. Any Pod with the label app: nginx will be part of this Service. If you scale your Deployment, adding more app: nginx Pods, the Service automatically includes them. Kitna badhiya hai na?
Mastering kubectl: Your Command-Line Companion
The primary way you interact with a Kubernetes cluster is through the kubectl command-line tool. It’s your Swiss Army knife for deploying applications, inspecting and managing cluster resources, and viewing logs. Getting comfortable with kubectl is non-negotiable for anyone in DevOps working with Kubernetes.
Basic Operations: get, describe, logs
These are your daily go-to commands for observing and understanding your cluster state.
kubectl get: Used to list resources. You can get almost anything: Pods, Deployments, Services, Nodes, Namespaces, etc.
kubectl get pods
kubectl get deployments
kubectl get services -n my-namespace # Get services in a specific namespace
kubectl get all # Get all common resources (pods, deployments, services, replicasets)
kubectl describe: Provides detailed information about a specific resource. This is incredibly useful for troubleshooting, as it includes events, status conditions, resource limits, and more.
kubectl describe pod my-nginx-pod-abcde # Use the full pod name
kubectl describe deployment nginx-deployment
kubectl logs: Retrieves logs from a container in a Pod. Essential for debugging application issues.
kubectl logs my-nginx-pod-abcde # Logs from the first container in the pod
kubectl logs my-nginx-pod-abcde -c my-sidecar-container # Logs from a specific container
kubectl logs -f my-nginx-pod-abcde # Follow logs in real-time (like `tail -f`)
Modifying and Deleting Resources: apply, edit, delete
Once you’ve defined your desired state in YAML, these commands help you push those changes to the cluster.
kubectl apply -f <file.yaml>: The most common way to create or update resources. It’s idempotent, meaning you can run it multiple times, and it will only apply changes if there’s a difference between your YAML and the cluster’s current state. This is ideal for CI/CD pipelines.
kubectl apply -f nginx-deployment.yaml
kubectl apply -f my-service.yaml
kubectl edit <resource-type> <name>: Opens the live configuration of a resource in your default editor (like vi or nano). Be careful with this one, as changes are applied immediately. Best for quick, ad-hoc modifications rather than systematic deployments.
kubectl edit deployment nginx-deployment
kubectl delete: Removes resources from the cluster.
kubectl delete -f nginx-deployment.yaml # Delete based on file
kubectl delete pod my-nginx-pod-abcde # Delete a specific pod
kubectl delete deployment nginx-deployment # Delete a deployment and its pods/replicasets
kubectl delete namespace dev-staging # Delete an entire namespace (and everything in it!)
Interacting with Containers: exec, port-forward
Sometimes you need to peek inside a running container or access a service locally for testing.
kubectl exec -it <pod-name> -- <command>: Executes a command inside a running container. The -it flags are for interactive terminal. This is your way to "SSH" into a container.
kubectl exec -it my-nginx-pod-abcde -- bash # Open a bash shell
kubectl exec -it my-nginx-pod-abcde -- ls /app # List files in /app directory
kubectl port-forward <resource-type>/<name> <local-port>:<container-port>: Forwards one or more local ports to a Pod or Service. Extremely useful for testing or debugging services running in your cluster from your local machine.
kubectl port-forward pod/my-nginx-pod-abcde 8080:80 # Access Nginx on localhost:8080
kubectl port-forward service/my-nginx-service 8000:80 # Access service on localhost:8000
Mastering these kubectl commands will make you a formidable Kubernetes operator. For more advanced use cases like automating deployments, you might want to look into CI/CD integration with Kubernetes.
Practical Considerations and Best Practices in Your Kubernetes Journey
Chalo, we've covered the basics. But deploying applications in Kubernetes is more than just writing YAML files. There are crucial best practices and concepts that ensure your applications are robust, secure, and performant. Let's touch upon a few key ones.
Namespaces: Organizing Your Cluster
As your Kubernetes cluster grows, so does the number of resources. A single, flat cluster can quickly become a chaotic mess. Namespaces provide a mechanism for isolating groups of resources within a single cluster. Think of them as virtual sub-clusters. They are ideal for organizing applications by environment (e.g., dev, staging, prod), team, or project.
Resources in one namespace are logically isolated from resources in another. For example, a Service named my-app in the dev namespace is distinct from a Service named my-app in the prod namespace. This helps prevent naming conflicts and provides a scope for authorization policies.
You can create a namespace like this:
kubectl create namespace my-app-dev
And then specify the namespace when deploying or getting resources:
kubectl apply -f deployment.yaml -n my-app-dev
kubectl get pods -n my-app-dev
Always use namespaces; it's a fundamental organizational principle in Kubernetes.
Resource Management: Requests and Limits
When you deploy a Pod, you can specify how much CPU and memory each container needs. This is done through Resource Requests and Limits. This is super important for fair resource allocation and preventing resource starvation or one "noisy neighbor" container from hogging all the resources on a node.
- Requests: Define the minimum amount of resources a container requires. The scheduler uses this value to decide which node to place the Pod on. If a node doesn't have at least this much free resource, the Pod won't be scheduled there.
- Limits: Define the maximum amount of resources a container can consume. If a container tries to use more CPU than its limit, it will be throttled. If it tries to use more memory than its limit, it will be terminated (OOMKilled - Out Of Memory Kill).
Here’s how you define them in a Pod/Deployment YAML:
spec:
  containers:
  - name: my-app
    image: my-app:latest
    resources:
      requests:
        memory: "64Mi"
        cpu: "250m" # 250 milliCPU = 0.25 CPU core
      limits:
        memory: "128Mi"
        cpu: "500m"
    ports:
    - containerPort: 80
Setting appropriate requests and limits is critical for cluster stability, performance, and cost optimization. It ensures that your applications get the resources they need and don't starve others. This is also key when you are optimizing Kubernetes costs.
Health Checks: Liveness and Readiness Probes
A Kubernetes Pod might be "running," but is the application inside it actually healthy and ready to serve traffic? This is where Liveness and Readiness Probes come in. They tell Kubernetes how to check the health of your containers.
- Liveness Probe: This tells Kubernetes when to restart a container. If the liveness probe fails, Kubernetes will restart the container. This is useful for catching deadlocks, where an application is running but unable to make progress.
- Readiness Probe: This tells Kubernetes when a container is ready to start accepting traffic. If the readiness probe fails, Kubernetes will remove the Pod's IP address from the endpoints of all Services, effectively taking it out of rotation. Once the probe passes, the Pod is added back. This is crucial during startup or scaling, ensuring traffic only goes to fully initialized application instances.
Both probes can be configured as HTTP GET requests, TCP sockets, or command executions inside the container.
spec:
  containers:
  - name: my-app
    image: my-app:latest
    livenessProbe:
      httpGet:
        path: /healthz
        port: 8080
      initialDelaySeconds: 5
      periodSeconds: 5
    readinessProbe:
      httpGet:
        path: /ready
        port: 8080
      initialDelaySeconds: 10
      periodSeconds: 5
Implementing these probes is a standard practice for building resilient microservices in Kubernetes. It's like having your application tell Kubernetes, "Hey, I'm feeling sick, restart me!" or "I'm not quite ready for customers yet, wait a bit!"
Configuration Management: ConfigMaps and Secrets
Hardcoding configuration values directly into your container images or Pod definitions is generally a bad idea. It makes your images less reusable and requires rebuilding/redeploying for every configuration change. Kubernetes provides two excellent resources for externalizing configuration:
- ConfigMaps: Used to store non-confidential configuration data as key-value pairs. You can inject ConfigMap data into Pods as environment variables, command-line arguments, or mount them as files in a volume.
apiVersion: v1
kind: ConfigMap
metadata:
  name: app-config
data:
  database.host: "mydb.example.com"
  api.key: "some_public_api_key"
Secrets: Similar to ConfigMaps but designed for sensitive data like passwords, API keys, and tokens. Secrets are base64 encoded by default (not encrypted!), so they should still be handled with care, especially at rest. Kubernetes provides mechanisms to integrate with external secret management systems for enhanced security.
apiVersion: v1
kind: Secret
metadata:
  name: app-secret
type: Opaque
data:
  db_password: "YWRtaW4xMjM0NQ==" # base64 encoded "admin12345"
Both ConfigMaps and Secrets allow you to decouple configuration from your application code and container images, promoting portability and easier management.
By now, you should have a solid grasp of the core concepts that drive Kubernetes. From understanding its intricate architecture to mastering the use of Pods, Deployments, and Services, and becoming fluent with kubectl, you’re well on your way to becoming a Kubernetes expert. This 'Part 2' has laid down the essential groundwork for you to build, deploy, and manage your applications efficiently in a cloud-native world. Keep experimenting, keep learning, and remember, in DevOps, the journey is continuous!
Key Takeaways
- Kubernetes is an open-source platform for automating the deployment, scaling, and management of containerized applications, essential for modern DevOps.
- The Kubernetes Control Plane (API Server, etcd, Scheduler, Controller Manager) acts as the brain, while Worker Nodes (Kubelet, Kube-proxy, Container Runtime) execute the workloads.
- Pods are the smallest deployable units, capable of running one or more tightly coupled containers, and are inherently ephemeral.
- Deployments manage the lifecycle of Pods, enabling declarative scaling, zero-downtime rolling updates, and easy rollbacks.
- Services provide stable network endpoints to ephemeral Pods, allowing reliable communication within and outside the cluster via types like ClusterIP, NodePort, and LoadBalancer.
kubectl is your indispensable command-line tool for interacting with the Kubernetes cluster, performing actions like getting information, deploying resources, viewing logs, and debugging.- Best practices include using Namespaces for isolation, defining Resource Requests and Limits for stability, implementing Liveness and Readiness Probes for resilience, and utilizing ConfigMaps and Secrets for secure configuration management.
Frequently Asked Questions
What is the difference between Docker and Kubernetes?
Docker is a platform for building, running, and managing individual containers, allowing you to package applications and their dependencies into portable units. Kubernetes, on the other hand, is an orchestration platform designed to manage and automate the deployment, scaling, and operation of *many* Docker (or other container runtime) containers across a cluster of machines. Think of Docker as building and running individual cars, while Kubernetes is the traffic management system that ensures thousands of cars run smoothly on the highway.
How do Deployments achieve zero-downtime updates?
Kubernetes Deployments achieve zero-downtime updates through a strategy called "rolling updates." When you update a Deployment (e.g., change the image version), Kubernetes creates new Pods with the updated configuration alongside the old ones. It then gradually brings up new Pods and drains traffic from old Pods, ensuring that a minimum number of healthy Pods are always running. This process continues until all old Pods are replaced by new ones, without ever taking the application completely offline.
What are the key components of a Kubernetes Control Plane?
The key components of a Kubernetes Control Plane are: the Kube-APIServer (the central hub for all communication), etcd (the cluster's consistent and highly-available key-value store for all cluster data), the Kube-Scheduler (which assigns new Pods to available nodes), and the Kube-Controller-Manager (which runs various controllers to ensure the cluster's actual state matches the desired state).
Why do we need Services in Kubernetes?
Services are essential in Kubernetes because Pods are ephemeral; their IP addresses are not stable and can change upon restart or rescheduling. Services provide a stable, persistent IP address and DNS name that acts as a reliable frontend for a logical group of Pods. They abstract away the changing Pod IPs, enabling other applications or external users to consistently access your application, while also providing load balancing across the healthy Pods.
For a more hands-on demonstration and visual explanations of these critical Kubernetes concepts, make sure to watch the full "Docker Kubernetes Part 2 - DevOps Online Training" video on @explorenystream. Don't forget to like, comment, and subscribe for more in-depth DevOps content!