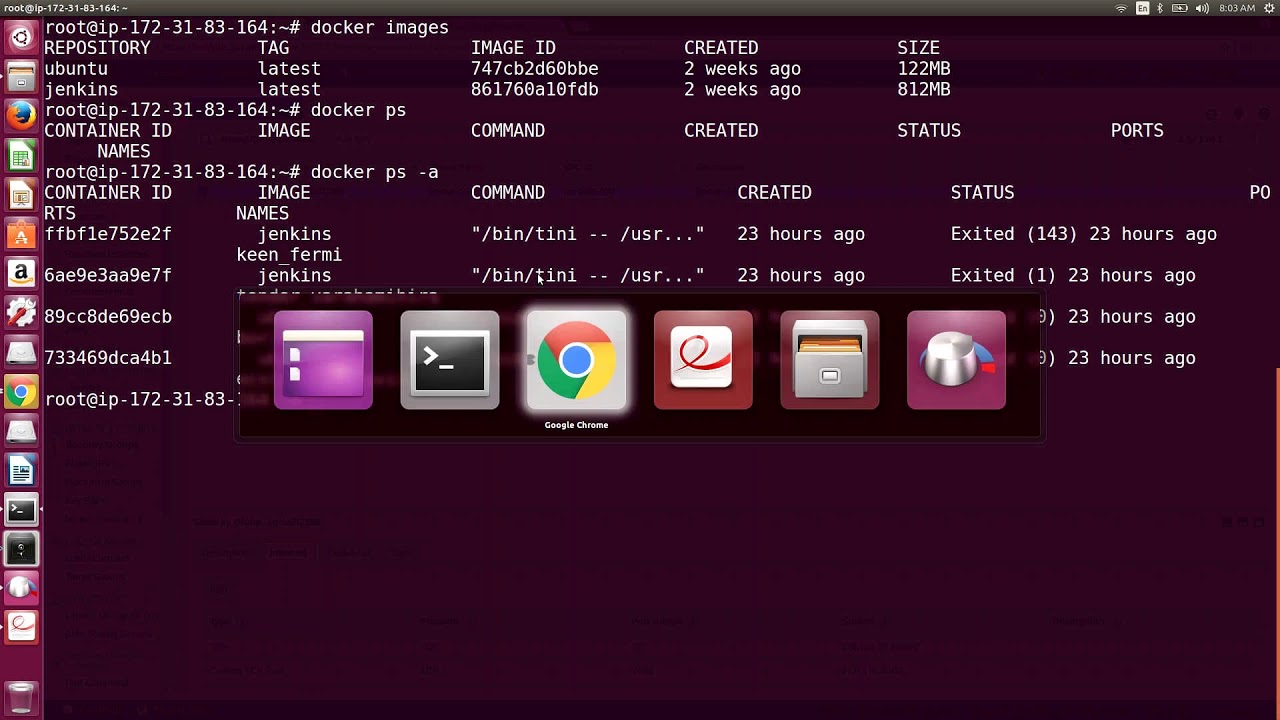
Docker Part4 DEVOPS ONLINE TRAINING
July 13, 2026 — LiveStream
🛒 Recommended gear on AmazonDisclosure: some links above are affiliate links — if you buy through them I may earn a small commission at no extra cost to you. Thanks for supporting the channel!
As an Amazon Associate I earn from qualifying purchases.
Mastering Docker for multi-container applications is a cornerstone for any DevOps engineer looking to streamline development and deployment workflows. This comprehensive guide dives deep into the advanced concepts typically covered in Docker Part 4 training, focusing on leveraging Docker Compose to orchestrate complex services efficiently and robustly.
Yaar, if you've been following along with our Docker DevOps online training series, you've already got a good grip on the basics – running single containers, building custom images with Dockerfiles, and probably a bit about simple networking and volumes. But what happens when your application isn't just one service, but a frontend, a backend API, a database, and maybe a caching layer, all needing to talk to each other? That's where things get interesting, and that's precisely what our Docker Part4 DEVOPS ONLINE TRAINING session, likely, tackles head-on: managing multiple interconnected services with Docker Compose.
As a DevOps engineer, you'll constantly face scenarios where your applications are modular, distributed systems. Trying to manage each container individually with verbose docker run commands for every service is, frankly, a headache, a time-sink, and prone to errors. Imagine having to spin up ten different containers, ensuring they're on the right networks, have the correct volumes mounted, and are exposing the right ports, every single time you want to test your application locally. Thak jaoge! This is exactly why Docker Compose was built: to define and run multi-container Docker applications smoothly. It’s a big deal for local development, staging environments, and even simpler production deployments.
Orchestrating Chaos: The Power of Docker Compose in DevOps
Dekho, when we talk about Docker Compose, we're essentially talking about simplifying the orchestration of complex applications. Instead of a series of manual commands, you define your entire application stack in a single YAML file, traditionally named docker-compose.yml. This file describes all the services that make up your application, their configurations, networks they connect to, and the volumes they use for persistent data. It's like writing a blueprint for your whole distributed system.
Why Docker Compose is a DevOps Superpower
- Declarative Configuration: Everything is defined in a YAML file, making your application stack version-controlled, shareable, and repeatable. No more "it works on my machine" issues because everyone uses the same configuration.
- Simplified Development Workflow: Spin up your entire application with a single command:
docker compose up. Need to tear it down? docker compose down. This drastically speeds up development and testing cycles.
- Service Discovery: Services within a Compose network can discover each other by their service names. No need to hardcode IP addresses or complex DNS configurations.
- Environment Isolation: Each Compose project creates its own isolated network, preventing conflicts with other Docker applications running on your machine.
- Resource Management: You can define resource limits (CPU, memory) for each service directly in the Compose file, helping you simulate production constraints and identify performance bottlenecks early.
Diving into the docker-compose.yml Structure
The docker-compose.yml file is the heart of your multi-service application. It typically starts with a version declaration and then defines three main top-level keys: services, networks, and volumes. Let's break down a simple example, say, a Python Flask web app with a PostgreSQL database and a Nginx reverse proxy.
version: '3.8'

services:
  web:
    build: .
    ports:
      - "5000:5000"
    environment:
      DATABASE_URL: postgres://user:password@db:5432/mydatabase
    depends_on:
      - db
    networks:
      - app-net

  nginx:
    image: nginx:latest
    ports:
      - "80:80"
    volumes:
      - ./nginx.conf:/etc/nginx/nginx.conf:ro
    depends_on:
      - web
    networks:
      - app-net

  db:
    image: postgres:13
    environment:
      POSTGRES_DB: mydatabase
      POSTGRES_USER: user
      POSTGRES_PASSWORD: password
    volumes:
      - db-data:/var/lib/postgresql/data
    networks:
      - app-net

networks:
  app-net:
    driver: bridge

volumes:
  db-data:
Let’s unpack this, step by step:
version: '3.8': This specifies the Compose file format version. Always use the latest stable version for access to new features.services:: This is where you define each individual component of your application.
web:: Our Flask application.
build: . tells Docker Compose to look for a Dockerfile in the current directory (where docker-compose.yml resides) and build an image from it.ports: - "5000:5000" maps port 5000 on your host machine to port 5000 inside the container.environment: sets environment variables inside the container, crucial for database connection strings, API keys, etc. Notice how we reference db (the service name) in the DATABASE_URL – that’s service discovery in action!depends_on: - db ensures that the db service starts before the web service. This is a crucial orchestration directive.networks: - app-net connects the web service to our custom app-net network.
nginx:: Our Nginx reverse proxy.
image: nginx:latest uses an existing image from Docker Hub.ports: - "80:80" maps the default HTTP port.volumes: - ./nginx.conf:/etc/nginx/nginx.conf:ro mounts our local Nginx configuration file into the container. :ro makes it read-only.depends_on: - web ensures Nginx starts after the web service.networks: - app-net connects it to the same network.
db:: Our PostgreSQL database.
image: postgres:13 uses a specific PostgreSQL image.environment: sets up the database name, user, and password, as required by the PostgreSQL image.volumes: - db-data:/var/lib/postgresql/data uses a named volume (db-data) to persist our database data even if the container is removed. More on this later!networks: - app-net connects it to the common network.
networks:: Defines custom networks for your services. Here, app-net is a user-defined bridge network, which is best practice for isolated environments.volumes:: Declares named volumes that can be used by services for persistent storage. db-data: simply declares a named volume named db-data.
Essential Docker Compose Commands
Once your docker-compose.yml is ready, here are the commands you'll be using constantly:
docker compose up: Builds (if needed) and starts all services defined in your docker-compose.yml in detached mode (-d) if you want the terminal back.docker compose up --build: Forces a rebuild of images even if they haven't changed, useful during development.docker compose ps: Lists the running containers for your project.docker compose logs [service_name]: Shows logs for a specific service or all services. Use -f to follow logs.docker compose exec [service_name] [command]: Executes a command inside a running service container, e.g., docker compose exec web bash to get a shell.docker compose stop: Stops running containers without removing them.docker compose down: Stops and removes containers, networks, and volumes defined in the Compose file. Use -v to remove named volumes.
Building Smarter, Not Harder: Advanced Dockerfile Techniques for Multi-Service Apps
While Docker Compose orchestrates your services, the quality of your individual service images still matters immensely. In the Docker Part4 DEVOPS ONLINE TRAINING, we'd definitely touch upon how to optimize your Dockerfiles to create efficient, secure, and small images, especially for multi-service environments. Because, yaar, a smaller image means faster downloads, less storage, and a smaller attack surface.
Multi-Stage Builds: The Game Changer
One of the most powerful advanced Dockerfile techniques is the multi-stage build. This allows you to use multiple FROM statements in your Dockerfile, each new FROM instruction starting a new build stage. You can then selectively copy artifacts from one stage to another, leaving behind everything not needed in the final image.
Consider a typical Go or Node.js application. You need compilers, build tools, and development dependencies to build the application, but none of these are required at runtime. Multi-stage builds help you get rid of this bloat.
# Stage 1: Build the application
FROM node:18-alpine AS builder
WORKDIR /app
COPY package*.json ./
RUN npm install
COPY . .
RUN npm run build # For frontend frameworks like React/Angular, or Node.js app if transpiled

# Stage 2: Create the production-ready image
FROM node:18-alpine
WORKDIR /app
COPY --from=builder /app/node_modules ./node_modules
COPY --from=builder /app/build ./build # If there's a build output directory
COPY server.js . # Or your main application entry file
EXPOSE 3000
CMD ["node", "server.js"]
In this example, the first stage (AS builder) installs all development dependencies and builds the app. The second stage then copies only the necessary build artifacts and runtime dependencies from the builder stage. The result? A much smaller, production-ready image without any build tools.
The `.dockerignore` File: Don't Bloat Your Context!
Just like .gitignore, the .dockerignore file tells the Docker daemon which files and directories to ignore when building images. This is super critical for multi-service applications because accidentally including large development files (like node_modules or your .git folder) in your build context can significantly slow down image builds and increase image size unnecessarily.
# .dockerignore example
node_modules
.git
.vscode
npm-debug.log
dist/tmp
*.env
Other Dockerfile Best Practices
- Use Specific Base Images: Instead of
ubuntu:latest, use specific versions like ubuntu:22.04 or even smaller images like alpine when possible.
- Order Layers for Caching: Place instructions that change infrequently (like copying
package.json and running npm install) before instructions that change often (like copying your application code). Docker caches layers, so this speeds up subsequent builds.
- Minimize Layers: Combine multiple
RUN commands into a single RUN command using && to reduce the number of layers and thus the image size.
- Don't Run as Root: Create a non-root user and switch to it in your Dockerfile (
USER appuser) for security best practices.
- Health Checks: Add
HEALTHCHECK instructions to your Dockerfile to allow orchestrators (like Docker Compose or Kubernetes) to determine if your service is truly healthy, not just running.
Weaving the Web: Advanced Docker Networking and Persistent Storage with Compose
A multi-service application is only as good as its ability for services to communicate and persist data reliably. In Docker Part4 DEVOPS ONLINE TRAINING, understanding how Docker Compose handles networking and volumes is non-negotiable for any aspiring DevOps engineer. It's the wiring and the memory of your application, respectively.
User-Defined Networks in Docker Compose
By default, Docker Compose creates a single bridge network for your entire application. All services defined in your docker-compose.yml connect to this default network. Within this network, containers can reach each other using their service names as hostnames.
However, for more complex scenarios, or when you want to segment your application into different logical groups, you can define custom networks, as we did with app-net in our example. This gives you finer control over isolation and communication. You might have one network for internal services and another for services that expose ports to the outside world, for example.
Key aspects of Compose networking:
- Service Discovery: The magic of Compose is that you don't need to know the IP address of your database. If your database service is named
db, your web service can simply connect to db:5432. Docker's embedded DNS server handles the resolution.
- Network Drivers: While the default is
bridge, you can specify other network drivers like host (for direct access to the host's network stack, generally not recommended for security/portability) or overlay (for multi-host Swarm setups, though that's usually beyond a basic "Part 4").
- External Networks: You can even connect your Compose application to existing Docker networks outside your project, useful for integrating with other services or infrastructure.
networks:
  app-net:
    driver: bridge
  external_monitoring_net:
    external: true # Connects to an already existing network named 'external_monitoring_net'
Mastering Persistent Storage with Volumes
One of the golden rules of containerization is that containers are ephemeral. If a container dies or is removed, any data stored inside its writable layer is lost. This is unacceptable for databases, user uploads, or any stateful data. This is where Docker Volumes come into play, and their proper use is crucial for robust DevOps practices.
Compose supports two main types of volumes:
- Named Volumes (Recommended): These are managed by Docker and stored in a specific location on the host machine (usually
/var/lib/docker/volumes/). You create them once, and Docker manages their lifecycle. They are the preferred way to persist data for databases and other stateful applications because they are portable, easier to back up, and don't depend on the host's directory structure.
        services:
          db:
            image: postgres:13
            volumes:
              - db-data:/var/lib/postgresql/data # named volume 'db-data' maps to container path
        volumes:
          db-data: # Declaration of the named volume
When you run docker compose down -v, it will remove the named volumes along with the containers and networks, so be cautious in production!
- Bind Mounts: These mount a file or directory from the host machine directly into the container. They are great for development purposes (e.g., hot-reloading code changes without rebuilding the image) or for sharing configuration files. However, they are less portable as they tie your container to a specific directory structure on the host.
        services:
          web:
            build: .
            volumes:
              - ./src:/app/src # Mounts local 'src' directory into container's '/app/src'
Bind mounts are excellent for local development of services, allowing you to modify code on your host and see changes reflected instantly inside the container without rebuilding the image. For our Flask app example, mounting your application's source code directory would be a common use case.
Understanding the difference and knowing when to use which type of volume is a key skill for a DevOps engineer. For production databases, always lean towards named volumes.
Real-World DevOps: Integrating Docker Compose into Your Workflow
The true power of Docker Compose isn't just in running services; it's in how it transforms your development, testing, and even deployment workflows. Our Docker Part4 DEVOPS ONLINE TRAINING would certainly highlight these practical applications.
Development Environment Setup
Imagine a new developer joining your team. Instead of spending hours installing dependencies, databases, and configuring services, they just need Docker and Docker Compose installed. Clone the repository, run docker compose up, and boom! The entire application stack is up and running, configured exactly as it should be. This consistency eliminates "it works on my machine" issues and significantly reduces onboarding time. For hot-reloading during development, bind mounts (e.g., - ./app:/app) are your best friend, allowing code changes on the host to reflect immediately inside the container.
Testing and CI/CD Integration
Docker Compose is a fantastic tool for setting up isolated testing environments. You can spin up your entire application, run integration tests against it, and then tear it down, ensuring a clean slate for every test run. In a CI/CD pipeline, you might use Compose to:
- Build Images: Use
docker compose build to create your service images.
- Run Unit/Integration Tests: Start your services with
docker compose up -d, then execute your test suite against the running containers.
- Run End-to-End Tests: Similar to integration tests, but involves more services and user flows.
- Cleanup: Use
docker compose down -v to clean up after tests.
This approach ensures that your tests run in an environment that closely mirrors your production setup, catching environment-specific bugs much earlier.
Managing Environment Variables and Secrets
In Compose, environment variables are critical for configuring services without hardcoding values. You can define them directly in the docker-compose.yml, or use an .env file (which Compose automatically picks up) for sensitive data or machine-specific configurations. For truly sensitive data like API keys or database passwords, Docker provides Docker Secrets, which, while not directly a Compose-only feature, integrates well with Compose for Swarm mode deployments.
# .env file example
DB_USER=myuser
DB_PASSWORD=mysecretpassword
APP_PORT=8080
Then, in your docker-compose.yml:
services:
  web:
    image: myapp:latest
    environment:
      - DB_USER=${DB_USER} # Compose will automatically substitute from .env
      - DB_PASSWORD=${DB_PASSWORD}
    ports:
      - "${APP_PORT}:8080"
This keeps your docker-compose.yml clean and prevents sensitive information from being committed to version control.
Scaling with Compose and Beyond
While Docker Compose is primarily designed for single-host orchestration (meaning all your containers run on one machine), it can be a stepping stone to more advanced orchestrators like Docker Swarm or Kubernetes. You can easily adapt a docker-compose.yml file into a Swarm stack file with minimal changes, giving you horizontal scaling and high availability across multiple nodes. This transition, from local development to production-grade orchestration, is a key part of the DevOps journey that Docker enables.
So, you see, Docker Part4 DEVOPS ONLINE TRAINING is not just about learning new commands; it's about understanding how to structure, manage, and deploy entire applications efficiently. It's about taking your containerization skills to the next level, making you a more effective and indispensable DevOps engineer. This foundational knowledge empowers you to tackle complex distributed systems with confidence, moving from individual containers to fully orchestrated application stacks.
Key Takeaways
- Docker Compose is indispensable for multi-container applications: It allows you to define, run, and manage an entire application stack using a single YAML file, simplifying complex setups.
- The
docker-compose.yml file is your application blueprint: It declares services, networks, and volumes, making your application reproducible and portable across different environments.
- Advanced Dockerfile techniques like multi-stage builds are crucial for optimized images: These reduce image size and improve security by separating build environments from runtime environments.
- Robust networking and persistent storage are fundamental: User-defined networks enable seamless service discovery, while named volumes are critical for persisting data for stateful services like databases.
- Docker Compose streamlines DevOps workflows: It accelerates local development, simplifies testing, and provides a clear path for CI/CD integration and eventual scaling to production orchestration platforms.
Frequently Asked Questions
What is Docker Compose and why is it essential for DevOps?
Docker Compose is a tool for defining and running multi-container Docker applications. It allows you to use a YAML file (docker-compose.yml) to configure your application's services, networks, and volumes. It's essential for DevOps because it simplifies complex application setups, ensures environment consistency across development and testing, and speeds up development cycles by allowing you to spin up an entire application stack with a single command.
How do services communicate within a Docker Compose application?
By default, Docker Compose creates a single user-defined bridge network for all services in your docker-compose.yml file. Services within this network can communicate with each other using their service names as hostnames. Docker's internal DNS system handles the resolution of these service names to their respective container IP addresses, making inter-service communication seamless and easy to configure.
What's the primary difference between docker run and docker compose up?
docker run is used to start and manage a single Docker container. You provide all configuration (image, ports, volumes, environment variables) directly as command-line arguments. In contrast, docker compose up starts and manages multiple containers (services) that are defined together in a docker-compose.yml file. It orchestrates the entire application stack, including setting up networks and volumes, based on a single declarative configuration file.
How do you manage persistent data for databases using Docker Compose?
For databases and other stateful applications in Docker Compose, you primarily manage persistent data using named volumes. You declare a named volume in the volumes section of your docker-compose.yml and then mount it to the appropriate path within your database service container (e.g., db-data:/var/lib/postgresql/data). This ensures that even if the database container is removed or recreated, the data stored in the named volume persists on the host machine.
If you're eager to see these concepts in action, learn from an expert, and get hands-on experience, make sure to watch the full Docker Part4 DEVOPS ONLINE TRAINING video on the @explorenystream channel. Don't forget to hit that subscribe button to stay updated with more invaluable DevOps insights and training sessions!