Jenkins Part1 DEVOPS ONLINE TRAINING
July 10, 2026 — LiveStream
🛒 Recommended gear on AmazonDisclosure: some links above are affiliate links — if you buy through them I may earn a small commission at no extra cost to you. Thanks for supporting the channel!
As an Amazon Associate I earn from qualifying purchases.
Are you looking to kickstart your journey into the world of DevOps? Understanding Jenkins is absolutely essential, as it's the undisputed champion for orchestrating CI/CD pipelines and driving seamless automation in modern software development. This comprehensive guide will walk you through the fundamentals of Jenkins, from installation to running your first automated job, ensuring you grasp the core concepts of this powerful DevOps tool.
Understanding Jenkins: The Core of DevOps Automation
Dekho, in today's fast-paced tech world, if your team isn't delivering software quickly and reliably, you're already behind. That's where DevOps comes in, right? It's all about bridging the gap between development and operations, fostering collaboration, and automating as much as possible. And when we talk about automation, especially for building, testing, and deploying code, one name shines brightest: Jenkins. For anyone getting into DevOps training, mastering Jenkins is non-negotiable.
What is Jenkins and Why is it Indispensable?
Simply put, Jenkins is an open-source automation server. Think of it as the central nervous system of your software development lifecycle. Its primary role is to automate the non-human parts of the software development process, with continuous integration and facilitating continuous delivery. But it’s much more than just a build server, yaar. It’s a highly extensible system that helps teams automate everything from compiling code and running unit tests to packaging applications, deploying them to various environments, and even running acceptance tests.
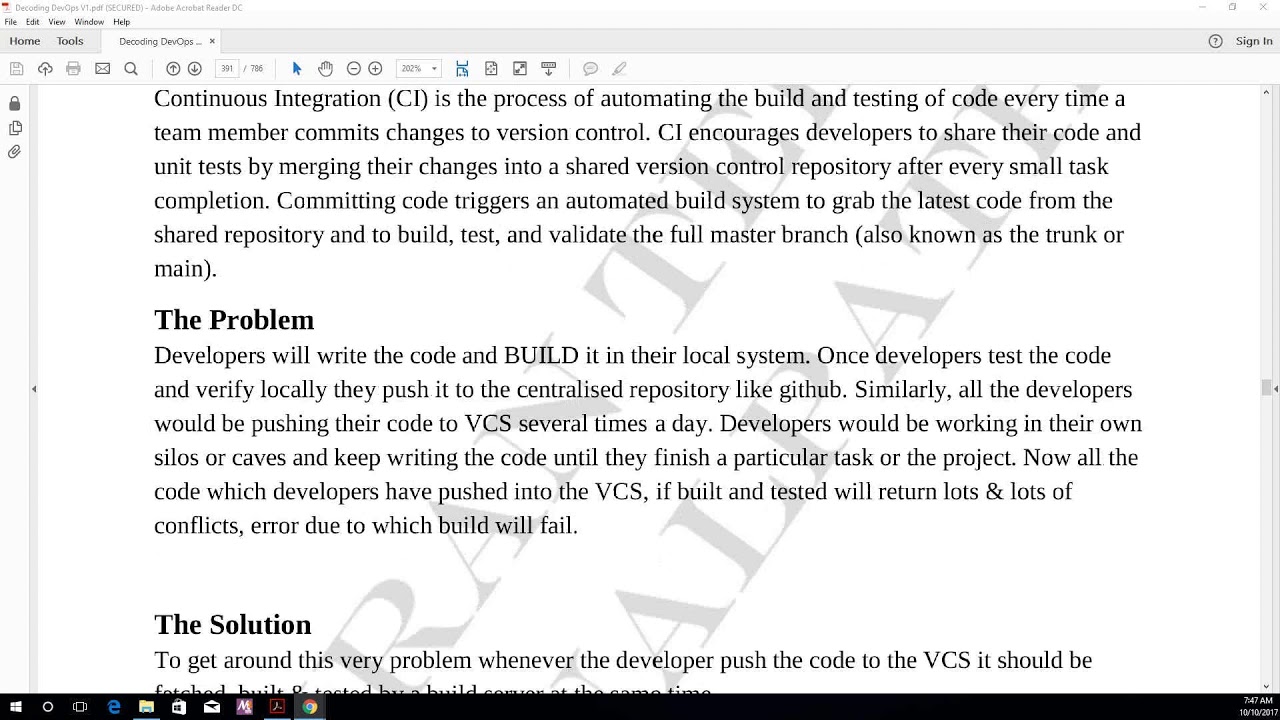
Before Jenkins and similar tools, developers would often write code for weeks, then merge it all at once, leading to a "merge hell" – conflicts, broken builds, and long debugging cycles. The integration process was a bottleneck, not an enabler. Jenkins changed this paradigm by promoting Continuous Integration (CI).
So, why is it indispensable?
- Automation Powerhouse: It takes repetitive, manual tasks and automates them, freeing up developers to focus on writing code.
- Faster Feedback: With automated builds and tests running frequently (often on every commit), developers get immediate feedback if their changes break anything. This helps catch bugs early, when they're cheaper and easier to fix.
- Improved Code Quality: Consistent testing and build processes lead to more stable and reliable codebases.
- Reduced Risk: Automated deployments mean fewer human errors, making releases smoother and less risky.
- Scalability: Jenkins can manage projects of any size, from small startups to large enterprises, handling hundreds or thousands of builds daily.
- Extensibility: With thousands of plugins, Jenkins can integrate with almost any tool in your software stack – version control systems, build tools, testing frameworks, deployment platforms, you name it.
The CI/CD Lifeline Jenkins Provides
When we talk about CI/CD, we're essentially talking about a set of practices that enable rapid, reliable, and frequent delivery of software. Jenkins is at the very heart of making this a reality. Let's break down how it fits into CI/CD:
Continuous Integration (CI)
CI is the practice of frequently merging all developers' working copies to a shared mainline. Jenkins monitors your version control system (like Git). The moment a developer pushes new code, Jenkins springs into action:
- It automatically pulls the latest code.
- It compiles the code to ensure it builds successfully.
- It runs automated unit and integration tests to verify functionality.
- If any step fails, Jenkins immediately notifies the development team, allowing them to fix issues quickly.
This continuous feedback loop drastically reduces the time and effort required to integrate changes and maintain a stable codebase. It means your code is always in a releasable state, or at least you know exactly when it isn't.
Continuous Delivery (CD)
Building on CI, Continuous Delivery (CD) is the practice where every change that passes the automated tests is automatically prepared for a release to production. Jenkins helps here by:
- Packaging applications: Creating deployable artifacts (e.g., JAR, WAR, Docker images).
- Deploying to staging/UAT environments: Automatically pushing these artifacts to various testing environments for further validation.
- Running automated acceptance and performance tests: Ensuring the application meets business requirements and performs well under load.
With Continuous Delivery, you have the capability to deploy to production at any time, though it still requires a manual push or approval. This gives businesses immense flexibility and agility.
Continuous Deployment (CD)
This is the ultimate evolution of CD. With Continuous Deployment, every change that passes all stages of your CI/CD pipeline is automatically deployed to production, without human intervention. Jenkins can be configured to manage this entire process, making releases truly automated end-to-end. While not every organization adopts full continuous deployment due to various regulatory or business reasons, Jenkins provides the backbone to achieve it if desired. The goal, ultimately, is to get valuable software into the hands of users faster and more reliably.
Setting Up Your Jenkins Environment: A Step-by-Step Guide for Linux
Chalo, enough gyaan for now. Let's get our hands dirty and install Jenkins. For any DevOps training, hands-on experience is paramount. We’ll focus on installing Jenkins on a Linux-based system, specifically Ubuntu, which is a common choice in production environments and for learning purposes. Make sure you have a fresh Ubuntu instance (or any Debian-based distribution) ready. You'll need root or sudo privileges for these steps.
Prerequisites: Get Your System Ready, Yaar!
Before installing Jenkins, you need to ensure Java is installed. Jenkins is a Java-based application, so it needs a Java Runtime Environment (JRE) to run. The recommended version is OpenJDK 11. Let's install it.
Open your terminal and run these commands:
sudo apt update
sudo apt install openjdk-11-jre -y
After installation, you can verify the Java version:
java -version
You should see output similar to this, indicating OpenJDK 11 is installed:
openjdk version "11.0.19" 2023-04-18
OpenJDK Runtime Environment (build 11.0.19+7-post-Ubuntu-1ubuntu122.04.1)
OpenJDK 64-Bit Server VM (build 11.0.19+7-post-Ubuntu-1ubuntu122.04.1, mixed mode, sharing)
If you have multiple Java versions, you might need to configure the default using sudo update-alternatives --config java. For a fresh install, this should usually not be an issue.
Installing Jenkins on Ubuntu/Debian
Now that Java is sorted, let's proceed with installing Jenkins. We'll add the Jenkins repository to our system's package manager, so we can install it like any other software package and keep it updated easily.
1. Add the Jenkins APT key
First, we need to add the GPG key for the Jenkins repository. This key is used to verify the authenticity of the packages from the repository.
curl -fsSL https://pkg.jenkins.io/debian-stable/jenkins.io-2023.key | sudo tee \
  /usr/share/keyrings/jenkins-keyring.asc > /dev/null
2. Add the Jenkins repository to your system's sources
Next, we'll add the Jenkins repository URL to our system's sources list. This tells APT where to find the Jenkins packages.
echo deb [signed-by=/usr/share/keyrings/jenkins-keyring.asc] \
  https://pkg.jenkins.io/debian-stable binary/ | sudo tee \
  /etc/apt/sources.list.d/jenkins.list > /dev/null
3. Update your package list and install Jenkins
Now, update your local package index to include the new Jenkins repository, and then install Jenkins.
sudo apt update
sudo apt install jenkins -y
This command will download and install Jenkins along with its dependencies. During the installation, Jenkins will be configured to start automatically on boot.
4. Verify Jenkins service status
After installation, Jenkins should start automatically. You can check its status using:
sudo systemctl status jenkins
You should see output indicating that Jenkins is active (running). If it's not running, you can start it with sudo systemctl start jenkins.
5. Adjust Firewall (if applicable)
If you have a firewall enabled (like UFW), you need to open port 8080, which is the default port Jenkins runs on. Without this, you won't be able to access the Jenkins web interface from your browser.
sudo ufw allow 8080
sudo ufw enable
Initial Jenkins Setup: Unlocking the Powerhouse
With Jenkins installed and running, it's time to access its web interface and complete the initial setup. Open your web browser and navigate to http://your_server_ip_or_hostname:8080.
You'll be greeted by an "open up Jenkins" screen. This is a security measure. Jenkins generates an initial admin password and stores it in a file on the server.
1. Retrieve the initial admin password
Go back to your terminal and use the following command to retrieve the password:
sudo cat /var/lib/jenkins/secrets/initialAdminPassword
Copy the long alphanumeric string displayed. This is your initial password.
2. Enter the administrator password
Paste this password into the "Administrator password" field in your browser and click "Continue."
3. Install Plugins
The next screen will ask you to install plugins. Plugins are the lifeblood of Jenkins, extending its functionality tremendously. For beginners, it's always best to:
- Install suggested plugins: This option installs a set of commonly used plugins that are generally sufficient for most basic Jenkins setups.
Click "Install suggested plugins." Jenkins will now download and install these plugins. This process can take a few minutes, depending on your internet connection.
4. Create First Admin User
Once the plugin installation is complete, you'll be prompted to "Create First Admin User." Fill in the details: username, password, full name, and email address. Remember these credentials, as they will be your primary login for Jenkins.
Click "Save and Finish."
5. Jenkins is Ready!
Finally, you'll see a "Jenkins is Ready!" screen. Click "Start using Jenkins." You will be redirected to the Jenkins dashboard. Congrats, boss! Your Jenkins environment is now up and running, ready for you to start automating tasks.
This initial setup is crucial for any Jenkins tutorial, as it forms the foundation for all your future automation efforts. You've successfully navigated the basics of Jenkins installation and configuration.
Your First Jenkins Job: Automating a Simple Task
Now that Jenkins is alive and kicking, let's create our first automation job. This is where the real fun begins! We'll start with a "Freestyle project," which is a flexible option for simple tasks. Imagine we just want Jenkins to run a simple shell script to display a "Hello, DevOps!" message and list some files. A very basic continuous integration example.
working through the Jenkins Dashboard
The Jenkins dashboard is your command center. You'll see options like "New Item," "People," "Build History," "Manage Jenkins," etc. Take a moment to familiarize yourself with the layout. The left-hand navigation pane is particularly useful.
Creating a Freestyle Project: The "Hello World" of Jenkins
Follow these steps to create your first Jenkins job:
1. Click "New Item"
On the Jenkins dashboard, click on "New Item" in the left-hand navigation pane.
2. Enter Item Name and Select Project Type
- Enter an item name: Let's call it
MyFirstJob. Choose a descriptive name.
- Select "Freestyle project": This is the simplest type of project and a great starting point.
Click "OK."
3. Configure Your Job
You'll be taken to the job configuration page. This page has many sections, but for our first job, we'll only focus on a few key ones:
General Section
- Description: Add a brief description, e.g., "My very first Jenkins job to say hello and list files." Good descriptions are helpful, especially as you get more jobs.
Source Code Management (SCM) Section
For this simple job, we won't integrate with a version control system yet. Leave "None" selected. In a real-world scenario, this is where you'd connect to Git (GitHub, GitLab, Bitbucket) to pull your source code.
Build Triggers Section
This section defines when your job should run. For now, leave these unchecked. We'll trigger it manually. In future, this is where you configure automated triggers like "Poll SCM" (check for code changes periodically) or "Webhook" (trigger build on every push).
Build Environment Section
Leave this as default for now.
Build Steps Section
This is where you define the actual work Jenkins will do. We want to run a shell command.
- Click "Add build step."
- Select "Execute shell."
A text area will appear. Enter your shell commands here. Let's add two simple commands:
echo "Hello, DevOps! This is MyFirstJob running successfully!"
echo "Current directory contents:"
ls -la
Post-build Actions Section
This section defines what Jenkins should do after the build steps are complete (e.g., send email notifications, archive artifacts). For now, we'll leave this empty.
4. Save Your Job
Scroll down and click "Save." Your job is now created and configured!
Building and Verifying Your Job
You'll be redirected to the job's main page for MyFirstJob. On the left-hand side, you'll see "Build Now."
1. Trigger the Build
Click "Build Now." You'll see a build appear in the "Build History" panel on the left. A small spinning blue icon indicates it's running (or has succeeded). A red icon means failure, and yellow means unstable.
2. View Build Output (Console Output)
Once the build finishes (it should be very quick for this simple job), click on the build number (e.g., #1) in the "Build History" panel. Then, on the left, click "Console Output."
This console output shows you everything Jenkins did during that build. You should see your "Hello, DevOps!" message and the directory listing. If you see SUCCESS at the end, then congratulations! You've successfully run your first automated job using Jenkins.
This fundamental exercise is crucial for any DevOps training, demonstrating how to leverage Jenkins for automation. You've taken your first step towards building complex CI/CD pipelines!
Beyond the Basics: Expanding Your Jenkins Horizon
Running a simple shell script is just the tip of the iceberg with Jenkins. To truly harness its power for robust DevOps automation and scalable CI/CD pipelines, you need to understand a few more core concepts.
Jenkins Architecture: Master-Agent Paradigm
As your Jenkins usage grows, one server might not be enough to handle all the builds and tests. That's where the Master-Agent architecture comes in.
- Jenkins Master: This is the primary server you installed. It handles the web UI, stores configurations, schedules jobs, and orchestrates the work. It doesn't necessarily perform the heavy lifting of building and testing itself.
- Jenkins Agents (formerly Slaves): These are separate machines (physical or virtual) that connect to the Master. They execute the actual build jobs. When you trigger a job, the Master assigns it to an available Agent, which then performs the tasks (e.g., compiling code, running tests).
Why this architecture?
- Scalability: You can add more agents as your workload increases.
- Workload Distribution: Different jobs can run on different agents simultaneously, speeding up your pipeline.
- Environment Isolation: You can configure agents with different operating systems, tools, or dependencies, ensuring that jobs run in the specific environment they require. For example, one agent for Linux builds, another for Windows, or one with specific database access.
Configuring agents involves setting up SSH or JNLP connections from the agent to the master, or having the master launch agents via cloud providers like AWS EC2 or Kubernetes. This is a critical next step when scaling your Jenkins setup.
The Power of Plugins: Extending Jenkins Capabilities
Jenkins out-of-the-box is powerful, but its true strength lies in its ecosystem of thousands of plugins. Plugins allow Jenkins to integrate with virtually any tool or service in your development stack. Jab tak plugin hai, Jenkins hai!
Some essential plugin categories include:
- Source Code Management (SCM) Plugins: Git, Subversion, Perforce – for connecting to your code repositories.
- Build Tool Plugins: Maven, Gradle, Ant – for managing your project builds.
- Automation/Orchestration Plugins: Pipeline, Blue Ocean – for defining and visualizing complex CI/CD workflows.
- Testing Plugins: JUnit, TestNG, SonarQube Scanner – for integrating various testing and code quality tools.
- Deployment Plugins: Docker, Kubernetes, Ansible, AWS EC2, Azure App Service – for deploying applications to different platforms.
- Notification Plugins: Email Extension, Slack Notification – for sending alerts and updates.
To install plugins, navigate to "Manage Jenkins" > "Plugins" > "Available plugins" from your Jenkins dashboard. Search for the plugin you need, select it, and click "Install without restart" or "Download now and install after restart." Exploring and leveraging the right plugins is key to building robust and efficient CI/CD pipelines with Jenkins.
Best Practices and Troubleshooting Tips
As a senior DevOps engineer, I'll tell you some wisdom:
- Keep Jenkins Updated: Regularly update Jenkins core and plugins to get the latest features, security fixes, and performance improvements.
- Backup Your Jenkins Home Directory: The
/var/lib/jenkins directory (or wherever you configured JENKINS_HOME) contains all your job configurations, build history, plugins, and user data. Back it up regularly!
- Use Version Control for Job Configurations (Configuration as Code): Instead of manually configuring jobs via the UI, learn about Jenkins Pipeline (Jenkinsfile) and tools like Job DSL. This allows you to define your pipeline in code, stored in your SCM, providing version control, reproducibility, and easier management.
- Monitor Jenkins: Keep an eye on system resources (CPU, memory, disk I/O) on your Master and Agents. Jenkins can consume a lot of resources during builds.
- Secure Jenkins: Implement proper user authentication, role-based access control, and consider limiting access to the Jenkins UI. Always use HTTPS.
- Troubleshooting Tip: Console Output is Your Best Friend: When a build fails, the very first place to look is the "Console Output" for that specific build. It provides detailed logs that often pinpoint the exact error.
- Common Pitfalls:
- Permissions Issues: Jenkins runs as the
jenkins user. Ensure this user has the necessary permissions to access files, directories, or run commands on the agent machine.
- Java Version Mismatch: Sometimes plugins or specific tools require a particular Java version. Always double-check Java configurations.
- Environment Variables: Ensure all necessary environment variables are set correctly for your build scripts.
- Resource Exhaustion: Builds failing mysteriously might be due to out-of-memory errors or disk space issues.
Key Takeaways
- Jenkins is the Cornerstone of DevOps: It automates critical software development processes like building, testing, and deployment, enabling fast and reliable software delivery.
- CI/CD is Jenkins' Forte: It provides the framework for Continuous Integration, Continuous Delivery, and Continuous Deployment, ensuring code is always in a releasable state.
- Installation is Straightforward: Setting up Jenkins on Linux involves installing Java, adding the Jenkins repository, and then running an automated setup through the web UI.
- Jobs are Your Automation Units: Creating Freestyle projects is the simplest way to define tasks for Jenkins, executing shell scripts or other build steps.
- Extensibility is Key: Jenkins' vast plugin ecosystem and Master-Agent architecture allow it to scale and integrate with virtually any tool in a complex software development environment.
Frequently Asked Questions
What is Jenkins used for in DevOps?
In DevOps, Jenkins serves as the primary automation server for orchestrating the entire software delivery pipeline. It automates repetitive tasks such as compiling source code, running automated tests (unit, integration, functional), packaging applications into deployable artifacts, and deploying them to various environments (development, staging, production). This enables teams to implement Continuous Integration (CI) by frequently merging code, and Continuous Delivery/Deployment (CD) by reliably and rapidly releasing software changes.
Is Jenkins difficult to learn for beginners?
Jenkins has a learning curve, but it's not overly difficult for beginners, especially with good guidance. The initial setup and creating simple Freestyle jobs are quite straightforward. The complexity increases when you start building advanced pipelines using Groovy-based Jenkinsfiles (Pipeline as Code), integrating numerous plugins, and setting up distributed builds with agents. However, with consistent practice and leveraging its extensive documentation and community support, beginners can become proficient in Jenkins for effective DevOps automation.
What are the alternatives to Jenkins?
While Jenkins is incredibly popular, several strong alternatives exist, each with its strengths. Popular choices include:
- GitLab CI/CD: Built directly into GitLab, offering a comprehensive SCM and CI/CD solution.
- GitHub Actions: Native CI/CD integrated with GitHub repositories, highly popular for open-source projects.
- CircleCI: A cloud-native CI/CD platform known for its ease of use and YAML-based configuration.
- Azure DevOps (Azure Pipelines): Microsoft's comprehensive suite offering CI/CD for various platforms and languages.
- Travis CI: One of the earliest hosted CI services, popular for open-source projects.
- Bamboo: Atlassian's CI/CD server, often integrated tightly with Jira and Bitbucket.
The best alternative depends on your team's existing toolchain, infrastructure, and specific requirements.
How does Jenkins integrate with other tools?
Jenkins integrates with thousands of other tools primarily through its extensive plugin architecture. Developers can install plugins that provide native support for various tools, such as:
- Version Control Systems: Git, SVN (via plugins like Git Plugin, Subversion Plugin).
- Build Tools: Maven, Gradle, Ant (via Maven Integration Plugin, Gradle Plugin).
- Code Quality Tools: SonarQube (via SonarQube Scanner plugin).
- Testing Frameworks: JUnit, TestNG (via JUnit Plugin for reporting).
- Containerization: Docker (via Docker Pipeline Plugin, Docker build steps).
- Orchestration/Deployment: Kubernetes, Ansible, Terraform (via respective plugins or executing shell commands).
- Notification: Slack, Email (via Slack Notification Plugin, Email Extension Plugin).
This vast integration capability is what makes Jenkins so versatile and adaptable to almost any development ecosystem.
Conclusion: Your DevOps Journey Begins Here
Toh, dekha na? This was just the Part 1 of your DevOps training with Jenkins, but you've already laid a solid foundation. You've learned what Jenkins is, why it's crucial for CI/CD automation, how to install it, and even ran your first automated job. This is not just theoretical knowledge; this is practical, job-ready skill development. As you progress, you'll dig deeper into advanced pipeline scripting, agent management, and integrating more sophisticated tools, expanding your capabilities for robust DevOps automation. Bilkul, your journey to becoming a pro DevOps engineer has truly begun. Keep practicing, keep learning, and keep automating!
If you found this guide useful and want to see these steps in action, I highly recommend watching the full video on the @explorenystream channel. Don't forget to like, share, and subscribe for more amazing DevOps content!