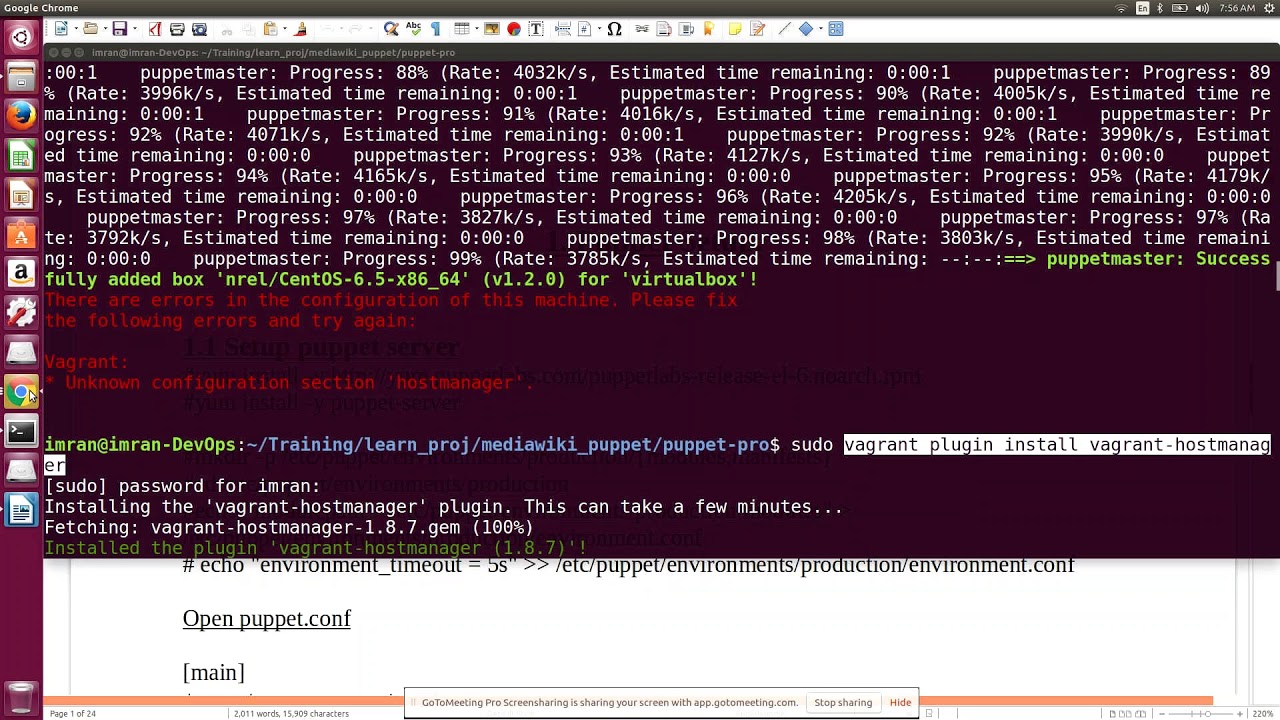
Puppet Part1 DEVOPS ONLINE TRAINING
July 07, 2026 — LiveStream
🛒 Recommended gear on AmazonDisclosure: some links above are affiliate links — if you buy through them I may earn a small commission at no extra cost to you. Thanks for supporting the channel!
As an Amazon Associate I earn from qualifying purchases.
Ever felt like you’re constantly battling configuration drift across your servers, manually updating packages, or struggling to maintain consistency in your production environment? Well, welcome to the world of Puppet, a powerful configuration management tool that's an absolute big deal for modern DevOps practices. This article dives deep into the fundamentals of Puppet, covering its core concepts, architecture, and practical setup steps, serving as a comprehensive guide for anyone starting their journey with Puppet Part1 DEVOPS ONLINE TRAINING.
In the fast-paced world of technology, consistency and automation are not just buzzwords; they are critical pillars for scalable, reliable infrastructure. Puppet, often referred to as an "orchestration" or "configuration management" tool, empowers you to define the desired state of your infrastructure using a declarative language, ensuring your systems always conform to your specifications. Whether you're managing a handful of servers or thousands, Puppet provides the framework to automate repetitive tasks, enforce standards, and achieve true Infrastructure as Code (IaC). So, grab your chai, and let's unravel the magic of Puppet, making your DevOps Online Training journey smoother and more insightful.
Puppet: The Maestro of Your Infrastructure Orchestra
Imagine managing hundreds or even thousands of servers. Each server needs specific software installed, services configured, files deployed, and users managed. Doing this manually is not just time-consuming; it's a recipe for disaster, leading to inconsistencies, human error, and sleepless nights. This is where Puppet steps in, acting as the maestro for your infrastructure orchestra. It's a robust, open-source configuration management tool designed to automate the provisioning, configuration, and management of server infrastructure.
At its heart, Puppet operates on a declarative model. Instead of telling your systems *how* to achieve a state (imperative), you tell Puppet *what* the desired state is (declarative), and Puppet figures out the "how." This paradigm shift is monumental for DevOps teams. For instance, you don't instruct a server to "run apt update, then apt install apache2, then edit /etc/apache2/apache2.conf." Instead, you declare: "I want the apache2 package to be installed, and the apache2 service to be running." Puppet then takes care of the intricate details, applying changes only if necessary to bring the system to the declared state. This concept is fundamental to Infrastructure as Code (IaC), where your infrastructure configurations are treated like any other code – version-controlled, testable, and deployable through automated pipelines. This not only enhances efficiency but also drastically reduces configuration drift, improves reliability, and speeds up deployment cycles.
Think about it: in a traditional setup, if you have a new team member join, you'd spend hours setting up their development environment, ensuring all tools and configurations match the production setup. With Puppet, you simply point their machine to the Puppet Master, and *voila!* – their environment is provisioned to the desired state automatically. This level of automation and standardization is what makes Puppet a true superpower in any modern DevOps environment.
Why Puppet is a Must-Have in Your DevOps Toolkit:
- Automation at Scale: Automates repetitive tasks across numerous servers, saving countless hours.
- Configuration Consistency: Ensures all your systems maintain a uniform, desired state, reducing "it works on my machine" scenarios.
- Idempotency: Puppet ensures that applying a configuration multiple times yields the same result as applying it once. It only makes changes if the system is not in the desired state.
- Infrastructure as Code (IaC): Treat your infrastructure configurations as code, enabling version control, peer review, and automated testing.
- Speed and Agility: Rapidly provision new servers and deploy applications with predefined configurations.
- Reduced Human Error: Automating processes minimizes the chances of manual mistakes.
- Auditing and Compliance: Provides a clear record of your infrastructure's state, crucial for compliance and security audits.
Unpacking the Brains: Understanding Puppet's Master-Agent Architecture
To truly harness Puppet's power, it’s essential to understand its core architecture. Puppet primarily operates on a Master-Agent model, a client-server relationship where a central Puppet Master server manages numerous Puppet Agent nodes. This setup is robust and designed for scalability, allowing you to manage hundreds or even thousands of machines from a single control plane. Dekho, it's pretty straightforward once you get the hang of it.
Key Components in the Puppet Ecosystem:
- Puppet Master: This is the central control server. It stores all your Puppet code (manifests, modules), compiles catalogs for agents, and serves them upon request. The Master is essentially the brain that dictates the desired state of your entire infrastructure. It handles requests from agents, compiles a "catalog" (a JSON document describing the desired state for that specific agent), and sends it back. The Master also manages the security certificates for all agents, ensuring secure communication.
- Puppet Agent: These are the client nodes (servers, VMs, containers) that need to be managed. An agent runs on each machine you want to configure. Periodically (by default, every 30 minutes), the Puppet Agent contacts the Puppet Master, sends information about itself (its "facts"), and requests its catalog. Once it receives the catalog, the agent compares the desired state described in the catalog with the current state of the machine and applies any necessary changes to bring the machine into compliance.
- Facter: This is an essential utility that runs on each Puppet Agent. Facter gathers "facts" about the agent node – details like its operating system, IP address, kernel version, available memory, disk space, and much more. These facts are then sent to the Puppet Master during the catalog request. The Master uses these facts to compile node-specific catalogs, allowing for conditional logic in your Puppet code. For example, you can write a manifest that installs Apache differently on CentOS versus Ubuntu by checking the
os['family'] fact. It’s super handy for making your code adaptable.
- Puppet DSL (Domain Specific Language): This is the language you use to write your Puppet code. It’s a declarative language designed to describe the desired state of resources. You'll define resources like packages, services, files, users, and more, specifying their attributes. For example, to ensure the 'nginx' package is installed and its service is running, you'd write:
package { 'nginx':
  ensure => present,
}

service { 'nginx':
  ensure  => running,
  enable  => true,
  require => Package['nginx'],
}
This DSL is quite intuitive and human-readable, making it easier for new engineers to pick up.
- Manifests: These are the files where you write your Puppet code using the DSL. Traditionally, the main manifest file is
site.pp, but in larger environments, you organize your code into modules for better structure and reusability.
- Modules: These are self-contained, reusable bundles of Puppet code and data. A module typically manages a specific technology or application, like Apache, MySQL, or users. They encapsulate classes, definitions, files, and templates related to a particular configuration. Using modules promotes code reusability, modularity, and maintainability, which is crucial for managing complex infrastructures. For instance, a firewall module would contain all the necessary code to configure firewall rules, independent of other system configurations.
- PuppetDB (Optional but Recommended): A powerful data warehouse for Puppet. It collects all data generated by Puppet (facts, catalogs, reports) and stores it in a queryable database. This allows you to perform advanced queries about your infrastructure, generate reports, and integrate with other tools for monitoring and visualization.
The Communication Flow: How Puppet Works Its Magic
- Agent Starts Up: The Puppet Agent service runs periodically on the managed nodes.
- Fact Collection: When an agent starts a run, Facter collects all the system facts (OS, IP, etc.) about that node.
- Catalog Request: The agent sends these facts to the Puppet Master and requests its configuration catalog.
- Catalog Compilation: The Puppet Master receives the facts, processes its Puppet code (manifests, modules) based on these facts and any node classifications, and compiles a node-specific catalog. This catalog is a detailed JSON document outlining the desired state for *that particular agent*.
- Catalog Delivery: The compiled catalog is sent back to the Puppet Agent.
- Configuration Enforcement: The Puppet Agent then compares the desired state described in the catalog with the actual state of its local system. It identifies any discrepancies and takes corrective actions to bring the system to the desired state. This includes installing packages, starting services, creating files, etc.
- Reporting: After applying changes (or determining no changes were needed), the agent sends a report of the run (including any errors, changes made, or status) back to the Puppet Master. This report can be stored in PuppetDB for analysis.
This cycle repeats at regular intervals (default 30 minutes), ensuring your infrastructure consistently adheres to the defined desired state. It's like having an army of robots constantly checking and fixing things on your servers. Bahut sahi, hai na?
Getting Your Hands Dirty: Setting Up Puppet Master and Agent
Alright, theory toh theek hai, but now let's get practical. To truly grasp Puppet, you need to set up a basic environment. This part of your Puppet Part1 DEVOPS ONLINE TRAINING will walk you through the essential steps to get a Puppet Master and a Puppet Agent up and running. We'll use a common Linux distribution like CentOS 7/8 or Ubuntu Server, as they are prevalent in DevOps environments.
Prerequisites:
- Two virtual machines (VMs) or cloud instances: one for the Puppet Master and one for the Puppet Agent.
- Both VMs should have internet access.
- Basic understanding of Linux command-line operations.
- Root or sudo privileges on both machines.
- Ensure your hostnames are properly set and resolvable (e.g., add entries to
/etc/hosts if not using DNS).
- For Master:
puppetmaster.example.com (or similar)
- For Agent:
puppetagent.example.com (or similar)
Step 1: Configure Hostnames and Host Files (on both Master and Agent)
Ensure both your master and agent can resolve each other. The easiest way for a lab setup is to modify /etc/hosts. Replace IP addresses and hostnames with your actual setup.
# On Puppet Master (e.g., IP: 192.168.1.10)
sudo hostnamectl set-hostname puppetmaster.example.com
echo "192.168.1.10 puppetmaster.example.com puppetmaster" | sudo tee -a /etc/hosts
echo "192.168.1.11 puppetagent.example.com puppetagent" | sudo tee -a /etc/hosts # Add agent's IP

# On Puppet Agent (e.g., IP: 192.168.1.11)
sudo hostnamectl set-hostname puppetagent.example.com
echo "192.168.1.11 puppetagent.example.com puppetagent" | sudo tee -a /etc/hosts
echo "192.168.1.10 puppetmaster.example.com puppetmaster" | sudo tee -a /etc/hosts # Add master's IP
Verify connectivity: ping puppetmaster.example.com and ping puppetagent.example.com from both machines.
Step 2: Install Puppet on the Master Server
We'll install the Puppet Server package, which includes the Puppet Master components.
For CentOS/RHEL 7/8:
# Install Puppet Labs repository
sudo yum install -y https://yum.puppet.com/puppet7-release-el-$(rpm -E %{rhel}).noarch.rpm

# Install Puppet Server
sudo yum install -y puppetserver

# Configure Puppet Server memory allocation (adjust based on your VM's RAM)
sudo sed -i 's/Xms2g/Xms512m/' /etc/default/puppetserver
sudo sed -i 's/Xmx2g/Xmx512m/' /etc/default/puppetserver

# Start and enable Puppet Server
sudo systemctl start puppetserver
sudo systemctl enable puppetserver

# Open firewall ports (if using firewalld)
sudo firewall-cmd --add-port=8140/tcp --permanent
sudo firewall-cmd --reload
For Ubuntu 20.04/22.04:
# Install Puppet Labs repository
wget https://apt.puppet.com/puppet7-release-$(lsb_release -sc).deb
sudo dpkg -i puppet7-release-$(lsb_release -sc).deb
sudo apt update

# Install Puppet Server
sudo apt install -y puppetserver

# Configure Puppet Server memory allocation (adjust based on your VM's RAM)
sudo sed -i 's/-Xms2g/-Xms512m/' /etc/default/puppetserver
sudo sed -i 's/-Xmx2g/-Xmx512m/' /etc/default/puppetserver

# Start and enable Puppet Server
sudo systemctl start puppetserver
sudo systemctl enable puppetserver

# Open firewall ports (if using ufw)
sudo ufw allow 8140/tcp
sudo ufw enable # if not already enabled
Verify the service status: sudo systemctl status puppetserver. It should show as "active (running)". This might take a minute or two to start up fully.
Step 3: Install Puppet Agent on the Client Server
Now, let's set up the agent node.
For CentOS/RHEL 7/8:
# Install Puppet Labs repository
sudo yum install -y https://yum.puppet.com/puppet7-release-el-$(rpm -E %{rhel}).noarch.rpm

# Install Puppet Agent
sudo yum install -y puppet-agent

# Configure agent to point to the Master
echo "[main]" | sudo tee /etc/puppetlabs/puppet/puppet.conf
echo "server = puppetmaster.example.com" | sudo tee -a /etc/puppetlabs/puppet/puppet.conf
echo "certname = puppetagent.example.com" | sudo tee -a /etc/puppetlabs/puppet/puppet.conf # Optional, defaults to hostname

# Start and enable Puppet Agent
sudo systemctl start puppet
sudo systemctl enable puppet
For Ubuntu 20.04/22.04:
# Install Puppet Labs repository
wget https://apt.puppet.com/puppet7-release-$(lsb_release -sc).deb
sudo dpkg -i puppet7-release-$(lsb_release -sc).deb
sudo apt update

# Install Puppet Agent
sudo apt install -y puppet-agent

# Configure agent to point to the Master
echo "[main]" | sudo tee /etc/puppetlabs/puppet/puppet.conf
echo "server = puppetmaster.example.com" | sudo tee -a /etc/puppetlabs/puppet/puppet.conf
echo "certname = puppetagent.example.com" | sudo tee -a /etc/puppetlabs/puppet/puppet.conf # Optional, defaults to hostname

# Start and enable Puppet Agent
sudo systemctl start puppet
sudo systemctl enable puppet
Once the agent service is running, it will attempt to contact the Puppet Master and request a certificate.
Step 4: Sign the Agent's Certificate on the Master
Puppet uses SSL certificates for secure communication between the Master and Agents. When an agent first contacts the Master, it submits a Certificate Signing Request (CSR). The Master needs to approve and sign this request before communication can proceed.
# On Puppet Master:
# List pending certificate requests
sudo /opt/puppetlabs/bin/puppet cert list

# You should see something like "puppetagent.example.com (SHA256) ..."
# Sign the agent's certificate
sudo /opt/puppetlabs/bin/puppet cert sign puppetagent.example.com

# Verify it's signed (it should no longer appear in the list)
sudo /opt/puppetlabs/bin/puppet cert list
Once the certificate is signed, the Puppet Agent will be able to communicate securely with the Master.
Step 5: Trigger an Agent Run and Verify (on Agent)
Now that the certificate is signed, let's force an agent run to confirm everything is working.
# On Puppet Agent:
sudo /opt/puppetlabs/bin/puppet agent -t
The -t flag means "test" and will perform a one-time run, sending facts, requesting a catalog, and applying it. You should see output indicating a successful run, possibly with "no changes" because you haven't defined any configurations yet. If there are any errors, check your hostnames, firewall rules, and Puppet Master status.
Chalo, your basic Puppet Master-Agent setup is complete! You now have the foundational environment to start defining your infrastructure with Puppet code. This is a huge step in your DevOps Online Training.
Your First Manifest: Declaring Desired State with Puppet DSL
With your Puppet environment up and running, it's time to write your first piece of Puppet code, also known as a manifest. This is where you declare the desired state of your resources using Puppet's Domain Specific Language (DSL). The beauty of Puppet is its declarative nature: you describe *what* you want, not *how* to achieve it. Let's start simple – ensuring a package is installed and a file exists.
Understanding Puppet Resources
Everything Puppet manages is a resource. A resource describes a specific component of your system, like a package, a service, a file, a user, or a cron job. Each resource has a type (e.g., package, service, file), a title (a unique identifier for that specific resource instance), and a set of attributes that define its desired state.
The basic syntax for defining a resource is:
resource_type { 'resource_title':
  attribute_name => 'attribute_value',
  another_attribute => 'another_value',
}
Example 1: Ensuring a Package is Installed
Let's say we want to ensure the vim package is installed on our agent node. We'll create a simple manifest on the Puppet Master.
On Puppet Master:
1. Create a directory for your main manifests:
sudo mkdir -p /etc/puppetlabs/code/environments/production/manifests
2. Create your first manifest file, let's call it site.pp:
sudo vi /etc/puppetlabs/code/environments/production/manifests/site.pp
3. Add the following content to site.pp:
# /etc/puppetlabs/code/environments/production/manifests/site.pp

node 'puppetagent.example.com' {
  package { 'vim':
    ensure => present,
  }
}
Let's break this down:
node 'puppetagent.example.com' { ... }: This is a node definition. It tells Puppet that the code inside these curly braces should only be applied to the node with the hostname puppetagent.example.com. This is how you target specific configurations to specific servers.package { 'vim': ... }: This defines a resource of type package with the title vim.ensure => present,: This is an attribute. It tells Puppet that the vim package should be in the "present" state (i.e., installed). If it's not installed, Puppet will install it. If it's already installed, Puppet will do nothing (idempotency!).
Example 2: Creating a File and Ensuring a Service is Running
Let's expand our manifest to also ensure the ntp service is running and a simple message file exists.
On Puppet Master, edit site.pp again:
# /etc/puppetlabs/code/environments/production/manifests/site.pp

node 'puppetagent.example.com' {
  package { 'vim':
    ensure => present,
  }

  package { 'ntp':
    ensure => present,
  }

  service { 'ntpd': # Use 'ntp' for Ubuntu/Debian, 'chronyd' for CentOS 8/RHEL 8, 'ntpd' for CentOS 7
    ensure  => running,
    enable  => true,
    require => Package['ntp'], # Dependency: ensure ntp package is installed first
  }

  file { '/tmp/puppet_managed_message.txt':
    ensure  => file,
    content => "Hello from Puppet! This file was created on #{fqdn} by the Puppet Master.\n",
    mode    => '0644',
    owner   => 'root',
    group   => 'root',
  }
}
A few new things here:
package { 'ntp': ensure => present, }: Ensures the NTP package is installed.service { 'ntpd': ... }:
ensure => running,: Makes sure the ntpd service is active.enable => true,: Configures the service to start automatically on boot.require => Package['ntp'],: This is a dependency. It tells Puppet that the ntp package *must* be installed before the ntpd service is started. Puppet automatically manages the order of operations based on these dependencies, which is critical for complex configurations.
file { '/tmp/puppet_managed_message.txt': ... }:
ensure => file,: Ensures that this path exists as a file. Can also be directory or absent.content => "...",: Specifies the exact content of the file. Notice #{fqdn} – this is an example of Puppet's templating capabilities, where fqdn is a Facter fact that will be replaced with the agent's fully qualified domain name.mode => '0644', owner => 'root', group => 'root',: Sets the file permissions and ownership.
Applying the Manifest on the Agent
Now, let's make these changes effective on our agent node.
On Puppet Agent:
sudo /opt/puppetlabs/bin/puppet agent -t
Watch the output carefully. You should see Puppet detecting the need to install vim and ntp, starting the ntpd service, and creating the /tmp/puppet_managed_message.txt file. Subsequent runs will show "no changes" unless you modify the manifest or manually alter the agent's state.
Verification on Agent:
# Check if vim is installed
dpkg -l vim || rpm -q vim

# Check if ntp is installed and running
dpkg -l ntp || rpm -q ntp
sudo systemctl status ntpd # or ntp/chronyd depending on your OS

# Check the created file
cat /tmp/puppet_managed_message.txt
You should see vim and ntp installed, the service active, and the file content displayed correctly, including the agent's FQDN. Awesome, right? You've just orchestrated your first infrastructure changes using Puppet!
Beyond the Basics: Classes, Modules, and Facter in Action
While a single site.pp works for a few resources, real-world Puppet deployments quickly become complex. This is where classes and modules become indispensable, providing structure, reusability, and maintainability. And Facter, which we touched upon earlier, plays a critical role in making your Puppet code intelligent and adaptable.
Puppet Classes: Grouping Related Resources
A class in Puppet is a named block of code that groups related resources and can be declared on a node to apply that set of configurations. Think of it as a blueprint for a specific role or application. Instead of listing individual resources in your node definition, you declare a class.
Let's refactor our previous example into a class named my_base_setup.
On Puppet Master:
1. Create a directory structure for a new module. Puppet modules have a standard structure. Let's create a module named mycompany (or anything you like) and a class my_base_setup within it.
sudo mkdir -p /etc/puppetlabs/code/environments/production/modules/mycompany/manifests
2. Create the class manifest file: /etc/puppetlabs/code/environments/production/modules/mycompany/manifests/base_setup.pp
sudo vi /etc/puppetlabs/code/environments/production/modules/mycompany/manifests/base_setup.pp
3. Add the following content:
# /etc/puppetlabs/code/environments/production/modules/mycompany/manifests/base_setup.pp
class mycompany::base_setup {
  package { 'vim':
    ensure => present,
  }

  package { 'ntp':
    ensure => present,
  }

  service { 'ntpd': # Adjust service name based on OS
    ensure  => running,
    enable  => true,
    require => Package['ntp'],
  }

  file { '/tmp/puppet_managed_message.txt':
    ensure  => file,
    content => "Hello from Puppet! This file was created on #{fqdn} by the Puppet Master. Managed by mycompany::base_setup class.\n",
    mode    => '0644',
    owner   => 'root',
    group   => 'root',
  }
}
Now, instead of the verbose resource definitions in site.pp, we can simply declare our new class.
4. Edit your site.pp to declare the class:
sudo vi /etc/puppetlabs/code/environments/production/manifests/site.pp
5. Update site.pp:
# /etc/puppetlabs/code/environments/production/manifests/site.pp

node 'puppetagent.example.com' {
  include mycompany::base_setup
}
The include mycompany::base_setup line tells Puppet to apply all the resources defined within the mycompany::base_setup class to this node. This makes your node definitions much cleaner and your code more modular.
Puppet Modules: The Building Blocks of Infrastructure
A module is the fundamental unit for organizing Puppet code. It's a directory structure containing classes, definitions, files, templates, and plugins that together manage a specific technology or aspect of your infrastructure. Our mycompany::base_setup class is actually part of the mycompany module.
A typical module structure looks like this:
mycompany/
├── manifests/              # Contains all Puppet classes and defined types
│   └── base_setup.pp       # Our class
│   └── init.pp             # Default class for the module (if module_name::init)
├── files/                  # Static files that can be served to agents
├── templates/              # ERB or EPP templates for dynamic file content
├── lib/                    # Custom facts, functions, and resource types
├── examples/               # Example usage of the module
├── spec/                   # RSpec tests for the module
└── metadata.json           # Module metadata (name, version, dependencies)
By using modules, you can encapsulate complex configurations into reusable components. For instance, you could have an apache module, a mysql module, a users module, etc. This promotes best practices like code reusability, testability, and clear separation of concerns, crucial for larger configuration management efforts.
Facter: The Information Gatherer
We already touched upon Facter, the utility that gathers data ("facts") about a node. These facts are invaluable for making your Puppet code dynamic and platform-aware. When the agent sends its facts to the Master, you can use these facts in your manifests for conditional logic.
Let's enhance our mycompany::base_setup class to adapt to different operating systems using Facter.
On Puppet Master, edit base_setup.pp:
# /etc/puppetlabs/code/environments/production/modules/mycompany/manifests/base_setup.pp
class mycompany::base_setup {
  package { 'vim':
    ensure => present,
  }

  # Use Facter to determine the correct NTP service name
  $ntp_package_name = $facts['os']['family'] ? {
    'Debian' => 'ntp',
    'RedHat' => 'ntp', # For CentOS 7
    'AlmaLinux' => 'chrony', # For AlmaLinux 8/9, Rocky Linux 8/9
    default  => 'ntp', # Fallback
  }

  $ntp_service_name = $facts['os']['family'] ? {
    'Debian' => 'ntp',
    'RedHat' => 'ntpd', # For CentOS 7
    'AlmaLinux' => 'chronyd', # For AlmaLinux 8/9, Rocky Linux 8/9
    default  => 'ntpd', # Fallback
  }

  package { $ntp_package_name:
    ensure => present,
  }

  service { $ntp_service_name:
    ensure  => running,
    enable  => true,
    require => Package[$ntp_package_name],
  }

  file { '/tmp/puppet_managed_message.txt':
    ensure  => file,
    content => "Hello from Puppet! This file was created on #{fqdn} by the Puppet Master. OS: #{facts['os']['name']} #{facts['os']['release']['full']}. Managed by mycompany::base_setup class.\n",
    mode    => '0644',
    owner   => 'root',
    group   => 'root',
  }
}
Here, we're using a case statement (using the ? {} selector) with the $facts['os']['family'] variable to dynamically set the correct package and service names for NTP based on the operating system family. This makes your code much more flexible and portable across different Linux distributions. Notice how #{facts['os']['name']} and #{facts['os']['release']['full']} are used in the file content, demonstrating dynamic content generation using facts.
After updating the manifest, run sudo /opt/puppetlabs/bin/puppet agent -t on the agent again. You'll see Puppet pick up the changes and ensure the correct NTP package and service for its specific OS. This adaptability is key to managing diverse infrastructures in a DevOps model.
This deep dive into classes, modules, and Facter provides a solid foundation for writing structured, reusable, and intelligent Puppet code. As you progress in your Puppet Part1 DEVOPS ONLINE TRAINING, you'll discover more advanced features, but mastering these core concepts will set you up for success. Samajh mein aaya na?
Key Takeaways
- Puppet Automates Configuration Management: It's a declarative tool that helps define and enforce the desired state of your infrastructure across many servers, crucial for consistent DevOps automation.
- Master-Agent Architecture is Core: A central Puppet Master distributes configurations (catalogs) to Puppet Agents running on client nodes, which then apply the changes to maintain desired state.
- Puppet DSL is Declarative: You write manifests using Puppet's Domain Specific Language to describe "what" you want (e.g., package installed, service running), not "how" to do it.
- Classes and Modules for Structure: Classes group related resources, while modules are reusable, self-contained units for organizing your Puppet code, promoting scalability and maintainability.
- Facter Provides Dynamic Intelligence: Facter collects system-specific data (facts) from agents, allowing Puppet code to adapt configurations based on the node's operating system, IP, etc.
Frequently Asked Questions
What is the primary benefit of using Puppet in a DevOps environment?
The primary benefit of using Puppet in a DevOps environment is achieving infrastructure as code (IaC) and configuration consistency at scale. It eliminates manual errors, speeds up server provisioning and application deployments, and ensures all systems continuously conform to predefined configurations. This leads to more reliable, predictable, and auditable infrastructure, fostering collaboration between development and operations teams.
How does Puppet ensure idempotency?
Puppet ensures idempotency by comparing the desired state (defined in the manifest) with the actual state of a resource on the agent node. It only takes action if a discrepancy is found. For example, if a package is declared as ensure => present and it's already installed, Puppet will do nothing during the agent run. If it's missing, Puppet will install it. This means applying the same manifest multiple times will always result in the same system state without causing unintended side effects.
What is the role of Facter in Puppet?
Facter is a crucial tool within the Puppet ecosystem that gathers system information, known as "facts," from the agent nodes. These facts include details about the operating system, IP addresses, memory, CPU, kernel version, and more. Facter sends these facts to the Puppet Master during an agent run. The Puppet Master then uses these facts to compile node-specific catalogs, allowing Puppet code to be dynamic and conditional, adapting configurations based on the unique characteristics of each managed node.
What are the main differences between Puppet and imperative configuration management tools?
The main difference lies in their approach: Puppet is a declarative tool, while many traditional or script-based tools are imperative. In an imperative approach, you specify the exact steps and order to achieve a configuration (e.g., "run this command, then edit this file, then restart this service"). In a declarative approach like Puppet, you simply describe the *desired end state* of your system (e.g., "this package should be installed, this service should be running"), and Puppet figures out the necessary steps to get there. This makes declarative tools more resilient to changes, easier to maintain, and inherently idempotent.
This comprehensive guide has armed you with the foundational knowledge of Puppet, from its architecture to setting up your first manifest. Now, to truly see these concepts come alive, make sure to watch the full Puppet Part1 DEVOPS ONLINE TRAINING video by @explorenystream. It’s a fantastic resource for visual learners and will complement this article perfectly. Don't forget to subscribe to @explorenystream for more insightful DevOps content!