
Create an EC2 instance & Install packages using Ansible
July 21, 2026 — LiveStream
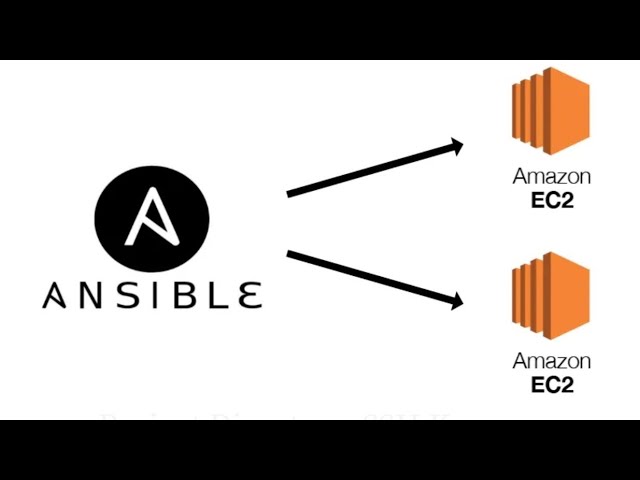
▶ Create an EC2 instance & Install packages using Ansible | Subscribe to @explorenystream
A senior DevOps engineer knows the pain points of manual cloud infrastructure provisioning. Imagine the endless clicking in the AWS console, the forgotten dependencies, the inconsistent configurations across environments. It’s a classic recipe for late-night P1 calls. But what if there was a better way to create an EC2 instance & install packages using Ansible, automating away these headaches? This article dives deep into leveraging Ansible to streamline your AWS EC2 provisioning and configuration workflows, making deployments predictable, repeatable, and fast.
Automating the creation of Amazon EC2 instances and subsequent package installation with Ansible is a cornerstone of modern DevOps practices. This powerful combination allows engineers to define their infrastructure as code, ensuring consistent environments, reducing human error, and dramatically speeding up deployment cycles for any application, from simple web servers to complex microservices architectures.
Setting the Stage: Why Ansible for EC2 Provisioning?
Arre junior, suno ek baat. Jab hum log development ya production environments setup karte hain, toh sabse pehla sawaal aata hai ki kaise karein? Manually instance launch karna, phir SSH karke ek-ek package install karna... bhai, ye manual kaam kitna headache deta hai, pata hai na? It's slow, error-prone, aur sabse badi baat, it's not scalable. Har baar same steps follow karna mushkil hai, aur consistency toh bhool hi jaao. Isi problem ka ek solid solution hai Infrastructure as Code (IaC), aur Ansible usmein ek chamakta sitara hai, especially when you need to create an EC2 instance & install packages using Ansible.
The Pain of Manual Provisioning
- Inconsistency: One instance might have Nginx 1.20, another 1.22. Small differences lead to big bugs.
- Time-Consuming: Clicking through the AWS console for multiple instances takes forever.
- Error-Prone: Human error is inevitable. Missed a firewall rule? Forgot to install a dependency? Boom, production down.
- Lack of Documentation: The actual setup process often resides only in someone's head.
- Scaling Challenges: How do you quickly spin up 10, 50, or 100 identical instances?
Ansible to the Rescue: Your DevOps Superpower
Ansible steps in here like a hero. It's an open-source automation engine that automates provisioning, configuration management, application deployment, orchestration, and many other IT needs. Why is it so good for AWS EC2? Let's break it down:
- Agentless: Unlike some other configuration management tools, Ansible doesn't require any special agent software to be installed on the target EC2 instances. It communicates over standard SSH (for Linux/Unix) or WinRM (for Windows). This simplifies setup and reduces overhead.
- Idempotent: This is a fancy word, but it's super important. It means you can run your Ansible playbook multiple times, and the end state of your infrastructure will always be the same. If a package is already installed, Ansible won't try to install it again. This prevents unintended changes and ensures consistency.
- Simple & Readable: Ansible playbooks are written in YAML, which is very human-readable. It's almost like writing a set of instructions in plain English (or Hinglish!). This makes it easy for teams to understand, share, and maintain their automation scripts.
- Powerful AWS Modules: Ansible has a rich ecosystem of modules specifically designed for AWS services. For EC2, you'll find modules to launch instances, manage security groups, volumes, VPCs, and much more. This makes it incredibly efficient to create an EC2 instance & install packages using Ansible.
- Community & Ecosystem: A massive and active community means plenty of examples, support, and continuous development of new modules and features.
While tools like CloudFormation and Terraform are excellent for managing infrastructure lifecycle at a high level, Ansible shines in the configuration management aspect *after* the resources are provisioned. So, you might use Terraform to create the VPC, subnets, and security groups, and then use Ansible to launch EC2 instances within that infrastructure and configure them precisely how you need them. The synergy is powerful, yaar!
Prerequisites & Initial Setup: Getting Ansible Ready for AWS
Achha, toh pehle apne hathiyar taiyyar kar lete hain. Before we can ask Ansible to create an EC2 instance & install packages using Ansible, we need to make sure our local machine (the control node) has everything in place. Think of it as preparing your chai ingredients before brewing the perfect cup.
1. Installing Ansible
First things first, Ansible itself. It's usually straightforward to install. For most Linux distributions, you can use your package manager:
# On Ubuntu/Debian
sudo apt update
sudo apt install ansible

# On CentOS/RHEL
sudo yum install epel-release
sudo yum install ansible

# Using pip (Python Package Installer) - generally recommended for latest versions
pip install ansible
Make sure Python is installed on your system, as Ansible is written in Python. You can verify the installation with:
ansible --version
2. Configuring AWS Credentials
For Ansible to interact with your AWS account, it needs permissions. The most common and recommended way is to configure your AWS credentials on your control node. You can do this using the AWS CLI:
pip install awscli
aws configure
When prompted, enter your AWS Access Key ID, Secret Access Key, default region (e.g., ap-south-1 for Mumbai), and output format. These credentials will be stored in ~/.aws/credentials and ~/.aws/config. Ansible's AWS modules automatically pick them up from here, or from environment variables (AWS_ACCESS_KEY_ID, AWS_SECRET_ACCESS_KEY, AWS_REGION).
Pro-tip for security: Never hardcode your AWS credentials directly in your playbooks. Always use `aws configure` or IAM roles for EC2 instances if you're running Ansible from an EC2 instance.
3. Installing Boto3 (AWS SDK for Python)
Ansible's AWS modules rely on the Boto3 library, which is the official AWS SDK for Python. If it's not installed, Ansible won't be able to talk to AWS APIs effectively. So, make sure it's there:
pip install boto3
pip install botocore # Boto3 depends on botocore, usually installed automatically
4. SSH Key Pair for EC2 Access
When Ansible launches an EC2 instance, it needs a way to connect to it via SSH to install packages. This is where your SSH key pair comes in. You should already have one generated in your AWS account (e.g., my-ansible-key.pem). If not, create one via the AWS console (EC2 -> Key Pairs -> Create key pair) and download the .pem file. Make sure its permissions are correctly set:
chmod 400 my-ansible-key.pem
This .pem file will be referenced in your Ansible playbook and also used by Ansible to establish the SSH connection to the newly launched instance.
5. Security Groups
A security group acts as a virtual firewall for your EC2 instances. For Ansible to connect via SSH (port 22) and for any web server you install (port 80/443), you'll need to create or use an existing security group that allows inbound traffic on these ports from your control node's IP address (for SSH) or from anywhere (0.0.0.0/0 for web traffic, if desired). You can create this via the AWS console or even programmatically with Ansible itself, but for this walkthrough, let's assume it's pre-existing.
Crafting the Ansible Playbook: From EC2 Launch to Package Installation
Ab aata hai main picture, boss! The heart of our operation is the Ansible playbook. This YAML file will contain all the instructions for Ansible to first create an EC2 instance, then connect to it, and finally install packages using Ansible. We'll break it down into phases, just like a proper project plan.
---
- name: Provision EC2 instance and install Nginx
hosts: localhost
connection: local
gather_facts: no
vars:
region: ap-south-1 # Your desired AWS region
ami_id: ami-0f5ee92e2d6341249 # Example AMI ID for Amazon Linux 2 (HVM), SSD Volume Type in ap-south-1
instance_type: t2.micro
key_pair_name: my-ansible-key # Your EC2 key pair name
security_group_name: my-ssh-web-sg # A security group allowing SSH (22) and HTTP (80)
instance_tag_name: AnsibleNginxServer
web_port: 80
tasks:
- name: Launch a new EC2 instance
community.aws.ec2:
key_name: "{{ key_pair_name }}"
group: "{{ security_group_name }}"
instance_type: "{{ instance_type }}"
image: "{{ ami_id }}"
region: "{{ region }}"
wait: yes
assign_public_ip: yes
tags:
Name: "{{ instance_tag_name }}"
register: ec2_instance_info
- name: Add new instance to in-memory inventory and wait for SSH
ansible.builtin.add_host:
hostname: "{{ item.public_ip_address }}"
groupname: newly_created_ec2
ansible_user: ec2-user # Default user for Amazon Linux 2
ansible_ssh_private_key_file: "~/.ssh/{{ key_pair_name }}.pem" # Path to your .pem key
loop: "{{ ec2_instance_info.instances }}"
when: item.public_ip_address is defined
delegate_to: localhost
changed_when: false
- name: Wait for SSH to be available on newly created EC2 instance
ansible.builtin.wait_for_connection:
delay: 30 # Wait 30 seconds before first attempt
timeout: 300 # Total timeout of 5 minutes
delegate_to: localhost
changed_when: false
run_once: true # Only run once, not for each host if multiple instances are created
- name: Configure the newly provisioned EC2 instances
hosts: newly_created_ec2 # Now we target our newly created instance group
become: yes # Use sudo on the remote host
gather_facts: yes
tasks:
- name: Update all packages to the latest version
ansible.builtin.yum:
name: "*"
state: latest
update_cache: yes # Ensure package cache is updated
- name: Install Nginx web server
ansible.builtin.yum:
name: nginx
state: present
- name: Start Nginx service
ansible.builtin.systemd:
name: nginx
state: started
enabled: yes
- name: Create a simple index.html file
ansible.builtin.copy:
content: "Hello from Ansible on EC2!
"
dest: /usr/share/nginx/html/index.html
owner: nginx
group: nginx
mode: '0644'
- name: Check Nginx service status (optional)
ansible.builtin.command: systemctl status nginx
register: nginx_status_check
changed_when: false
failed_when: "'Active: active (running)' not in nginx_status_check.stdout"
tags: verification
- name: Print Nginx status check result
ansible.builtin.debug:
msg: "{{ nginx_status_check.stdout }}"
tags: verification
Phase 1: Launching the EC2 Instance (First Play)
In our playbook, the first play block (starting with - name: Provision EC2 instance and install Nginx) is responsible for interacting with AWS. Notice hosts: localhost and connection: local. This tells Ansible to run these tasks on the machine where the playbook is executed (your control node) because it's talking to the AWS API, not directly to an EC2 instance yet.
Key Components:
vars: Define variables likeregion,ami_id,instance_type,key_pair_name, andsecurity_group_name. These make your playbook flexible and easy to modify without changing task logic.community.aws.ec2module: This is the workhorse for creating EC2 instances.key_name: The name of the SSH key pair you created in AWS. Ansible will use your local.pemfile to connect.group: The name of the security group to associate with the instance.instance_type: (e.g.,t2.micro) defines the instance's compute and memory capacity.image: The Amazon Machine Image (AMI) ID. This specifies the OS and pre-installed software. For Amazon Linux 2 in Mumbai (ap-south-1), an AMI might look likeami-0f5ee92e2d6341249. Always pick an AMI appropriate for your region and application.region: The AWS region where the instance will be launched.wait: yes: Tells Ansible to wait until the instance is fully running before proceeding.assign_public_ip: yes: Essential if you want to connect to it directly from the internet.tags: Good practice for organizing and identifying your AWS resources.
register: ec2_instance_info: This task registers the output of theec2module into a variable namedec2_instance_info. This variable will contain details about the newly created instance, including its public IP address.ansible.builtin.add_host: This is a crucial step! After the instance is launched, Ansible doesn't magically know how to connect to it. We useadd_hostto dynamically add the new EC2 instance's public IP address to Ansible's in-memory inventory under a new group (newly_created_ec2). We also specify theansible_user(e.g.,ec2-userfor Amazon Linux,ubuntufor Ubuntu AMIs) and the path to ouransible_ssh_private_key_file.ansible.builtin.wait_for_connection: EC2 instances take a moment to boot up and for SSH to become available. This module pauses the playbook execution until SSH is responsive on the new host, preventing "connection refused" errors.
Phase 2: Installing Packages (Second Play)
Once the EC2 instance is up and SSH-able, we switch gears to the second play block (starting with - name: Configure the newly provisioned EC2 instances). Here, hosts: newly_created_ec2 targets the instance(s) we just added to our inventory.
Key Components:
become: yes: This tells Ansible to use privilege escalation (likesudo) on the remote host, which is necessary for installing packages and managing services.gather_facts: yes: Ansible gathers facts about the remote host (OS, memory, network interfaces, etc.), which can be useful for conditional logic later on.ansible.builtin.yum(orapt): This module is used for installing and managing packages. Since we are using an Amazon Linux 2 AMI, it usesyum. If you chose an Ubuntu AMI, you'd useansible.builtin.apt.name: "*"withstate: latestandupdate_cache: yes: A good practice to ensure the instance's packages are up-to-date right after launch.name: nginxwithstate: present: Installs the Nginx web server.
ansible.builtin.systemd: This module manages services.name: nginx: Specifies the service to manage.state: started: Ensures the Nginx service is running.enabled: yes: Configures Nginx to start automatically on boot.
ansible.builtin.copy: We use this to create a simpleindex.htmlfile. This isn't strictly necessary for "installing packages" but helps us verify that Nginx is serving content later.ansible.builtin.commandandansible.builtin.debug: These are for optional verification, allowing us to check the Nginx service status and print the output for debugging. Usingchanged_when: falseandfailed_whenmakes sure these tasks don't incorrectly report changes or failures based on their output.
Important Considerations:
- AMI Selection: Always verify the AMI ID for your chosen region and operating system. AWS AMIs are region-specific.
- Security Groups: Double-check that your security group allows inbound SSH (port 22) from your control node's IP, and HTTP (port 80) if you're deploying a web server.
- SSH Key Path: Ensure the
ansible_ssh_private_key_filepath in youradd_hostmodule is correct and the.pemfile haschmod 400permissions. - Ansible User: The
ansible_uservaries by AMI (ec2-userfor Amazon Linux,ubuntufor Ubuntu,centosfor CentOS, etc.).
Executing the Playbook & Verification
Jab poora blueprint ready ho, tab usko execute karne ki baari aati hai! Running this playbook to create an EC2 instance & install packages using Ansible is just a single command.
Running the Playbook
Navigate to the directory where you saved your ec2_nginx_provision.yml file and run:
ansible-playbook ec2_nginx_provision.yml -i localhost,
Here, -i localhost, tells Ansible to use `localhost` as the initial host for the first play (where we interact with AWS). The comma is important to indicate it's a list. Ansible will then dynamically add your new EC2 instance to its inventory for the subsequent plays.
Watch the output carefully. Ansible will show you each task it's executing, whether it changed something (`changed=X`), or if it was already in the desired state (`ok=X`). If there are any errors, it will stop and show you the error message. This is where your debugging skills come in handy!
Debugging Tips (When things go Ganda):
- Connection refused? Check your security group. Is port 22 open to your IP? Is the EC2 instance fully booted?
- Authentication error? Double-check your
key_namein theec2module and theansible_ssh_private_key_filepath and permissions. Also, confirm theansible_user. - Module not found? Did you install
boto3? Is Ansible installed correctly? - YAML syntax error? YAML is sensitive to indentation. Use a YAML linter (like online YAML validators or VS Code extensions) to spot errors.
Verification (The Moment of Truth!)
Once the playbook completes successfully, it's time to verify that everything worked as expected:
- Check AWS Console: Go to your EC2 dashboard. You should see a new instance running with the tag "AnsibleNginxServer" (or whatever tag you specified).
- Get Public IP: Note down the Public IPv4 address of your new instance from the AWS console.
- SSH into the instance: Open your terminal and try to SSH into the instance using your key pair:
ssh -i ~/.ssh/my-ansible-key.pem ec2-user@YOUR_PUBLIC_IPOnce inside, you can manually check:
- Is Nginx installed?
nginx -v - Is Nginx running?
sudo systemctl status nginx - Is the
index.htmlfile present?cat /usr/share/nginx/html/index.html
- Is Nginx installed?
- Access the Web Server: Open your web browser and navigate to
http://YOUR_PUBLIC_IP. You should see "Hello from Ansible on EC2!". If not, recheck your security group (port 80 open?) and Nginx service status.
Idempotency in Action
Now, run the playbook again: ansible-playbook ec2_nginx_provision.yml -i localhost,. What do you observe? Ansible will tell you that most tasks are ok (green), not changed (yellow). This is idempotency! It means your infrastructure is already in the desired state, and Ansible won't make unnecessary changes. This is incredibly valuable for maintaining configuration and for running deployments multiple times without fear of breaking things.
Clean Up & Best Practices
Automation sirf banaane mein nahi, usko maintain aur clean karne mein bhi hai, junior. Once you're done experimenting or if an environment is no longer needed, you should terminate your EC2 instances to avoid unnecessary AWS charges. This is also something you can automate with Ansible.
Terminating EC2 Instances with Ansible
Ansible provides the community.aws.ec2_instance module (or the older ec2 module with specific parameters) to manage the state of EC2 instances, including termination. Here's a simple playbook to terminate instances based on a tag:
---
- name: Terminate EC2 instances tagged for cleanup
  hosts: localhost
  connection: local
  gather_facts: no
  vars:
    region: ap-south-1
    instance_tag_name: AnsibleNginxServer

  tasks:
    - name: Find instances to terminate
      community.aws.ec2_instance_info:
        filters:
          "tag:Name": "{{ instance_tag_name }}"
          instance-state-name: [ "running", "pending", "stopped" ]
        region: "{{ region }}"
      register: instances_to_terminate

    - name: Terminate found instances
      community.aws.ec2_instance:
        instance_ids: "{{ item.instance_id }}"
        state: absent # 'absent' means terminate
        region: "{{ region }}"
        wait: yes
      loop: "{{ instances_to_terminate.instances }}"
      when: instances_to_terminate.instances | length > 0
Run this with: ansible-playbook terminate_ec2.yml -i localhost,
This playbook first finds instances with the specified tag and then terminates them. Always be careful when running termination playbooks!
Security Best Practices
- Least Privilege: Your AWS IAM user/role used by Ansible should only have the minimum necessary permissions (e.g.,
ec2:RunInstances,ec2:TerminateInstances,ec2:DescribeInstances,ec2:AuthorizeSecurityGroupIngress). - Key Management: Protect your
.pemfiles. Never commit them to version control. Use SSH agent forwarding or vault solutions for enhanced security. - Ansible Vault: For sensitive data like database passwords or API keys that go into your application configuration, use Ansible Vault to encrypt them.
- Security Groups: Be precise with your security group rules. Only open ports that are absolutely necessary and restrict source IPs where possible.
Structuring Ansible Projects
For more complex deployments, don't just dump everything into one giant playbook. Consider using:
- Roles: Organize tasks, handlers, templates, and variables into reusable, shareable roles (e.g., a "webserver" role, a "database" role).
- Variables: Externalize environment-specific variables (e.g., development, staging, production) into separate YAML files.
- Inventory: For managing many instances, especially existing ones, explore Ansible's dynamic inventory for AWS, which can fetch instance details directly from your AWS account.
By following these best practices, you ensure that your automation is not only effective but also secure, maintainable, and scalable.
Key Takeaways
- Ansible automates the entire lifecycle of EC2 instance provisioning and configuration, ensuring consistency and speed across environments.
- Setting up involves installing Ansible and Boto3, configuring AWS credentials, and preparing your SSH key pair and security groups.
- The
community.aws.ec2module is central for launching instances, whileadd_hostandwait_for_connectionensure SSH connectivity. - Packaging modules like
ansible.builtin.yumoransible.builtin.aptare used for efficient software installation and configuration on remote hosts. - Idempotency is a core Ansible strength, allowing safe, repeatable playbook executions without unintended side effects.
Frequently Asked Questions
How do I securely manage AWS credentials for Ansible?
The most secure methods are using AWS CLI's aws configure (which stores credentials in ~/.aws/credentials with proper permissions) or leveraging IAM roles for EC2 instances if your Ansible control node is itself an EC2 instance. For CI/CD pipelines, consider environment variables that are securely managed by your CI/CD system, or integrate with secret management services like AWS Secrets Manager or HashiCorp Vault.
Can Ansible create multiple EC2 instances at once?
Yes, absolutely! The community.aws.ec2 module has a count parameter that allows you to specify how many identical instances you want to launch. Ansible will then create them in parallel, and your subsequent tasks can run against all of them as a group.
What's the difference between ec2 and ec2_instance modules?
The community.aws.ec2 module is older and has broader functionality, including instance creation, termination, and management of various instance properties. The newer community.aws.ec2_instance module focuses specifically on managing the *state* of an instance (running, stopped, terminated) and is often preferred for its clearer intent when just dealing with instance lifecycle states. For instance creation, `community.aws.ec2` is still widely used and powerful.
How do I ensure Ansible connects to the newly created EC2 instance?
After launching the instance with community.aws.ec2, you must use the ansible.builtin.add_host module. This module takes the public IP address (or DNS name) registered from the ec2 module's output and adds it to Ansible's in-memory inventory. This allows subsequent plays in your playbook to target this new host. Additionally, using ansible.builtin.wait_for_connection after add_host ensures the instance is fully booted and SSH is ready before Ansible attempts to connect and execute further tasks.
So, there you have it, junior! From launching an instance to getting Nginx up and running, all automated with a single playbook. This isn't just about saving time; it's about building robust, predictable, and scalable infrastructure. Keep experimenting, keep learning, aur aise hi bade-bade problems ko solve karte raho. For a practical walkthrough and to see these commands in action, make sure to watch the full video on how to Create an EC2 instance & Install packages using Ansible on @explorenystream. Don't forget to like and subscribe for more awesome DevOps content!