
🖥️ How to Install RedHat Enterprise Linux 6 (RHEL 6) on VMware Workstation | Step-by-Step Guide
July 24, 2026 — LiveStream
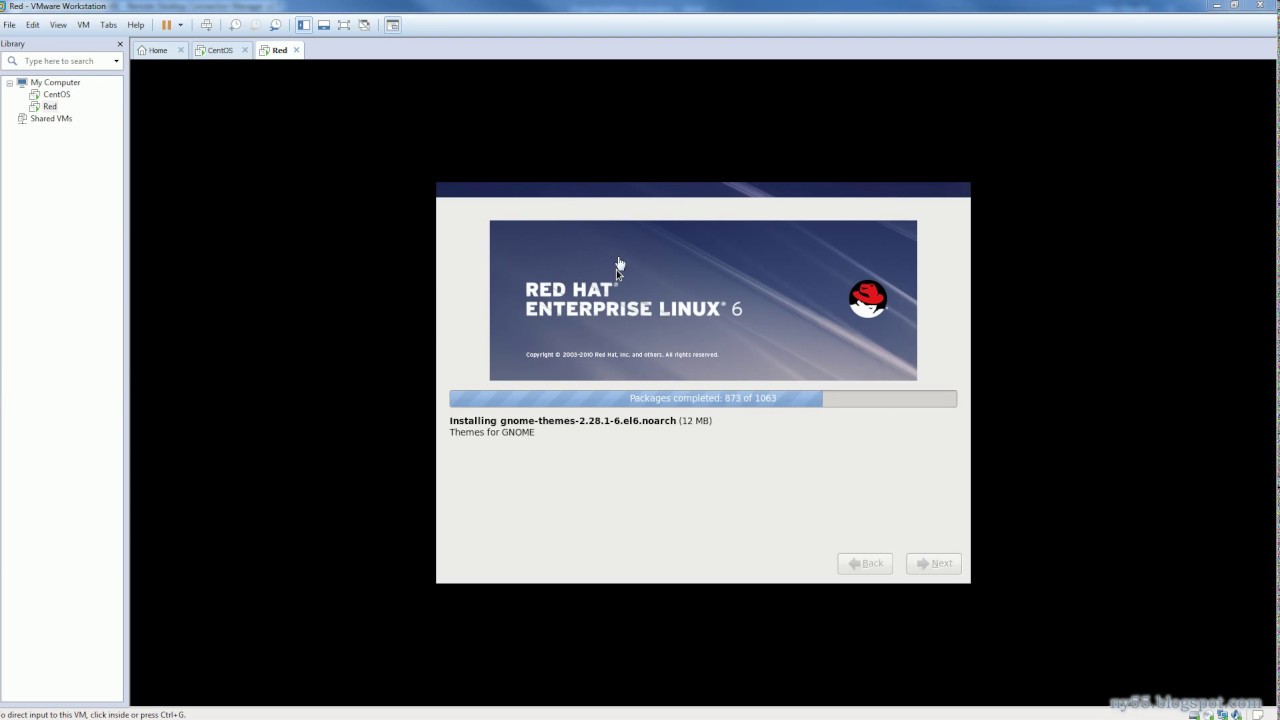
▶ 🖥️ How to Install RedHat Enterprise Linux 6 (RHEL 6) on VMware Workstation | Step-by-Step Guide | Subscribe to @explorenystream
🛒 Today's Picks on Amazon
As an Amazon Associate I earn from qualifying purchases.
Why RHEL 6 And Why VMware Workstation?
"Bhaiya, RHEL 6? Kyun? Aren't we on RHEL 9 now?" Good question, mere dost! While newer versions boast better performance and features, RHEL 6 still holds relevance for several reasons: * **Legacy Application Support:** Many enterprise applications, especially in banking, telecommunications, and government sectors, were certified or developed specifically for RHEL 6. Migrating them might be costly or complex, so maintaining RHEL 6 environments becomes crucial. * **DevOps Lab Scenarios:** For those learning the evolution of Linux or working on tools that might have specific dependencies on older library versions, an RHEL 6 VM is invaluable. It helps you understand the transition from SysVinit to systemd, older networking configurations, and package management differences. * **Security Auditing & Compliance:** Sometimes, you need an isolated RHEL 6 environment to test security patches, perform audits, or replicate production issues without touching live systems. * **Skill Development:** Understanding older systems improves your overall troubleshooting capabilities and broadens your perspective on enterprise Linux environments. Now, why VMware Workstation? Simple, it's a veteran in the virtualization game. It's user-friendly, feature-rich, and robust for creating isolated lab environments right on your desktop. Its powerful features like snapshots, virtual networking, and easy resource management make it a top choice for developers and system administrators. Setting up RHEL 6 on VMware Workstation provides a safe, sandboxed space to experiment and learn without affecting your host operating system.Pre-Installation Checklist: Gather Your Tools and Resources
Before we start the actual installation process, let’s ensure you have everything ready. Think of it as preparing your mise en place before cooking a fancy meal. 1. **VMware Workstation Installed:** Make sure you have VMware Workstation Pro (or a compatible version) installed on your host machine. The steps are generally consistent across recent versions. 2. **RHEL 6 ISO Image:** You'll need the installation media for Red Hat Enterprise Linux 6. If you have an active Red Hat subscription, you can download it from the Red Hat Customer Portal. For learning purposes, sometimes older ISOs are available through developer programs or specific archival sources. Ensure your ISO is genuine and not corrupted – a bad ISO can lead to frustrating installation failures. Usually, a 64-bit version (x86_64) is preferred. 3. **Host System Resources:** * **RAM:** At least 8GB to 16GB on your host machine is recommended. For the RHEL 6 VM itself, allocate at least 2GB of RAM, preferably 4GB if you plan to run a GUI and multiple services. * **CPU:** A modern multi-core processor (Intel i5/i7/Ryzen 5/7 equivalent or better) with virtualization extensions enabled in your BIOS/UEFI. Allocate at least 2 CPU cores to your RHEL 6 VM. * **Disk Space:** Ensure you have ample free space. For the RHEL 6 VM, a minimum of 20GB is needed, but 40GB-60GB is a safer bet, especially if you plan to install additional software, applications, or run updates. Once you have these prerequisites checked off, you’re good to go!Step-by-Step Guide: Installing RHEL 6 on VMware Workstation
This is where the real action begins, my friend. We'll go through creating the VM, installing the OS, and then some crucial post-installation steps.1. Creating a New Virtual Machine for RHEL 6
First things first, let’s get your new virtual machine ready to host RHEL 6. 1. **Open VMware Workstation:** Launch VMware Workstation Pro. 2. **Initiate VM Creation:** From the main menu, go to `File > New Virtual Machine...` or click on the "Create a New Virtual Machine" icon on the home screen. 3. **Choose Configuration Type:** Select `Custom (advanced)` and click `Next`. While "Typical" is faster, "Custom" gives you more granular control over hardware settings, which is essential for a fine-tuned lab environment. 4. **Hardware Compatibility:** Stick with the default latest hardware compatibility (e.g., Workstation 17.x) unless you have a specific reason to downgrade. Click `Next`. 5. **Installer Disc Image:** * Select `Installer disc image file (iso):`. * Click `Browse...` and navigate to the location of your RHEL 6 ISO file. * VMware might detect "Red Hat Enterprise Linux 6" automatically. Click `Next`. 6. **Guest Operating System Information:** * **Full name:** Enter your name (e.g., "DevOps Learner"). * **User name:** Choose a non-root user (e.g., `devopsuser`). * **Password:** Set a strong password for this user. * VMware’s Easy Install feature might pre-fill some details for Red Hat Linux. While convenient, for RHEL 6, sometimes it's better to bypass this and do a manual install for learning purposes. If it prompts for a product key, you can skip it and proceed, as RHEL 6 usually doesn't need a key at this stage for installation, only for subscription-based updates later. If you want full manual control, you can choose "I will install the operating system later" and configure it completely manually. For this guide, we'll assume the basic Easy Install detection, but we'll still cover the manual steps within the OS. 7. **Virtual Machine Name and Location:** * **Virtual machine name:** Give your VM a descriptive name, like `RHEL6-DevOps-Lab`. * **Location:** Choose a path on your host machine where the VM files will be stored. Ensure this location has enough disk space. Click `Next`. 8. **Processor Configuration:** * **Number of processors:** 1. * **Number of cores per processor:** 2 (for a total of 2 CPU cores). This provides a good balance for RHEL 6 without over-allocating host resources. Click `Next`. 9. **Memory for the Virtual Machine:** Allocate RAM. I recommend `4096 MB (4GB)` for a smooth RHEL 6 experience, especially with a GUI. Click `Next`. 10. **Network Type:** * **Use network address translation (NAT):** This is usually the easiest for lab environments, as your VM gets an IP address from VMware’s internal DHCP server and can access the internet through your host's network. * **Use bridged networking:** This makes your VM appear as a separate device on your physical network. Useful if your VM needs to be directly accessible from other physical machines on your LAN. * **Use host-only networking:** Creates a private network between your host and the VM, no external access. * For most cases, `NAT` is fine to start with. Click `Next`. 11. **I/O Controller Types:** Keep the default `LSI Logic SAS`. It's generally compatible and performs well. Click `Next`. 12. **Disk Type:** Select `SCSI (Recommended)` and click `Next`. 13. **Disk:** Choose `Create a new virtual disk` and click `Next`. 14. **Disk Size:** * **Maximum disk size (GB):** Set this to `60 GB`. * **Store virtual disk as a single file:** This can simplify management but might be harder to move around if the file gets too large. * **Split virtual disk into multiple files:** Easier to move but might have a slight performance overhead. Choose based on your preference. I usually prefer `single file` for simplicity if I don't plan to move it frequently. * **Allocate all disk space now:** This pre-allocates the entire 60GB on your host, which offers better performance but consumes space immediately. If you choose not to, it will be `thin provisioned` and grow as needed. For a lab, `thin provisioned` is often fine. Click `Next`. 15. **Disk File:** Accept the default name for the virtual disk file or change it if you prefer. Click `Next`. 16. **Ready to Create Virtual Machine:** Review all your settings. Before clicking `Finish`, click `Customize Hardware...` one last time. * **Remove unnecessary devices:** For a lean server, you might want to remove the `Sound Card`, `Printer`, and `USB Controller` if you don't need them. This saves host resources. * **CD/DVD (SATA):** Ensure it points to your RHEL 6 ISO image, and `Connect at power on` is checked. * **Display:** You can increase the video memory if you plan on running a heavy GUI. * Click `Close`, then `Finish`. Your RHEL 6 VM is now created and ready for OS installation!2. Installing Red Hat Enterprise Linux 6 within the VM
Now that your virtual hardware is configured, it's time to actually install RHEL 6. 1. **Power On the Virtual Machine:** In VMware Workstation, select your `RHEL6-DevOps-Lab` VM and click `Power on this virtual machine`. 2. **Boot from ISO:** The VM will boot from the RHEL 6 ISO. You'll see a boot menu: * `Install or upgrade an existing system` (select this) * `Install system with basic video driver` (useful if graphical install fails) * `Rescue installed system` * `Boot from local drive` * Choose the first option and press `Enter`. 3. **Media Test (Optional):** You might be prompted to test the installation media. For a known-good ISO, you can `Skip` this test to save time. 4. **Graphical Installation:** The RHEL 6 installer will start. * **Language:** Select `English (English)`. * **Keyboard Layout:** Select `U.S. English`. * Click `Next` on both. 5. **Storage Device Warning:** The installer will ask "What type of storage devices would you like to use?". Select `Basic Storage Devices` (this applies to the virtual disk you just created). Click `Next`. 6. **Hostname and Network Configuration:** * **Network Devices:** Choose your network interface (usually `eth0`). You can configure the network now or later. For now, check `Connect automatically` if it’s not already. * **IPv4 Settings:** For a lab, `DHCP` is usually fine. If you need a static IP, you can configure it here (select "Manual" method). * **Hostname:** Set a descriptive hostname like `rhel6-server.localdomain`. Click `Next`. 7. **Time Zone:** Select your appropriate geographic region and city. You can also configure `System clock uses UTC`. Click `Next`. 8. **Root Password:** This is critical. Set a strong password for the `root` user. Remember it! Click `Next`. 9. **Installation Type (Partitioning):** This is an important step for disk layout. * **Use All Space:** Easiest, but gives less control. * **Replace Existing Linux System:** Not applicable for a fresh install. * **Shrink Current System:** Not applicable. * **Create Custom Layout:** This is the most flexible and recommended for learning. Select `Create Custom Layout` and click `Next`. * **Custom Partitioning:** * You'll see your virtual disk (e.g., `sda`). Click `Create`. * **Standard Partition:** Choose `Standard Partition`. * **`/boot`:** Mount Point: `/boot`, Size: `500 MB` (Fixed size). This contains the kernel and boot loader. * **`swap`:** Mount Point: `swap`, Size: `4096 MB` (or 2x your RAM, up to 4GB for RHEL 6 generally). This is for virtual memory. * **`/` (root):** Mount Point: `/`, Size: Leave blank to `Fill to maximum allowable size`. This will use the remaining space. * Click `OK` for each partition, then `Next`. * **Format Confirmation:** Confirm to format the partitions. 10. **Boot Loader Configuration:** Keep the default `Install boot loader on /dev/sda`. Click `Next`. 11. **Software Selection:** This determines what packages get installed. * **Basic Server:** A good minimal starting point for a server, you can add packages later. * **Desktop:** Installs a full GUI environment (GNOME 2 for RHEL 6). Good for learning desktop usage but consumes more resources. * **Database Server, Web Server, etc.:** Specific roles. * For a DevOps lab, `Basic Server` is often sufficient. If you want a GUI, select `Desktop`. You can also `Customize now` to pick specific package groups. Make your choice and click `Next`. 12. **Review and Begin Installation:** Review the summary of changes. Click `Next` to start the installation. 13. **Installation Progress:** The installer will copy files and configure the system. This will take some time, depending on your host's performance and selected packages. 14. **Installation Complete:** Once finished, click `Reboot`. The VM will reboot, and you should remove the ISO from the virtual CD/DVD drive (VMware will usually prompt you, or you can do it via `VM > Settings > CD/DVD > Disconnect`). Congratulations, you now have a base RHEL 6 system installed!3. Post-Installation Configuration and VMware Tools
The base system is up, but there are a few critical steps to make your RHEL 6 VM more usable and performant. 1. **Initial Setup Wizard (First Boot):** * After reboot, if you installed with a GUI, you'll be guided through a few steps: * **Welcome:** Click `Forward`. * **Kdump:** This is a kernel crash dumping mechanism. For a lab VM, you can `Disable` it to save resources. Click `Forward`. * **Firewall:** Choose `Enabled` and ensure `SSH` is allowed if you plan to access the VM via SSH. * **SELinux:** `Enforcing` is the default and recommended for security. For a quick lab, you might set it to `Permissive` temporarily for troubleshooting, but remember to switch back. * **Create User:** If you didn't do it during the easy install, create a standard user account here. **Always work as a non-root user for daily tasks and use `sudo` for administrative privileges.** * **Date and Time:** Verify or adjust. * **System Registration:** You might be prompted to register with Red Hat Network. For a lab without a subscription, you can skip this. If you have a subscription, register to get updates. * Click `Finish` to complete the wizard. 2. **Login:** Log in with the user you created or as `root` (not recommended for daily use). 3. **Install VMware Tools (Crucial!):** VMware Tools significantly enhances the performance and usability of your VM. It provides better video drivers, mouse integration, shared folders, copy-paste functionality, and more. * **Install Dependencies:** Open a terminal and log in as `root` or use `sudo`. Install necessary build tools:yum install kernel-devel gcc make perl -y
(Note: You might need to configure `yum` repositories if you don't have an active Red Hat subscription, e.g., using a local repository or public EPEL if available for RHEL 6, though RHEL 6 official updates are now EOL. This can be tricky. For a basic lab, you might proceed without a full `yum` update initially, but VMware Tools might need `kernel-devel` specific to your running kernel version.)
* **Mount VMware Tools ISO:** In VMware Workstation, go to `VM > Install VMware Tools...`. This will mount a virtual CD-ROM with the VMware Tools installer inside your RHEL 6 VM.
* **Extract and Install:**
mkdir /mnt/cdrom
mount /dev/cdrom /mnt/cdrom
cp /mnt/cdrom/VMwareTools-*.tar.gz /tmp/
umount /mnt/cdrom
cd /tmp
tar -zxvf VMwareTools-*.tar.gz
cd vmware-tools-distrib
./vmware-install.pl
Follow the prompts, usually accepting the default options by pressing `Enter`.
* **Reboot:** After installation, reboot your VM:
reboot
* You should now have features like automatic screen resizing, drag-and-drop, and copy-paste working.
4. **Network Configuration Verification:**
* After reboot, verify network connectivity:
ifconfig eth0 (to check IP address)
ping google.com (to check internet connectivity)
* If you encounter issues, check `/etc/sysconfig/network-scripts/ifcfg-eth0` to ensure `ONBOOT=yes` and `NM_CONTROLLED=no` (if you're managing it manually), and restart the network service: `service network restart`.
5. **System Updates (If Subscribed):** If you have a Red Hat subscription configured, run:
yum update -y
This will fetch and install the latest security patches and package updates for RHEL 6. Without a subscription, `yum` might not work as expected for official repos. For learning, sometimes you just need the base OS.
6. **Take a Snapshot:** Once your RHEL 6 VM is clean, configured, and has VMware Tools installed, take a snapshot (`VM > Snapshot > Take Snapshot`). This allows you to revert to this pristine state if anything goes wrong during future experiments.