
Net Backup 7 5 master server installation on linux Information & Technology
July 24, 2026 — LiveStream
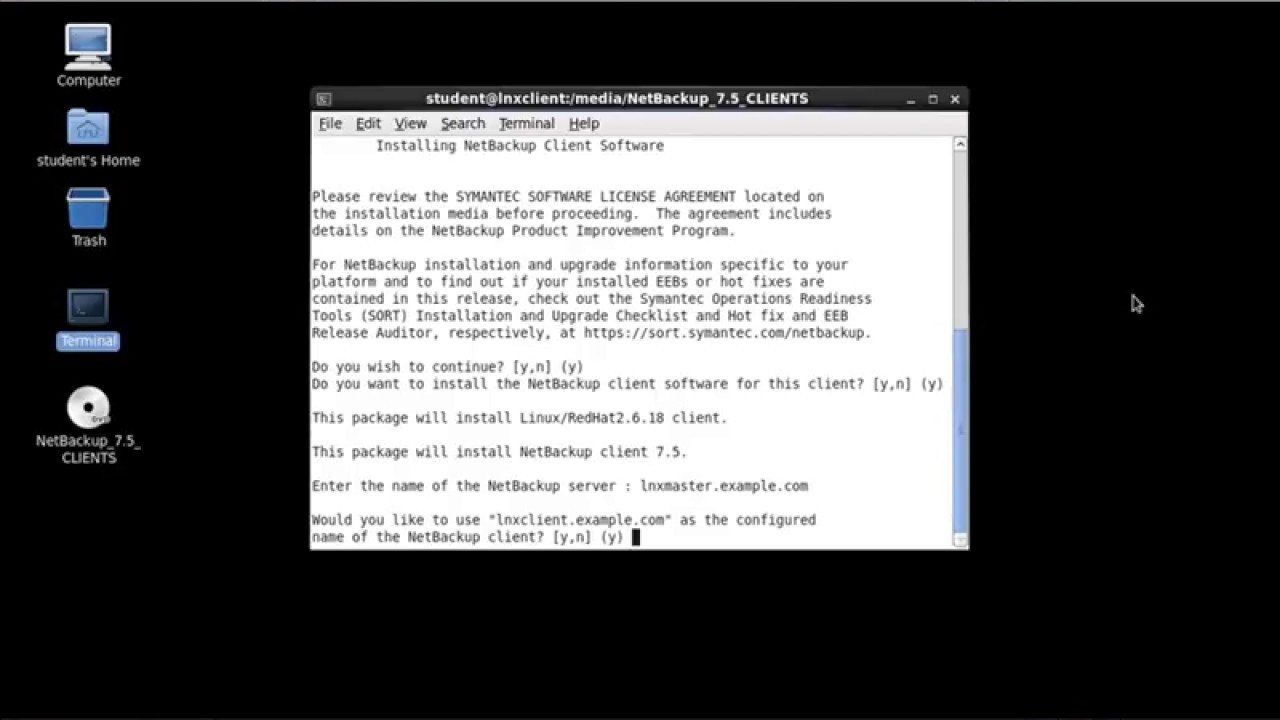
▶ Net Backup 7 5 master server installation on linux Information & Technology | Subscribe to @explorenystream
Setting up a robust enterprise backup solution is non-negotiable in today's data-driven world. This comprehensive guide walks you through the intricate process of Net Backup 7.5 master server installation on Linux, transforming a complex task into a clear, actionable roadmap for DevOps engineers.
Veritas NetBackup 7.5 remains a foundational pillar for large-scale data protection, offering unparalleled reliability and scalability. Mastering its deployment on a Linux platform is a critical skill, ensuring your organization's data assets are secure and recoverable from any unforeseen disaster, enabling you to safeguard vital information with confidence.
The Imperative of Robust Data Protection: Why NetBackup 7.5 Still Matters
In the vast landscape of enterprise IT, data is the ultimate currency. From critical customer databases to intellectual property, every byte holds immense value. The sheer volume, velocity, and variety of data generated today pose unprecedented challenges for IT departments. Data loss, whether due to hardware failure, cyber-attack, human error, or natural disaster, can cripple an organization, leading to significant financial losses, reputational damage, and regulatory penalties. This is where a comprehensive data protection strategy, spearheaded by powerful solutions like Veritas NetBackup, becomes not just an advisable practice but an absolute necessity.
Veritas NetBackup has long been the gold standard for enterprise backup and recovery, trusted by Fortune 500 companies worldwide. Its ability to protect diverse environments—physical, virtual, cloud, and hybrid—across a multitude of operating systems and applications makes it a formidable tool. NetBackup operates on a distributed architecture comprising Master Servers, Media Servers, and Clients. The master server is the brain of this operation. It manages the entire backup environment, including cataloging backup metadata, scheduling backup jobs, managing storage units, and orchestrating recovery operations. Without a properly functioning master server, your entire NetBackup infrastructure is effectively offline.
Choosing Linux as the operating system for your NetBackup master server brings a host of benefits. Linux distributions like Red Hat Enterprise Linux (RHEL) and SUSE Linux Enterprise Server (SLES) are renowned for their stability, security, and cost-effectiveness. They offer a robust foundation, often preferred in mission-critical environments due to their open-source flexibility, strong community support, and lower total cost of ownership compared to proprietary alternatives. Deploying a Net Backup 7.5 master server installation on Linux leverages these strengths, providing a highly reliable and secure platform for your data protection core.
While newer versions of NetBackup exist, understanding the setup process for NetBackup 7.5 is crucial for environments that still rely on it, perhaps due to legacy systems, specific application dependencies, or planned migration paths. The core principles and installation steps remain largely consistent, offering a valuable learning experience for future NetBackup deployments.
Preparing for Your NetBackup 7.5 Master Server Installation on Linux: The Pre-flight Checklist
Before you even think about running an installation script, thorough preparation is paramount. Think of it like building a house – a strong foundation and a clear blueprint prevent costly rework later. For a smooth Net Backup 7.5 master server installation on Linux, you need to ensure all prerequisites are met. Apni zameen tayyar karo, as we say, prepare your ground well!
Hardware Requirements: Kon Sa Server Chahiye?
The performance and stability of your NetBackup master server are directly tied to the underlying hardware. Don't skimp here; insufficient resources will lead to sluggish backups, failed recoveries, and a perpetually stressed administrator.
- CPU: Veritas typically recommends at least a quad-core processor. For smaller environments, this might suffice, but for larger deployments with many media servers and clients, consider a processor with more cores and higher clock speeds.
- RAM: Minimum 8 GB RAM is a good starting point for NetBackup 7.5, but 16 GB or more is highly recommended for production environments. The master server's catalog operations, especially during large backups or recoveries, can be memory-intensive. More RAM translates to better catalog performance and overall responsiveness.
- Disk Space: This is critical. You'll need space for:
- Operating System: Standard Linux OS installation space (e.g., 20-30 GB for root filesystem).
- NetBackup Software: The NetBackup software itself requires a few GBs (e.g., 5-10 GB). It's best practice to install it on a dedicated logical volume or partition.
- NetBackup Catalog: This is where the metadata about all your backups resides. It grows over time, potentially very rapidly. Veritas recommends allocating a generous, dedicated filesystem for the catalog (e.g.,
/usr/openv/netbackup/db). A good starting point might be 100-200 GB, but it needs to be scalable. Ensure this filesystem is on fast storage (SSD or high-performance RAID arrays) for optimal catalog performance. - Log Files: NetBackup generates extensive logs. While not as large as the catalog, ensure enough space is available for `/usr/openv/netbackup/logs` and `/usr/openv/var/log`.
- Network: Dual Gigabit Ethernet interfaces are recommended for redundancy and performance. The master server communicates constantly with media servers and clients.
Operating System Specifics: Apni Zameen Tayyar Karo
NetBackup 7.5 supports specific versions of Linux. Always consult the Veritas Hardware and Software Compatibility List (HCL) for the exact patch level and kernel versions. Generally, for 7.5, you'd be looking at:
- Red Hat Enterprise Linux (RHEL): RHEL 5.x and RHEL 6.x were commonly supported. Ensure all necessary OS packages are installed (e.g.,
compat-libstdc++, `glibc` development packages). - SUSE Linux Enterprise Server (SLES): SLES 10.x and SLES 11.x were also typical.
- Kernel: Verify your kernel version is compatible. Sometimes, minor kernel updates can cause issues if not tested by Veritas.
- Hostname Resolution: Crucial. The master server must be able to resolve its own hostname and the hostnames of all media servers and clients, both forward and reverse (DNS/
/etc/hosts). An incorrect or missing reverse DNS entry is a common culprit for communication failures. - Network Configuration:
- Static IP: Configure a static IP address for the master server. DHCP is generally not recommended for critical infrastructure components.
- NTP Synchronization: Ensure all NetBackup components (master, media, clients) are synchronized with a common NTP server. Time discrepancies can lead to authentication failures and backup scheduling issues.
- Firewall Configuration: NetBackup uses several ports for communication. These must be open on the master server. Key ports include:
- 1556: Veritas Private Branch Exchange (PBX) - main communication daemon.
- 13782: NetBackup Request Daemon (
bprd). - 13724: NetBackup Service Layer (
vmd). - VNETD: Veritas Network Daemon (typically dynamically assigned, but can use 13724 as well).
iptablesorfirewalld) to allow incoming connections on these ports from your media servers and clients. - SELinux/AppArmor: These security modules can interfere with NetBackup operations. While it's best to configure them to allow NetBackup processes, many administrators opt to set them to permissive or disabled during installation and then gradually tighten them. If you keep them enforced, ensure correct SELinux contexts are applied to NetBackup directories and binaries.
User Accounts and Permissions: Kaam Karne Wale
- You will need
rootprivileges to perform the installation. The NetBackup installation script typically needs to create directories, set permissions, and manage services. - While NetBackup runs its services as specific user accounts (e.g.,
nbwebgrp,nbdb), these are usually created automatically by the installer.
NetBackup 7.5 Media: Software Kahan Se Milega?
- Obtain the NetBackup 7.5 installation media from the Veritas Support Portal. Ensure you download the correct package for your Linux architecture (x86_64).
- It's good practice to verify the integrity of the downloaded ISO or tarball using checksums (MD5/SHA256) provided by Veritas. Corrupted installation media can lead to obscure and difficult-to-diagnose issues.
Database Considerations: Catalog Kaise Banega?
For the master server's internal catalog, NetBackup 7.5 uses an embedded database, typically Sybase Adaptive Server Anywhere (ASA), now referred to as NBDB. You generally don't need to install or configure an external database separately for the master server itself. The installer handles the setup of this embedded database. Just ensure adequate disk space, as discussed earlier.
Step-by-Step: NetBackup 7.5 Master Server Installation on Linux – A Practical Walkthrough
Alright, pre-flight check complete! Now, let's get down to the actual Net Backup 7.5 master server installation on Linux. We'll proceed systematically, mimicking a real-world deployment. Remember to execute all commands as root or with sudo privileges.
Mounting the Installation Media: CD-ROM Ya ISO?
First, you need to make the installation files accessible. If you have a physical DVD, insert it. More commonly, you'll be working with an ISO image.
- Create a temporary mount point:
mkdir /mnt/nb_install - Mount the ISO image:
Replacemount -o loop /path/to/NBU75_Linux_x86_64.iso /mnt/nb_install/path/to/NBU75_Linux_x86_64.isowith the actual path to your downloaded NetBackup ISO file. - Navigate to the mounted directory:
cd /mnt/nb_install
Initiating the Installation: Setup Chalate Hain
The NetBackup installer is typically an interactive script. It will guide you through the process, prompting for crucial information.
- Start the installer:
./install - Welcome Screen and License Agreement:
The installer will present a welcome message. Read and accept the Veritas End User License Agreement (EULA). Type
yto accept. - Installation Type:
You'll be asked to choose the type of installation. For a master server, select the appropriate option, typically
1for "Master Server".What type of installation do you wish to perform? 1) Master Server 2) Media Server 3) Client 4) Other (select this to add options to an existing installation) Enter choice (1-4): 1 - Package Selection:
The installer will list packages for the master server. Confirm installation of all required packages by typing
y. - Installation Directory:
The default installation path is
/usr/openv. It is highly recommended to stick with this default unless you have a specific, compelling reason not to. Changing this can complicate future upgrades and support. Press Enter to accept the default. - Network Configuration:
The installer will attempt to detect your network interface. Confirm the primary network interface (e.g.,
eth0,ens192) for NetBackup communication. - Security Level (Certificate Configuration): NetBackup 7.5 introduced enhanced security features, including certificate-based authentication. You'll be prompted to configure security levels. It's generally recommended to choose a higher security level (e.g., Medium or High) to enable stronger communication encryption and authentication between NetBackup components. You might need to generate security certificates. The installer often provides options for automatic certificate generation or using existing ones. For a fresh installation, automatic generation is standard.
- Web Services Password: You'll be asked to set a password for the NetBackup web services (used by the Java Admin Console). Choose a strong, complex password and record it securely.
- Database Configuration: For the embedded NBDB, the installer will typically handle this automatically. You might be asked to confirm database paths or settings, but for a standard installation, the defaults are usually sufficient. Ensure the dedicated catalog disk space is mounted correctly before this step.
- Review and Confirm:
The installer will present a summary of your choices. Review them carefully. If everything looks correct, type
yto proceed with the installation.
The installation process can take some time, depending on your server's performance. The script will unpack files, configure services, and set up the embedded database. Watch for any error messages in the console.
Post-Installation Checks: Sab Sahi Hai Na?
Once the installer completes, it's crucial to verify that all NetBackup services are running correctly. Sab sahi hai na? Let's check!
- Verify NetBackup Services:
Use the
bppscommand to list all running NetBackup processes.
You should see a long list of processes, including/usr/openv/netbackup/bin/bpps -xnbemm(Enterprise Media Manager),nbcs(Credential Service),nbevmon(Event Monitor),nbrepo(Repository Daemon),nbrmms(Resource Manager),nbjm(Job Manager),nbclnt(Client Service),bprd(Request Daemon), and various database-related processes (e.g.,nbdbms,dbsrv). If any critical processes are missing, check the NetBackup logs. - Check Log Files for Errors:
NetBackup logs are your best friend for troubleshooting.
Also, check the general NetBackup log directory:tail -f /usr/openv/netbackup/logs/bprd/log.
Look for any recent log files with "ERR" or "FAIL" messages.ls -l /usr/openv/netbackup/logs/ - Verify Licensing:
Check if your NetBackup licenses are correctly applied.
This command should list all installed licenses and their expiration dates./usr/openv/netbackup/bin/admincmd/bpminlicense -l - Connect via Java Administration Console: From a client workstation (Windows or Linux with the NetBackup Java Console installed), try to connect to the master server using its hostname or IP address and the web services password you set during installation. This is the ultimate test of basic connectivity and service functionality.
Troubleshooting Common Installation Hurdles: Agar Kahin Phans Gaye Toh?
Even with careful preparation, installations can sometimes hit snags. Here are common issues and how to approach them:
- Firewall Issues: If you can't connect from the Java console or media servers can't communicate, the firewall is the first suspect. Ensure all necessary NetBackup ports are open. You can temporarily disable the firewall (
systemctl stop firewalldorservice iptables stop– for testing only, re-enable immediately!) to confirm this. - Hostname Resolution: If the installer complains about hostnames or if services fail to start, verify DNS or
/etc/hostsentries. Both forward (hostname to IP) and reverse (IP to hostname) lookups must work correctly for the master server and any other NetBackup components.pingping -a - SELinux/AppArmor: If you've kept these security modules enforced, NetBackup processes might be blocked from accessing necessary files or network ports. Check
/var/log/audit/audit.logfor SELinux denials. You might need to create custom SELinux policies or set SELinux to permissive mode temporarily. - Insufficient Disk Space: If the installation fails or services won't start, check free disk space, especially for the NetBackup installation directory and the catalog directory.
df -h - Permission Errors: Ensure that the root user has full permissions to the installation directories. If files were copied manually or permissions were inadvertently changed, this could be an issue.
- Missing OS Packages: The installer usually checks for these, but if it fails early, it might be due to missing libraries or dependencies. Consult the Veritas HCL for required OS packages.
- Log Files: When in doubt, check the logs! NetBackup's verbose logging is invaluable. Start with
/usr/openv/netbackup/logs/install/install.logfor installation issues, and then specific daemon logs in/usr/openv/netbackup/logs/for service startup problems. You can also temporarily increase verbose logging levels for specific daemons to get more detailed information, though be mindful of disk space.
Beyond Installation: Initial Configuration and Best Practices
Installing the master server is just the beginning. To create a functional and reliable backup environment, several post-installation configurations and best practices need to be implemented. Ab install ho gaya, toh aage kya?
Adding Licenses: Legal Tarike Se Chalao
While some basic functionality might work after installation, you need to apply your Veritas NetBackup licenses to enable full features and ensure compliance. You typically receive license keys from Veritas. Use the bpminlicense command:
/usr/openv/netbackup/bin/admincmd/bpminlicense -add -host -key Repeat this for all your different license components (e.g., NetBackup Server, Data Protection Optimization, Application & Database Pack, etc.). Verify them with bpminlicense -l.
Configuring Storage Units: Jahaan Data Jayega
The master server directs backups to storage. You need to define where that storage is. This involves configuring storage units.
- Disk Storage: Most modern NetBackup environments use disk-based storage units, such as AdvancedDisk or BasicDisk.
- AdvancedDisk: This is the preferred method for disk storage, offering better performance and management. You'll need to define disk pools and then create AdvancedDisk storage units pointing to these pools. This often involves a media server managing the disk.
- BasicDisk: Simple disk storage, often used for smaller deployments or staging.
- Tape Libraries: If you're using tape, you'll need to configure tape drives, robot libraries, and media (tapes) within NetBackup. This usually involves a media server that's physically connected to the tape library.
All storage unit configuration is typically done through the NetBackup Administration Console.
Media Servers and Clients: Baaki Network Jodo
To start backing up data, you need to connect your media servers and clients to the master server.
- Add Media Servers: Install the NetBackup Media Server software on your designated media servers. During their installation, point them to your newly installed master server. Once installed, they will register with the master, and you can then assign storage units to them.
- Install Clients: Deploy the NetBackup client software on all the machines you want to protect. Similar to media servers, clients need to know the master server's name to communicate.
- Host Properties: Configure host properties for all clients and media servers on the master server to manage their backup behavior, security, and network settings.
Policies and Schedules: Backup Kaise Hoga?
The heart of your backup strategy lies in policies. Using the NetBackup Administration Console:
- Create Backup Policies: Define what data to back up (client list, backup selections), when to back it up (schedules), and where to store it (storage units).
- Configure Schedules: Set up full, incremental, and differential backup schedules.
- Retention Policies: Define how long backups are kept before being expired.
Security Hardening: Apne Backup Ko Secure Rakho
Your backup infrastructure holds the keys to your entire data estate. Secure it rigorously.
- Keep NetBackup Updated: Regularly apply Veritas NetBackup patches and hotfixes. New vulnerabilities are discovered frequently, and updates often include crucial security fixes.
- OS Security: Maintain a hardened Linux operating system. Keep the kernel and packages updated. Follow best practices for Linux server security.
- Secure Communication: Leverage NetBackup's security features, such as certificate-based authentication and encryption for network communication (already touched upon during installation).
- Role-Based Access Control (RBAC): Implement RBAC for the NetBackup console. Grant users only the minimum necessary permissions required for their roles. Avoid using highly privileged accounts for routine tasks.
- Firewall Configuration: Maintain strict firewall rules, only opening ports that are absolutely necessary for NetBackup communication.
Monitoring and Maintenance: Dekhbhal Bhi Zaroori Hai
A "set it and forget it" approach to backups is a recipe for disaster.
- Catalog Backups: Schedule regular, automated backups of your NetBackup catalog. The catalog is your recovery index; if it's lost, recovering data becomes extremely difficult, if not impossible. Store catalog backups off-site or on separate storage.
- Log Monitoring: Regularly review NetBackup logs for errors, warnings, and job failures. Integrate NetBackup logs with your centralized logging and monitoring solutions (e.g., ELK stack, Splunk).
- Performance Tuning: Monitor backup and restore performance. Adjust NetBackup configurations, network settings, and storage performance as needed.
- Regular Testing: Periodically perform test restores to ensure your backups are valid and recoverable. This is the ultimate validation of your backup strategy.
- Upgrades: Plan for future upgrades to newer NetBackup versions to take advantage of new features, security enhancements, and improved performance.
Key Takeaways
- Prerequisites are Paramount: A successful NetBackup 7.5 master server installation on Linux hinges on meticulous planning regarding hardware, OS, network, and firewall configurations.
- Interactive Installation is Key: The
./installscript guides you through essential choices, from installation type to security levels and database setup. - Post-Installation Verification is Crucial: Always confirm NetBackup services are running, licenses are applied, and the Java Administration Console connects successfully.
- Troubleshooting Relies on Logs: NetBackup log files (e.g.,
bpps -x, daemon-specific logs) are invaluable for diagnosing and resolving any installation or service startup issues. - Beyond Installation: Initial configuration of storage units, adding media servers and clients, defining policies, and rigorous security hardening are vital for a functional and secure backup environment.
Frequently Asked Questions
What are the minimum requirements for NetBackup 7.5 master server on Linux?
While exact minimums can vary by environment, a solid starting point for NetBackup 7.5 master server on Linux includes at least a quad-core CPU, 8-16 GB RAM, and sufficient, fast disk space. Crucially, allocate a minimum of 100-200 GB (scalable) on high-performance storage for the NetBackup catalog (/usr/openv/netbackup/db).
Which Linux versions are supported for NetBackup 7.5?
Veritas NetBackup 7.5 primarily supported Red Hat Enterprise Linux (RHEL) versions 5.x and 6.x, and SUSE Linux Enterprise Server (SLES) versions 10.x and 11.x. Always consult the Veritas Hardware and Software Compatibility List (HCL) on their support website (sort.veritas.com) for the precise certified distributions, kernel versions, and patch levels.
How do I verify if NetBackup services are running post-installation?
To verify NetBackup services after installation on Linux, open a terminal and run the command /usr/openv/netbackup/bin/bpps -x. This command lists all active NetBackup processes. You should see critical daemons like nbemm, nbcs, nbjm, bprd, and database-related processes running. If any are missing, check the NetBackup log files for errors.
What common issues might I face during NetBackup 7.5 installation on Linux?
Common issues during NetBackup 7.5 installation on Linux often include firewall misconfigurations (blocking required NetBackup ports), incorrect hostname resolution (DNS or /etc/hosts issues), insufficient disk space (especially for the catalog), SELinux or AppArmor conflicts, and missing operating system packages or dependencies. Thoroughly reviewing NetBackup's installation and daemon logs is key to diagnosing these problems.
Mastering the Net Backup 7.5 master server installation on Linux is a rewarding skill that lays the groundwork for enterprise-grade data protection. If you prefer a visual walkthrough or want to see these steps in action, be sure to watch the detailed YouTube video on this topic. Don't forget to subscribe to @explorenystream for more in-depth DevOps tutorials and insights into information technology!